AWS KMS
AWS Key Management Service (KMS) is an AWS-managed service that makes it easy for you to create and control the keys used to encrypt and sign your data.
This feature is available only to Dedicated clusters in a Business Critical project.
Overview
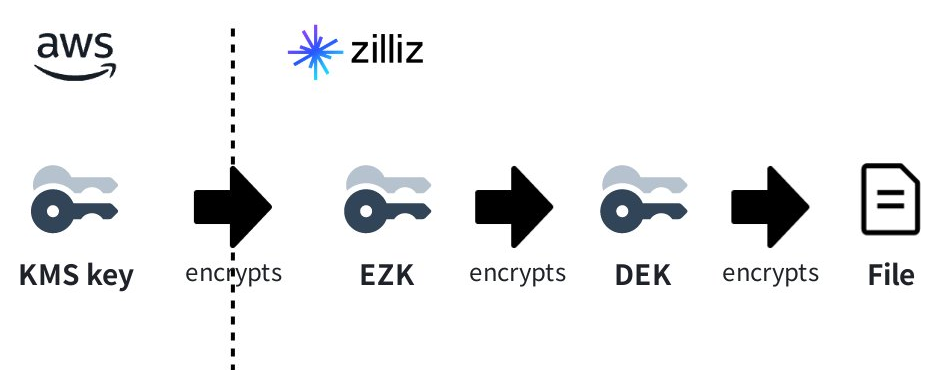
In typical cases, you do not use your KMS key to encrypt your data in a Zilliz Cloud cluster. Instead, you use the KMS key to encrypt an encryption zone key (EZK), use the EZK to encrypt a data encryption key (DEK), and use the DEK to encrypt your data.
For details on how encryption works and its scope, refer to this section. For more information on the CMEK feature's limitations, refer to this section. To use the CMEK feature, follow the procedure on this page.
Before you start
-
You have installed AWS CLI or have access to AWS CloudShell.
For details, refer to this page.
-
You have sufficient permissions to run KMS-related commands.
Add a KMS key
Each project allows up to 20 keys, regardless of the KMS providers. You can either add an existing KMS key or follow the instructions in the Zilliz Cloud console to create a KMS key and add it to Zilliz Cloud.
Procedures
Log in to the Zilliz Cloud console, go into one of your Business Critical projects, choose Network > CMEK from the left navigation pane, click + CMEK, and follow the steps in the Add CMEK (AWS KMS) dialog box to complete the process.
Before you start, you need to determine the IAM role to use during the procedure. An IAM role will be listed in Zilliz Cloud once you use it to add KMS keys. Check the drop-down list in the Select AWS IAM Role step in the Existing IAM Role tab and determine whether the IAM role you need is listed.
-
If yes, go to Add a KMS key using an existing role.
-
Otherwise, go to Add a KMS key using a new role.
Add a KMS key using an existing role
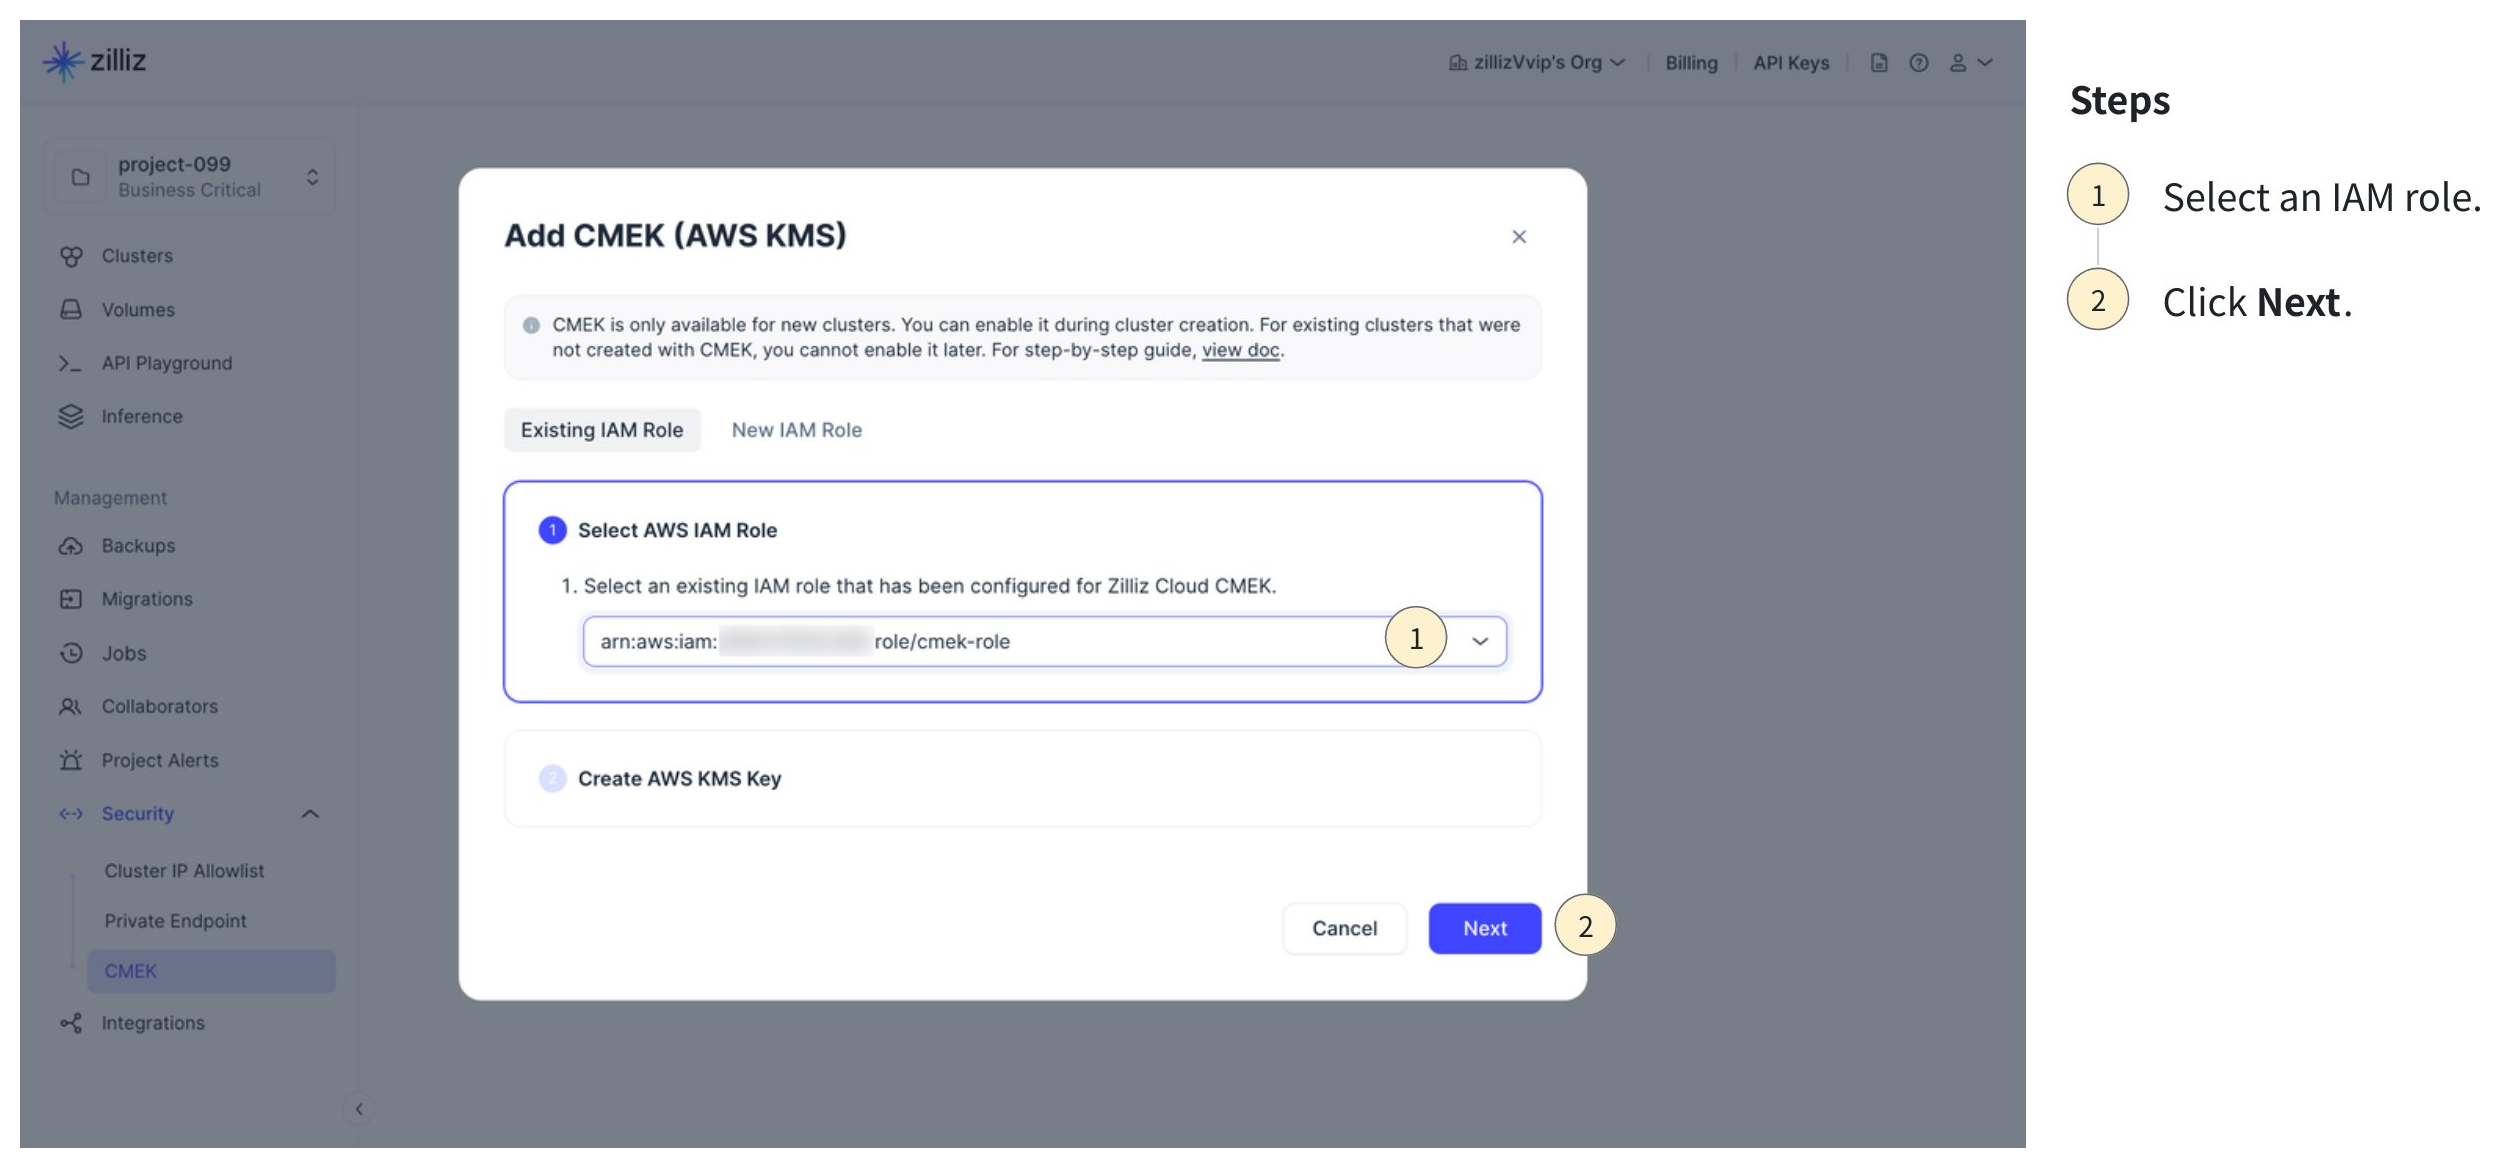
If the drop-down list in Select AWS IAM Role on the Existing IAM Role tab contains the IAM role you need, follow the steps in this section.
Click the drop-down in the Select AWS IAM Role step, select an IAM role, and click Next.
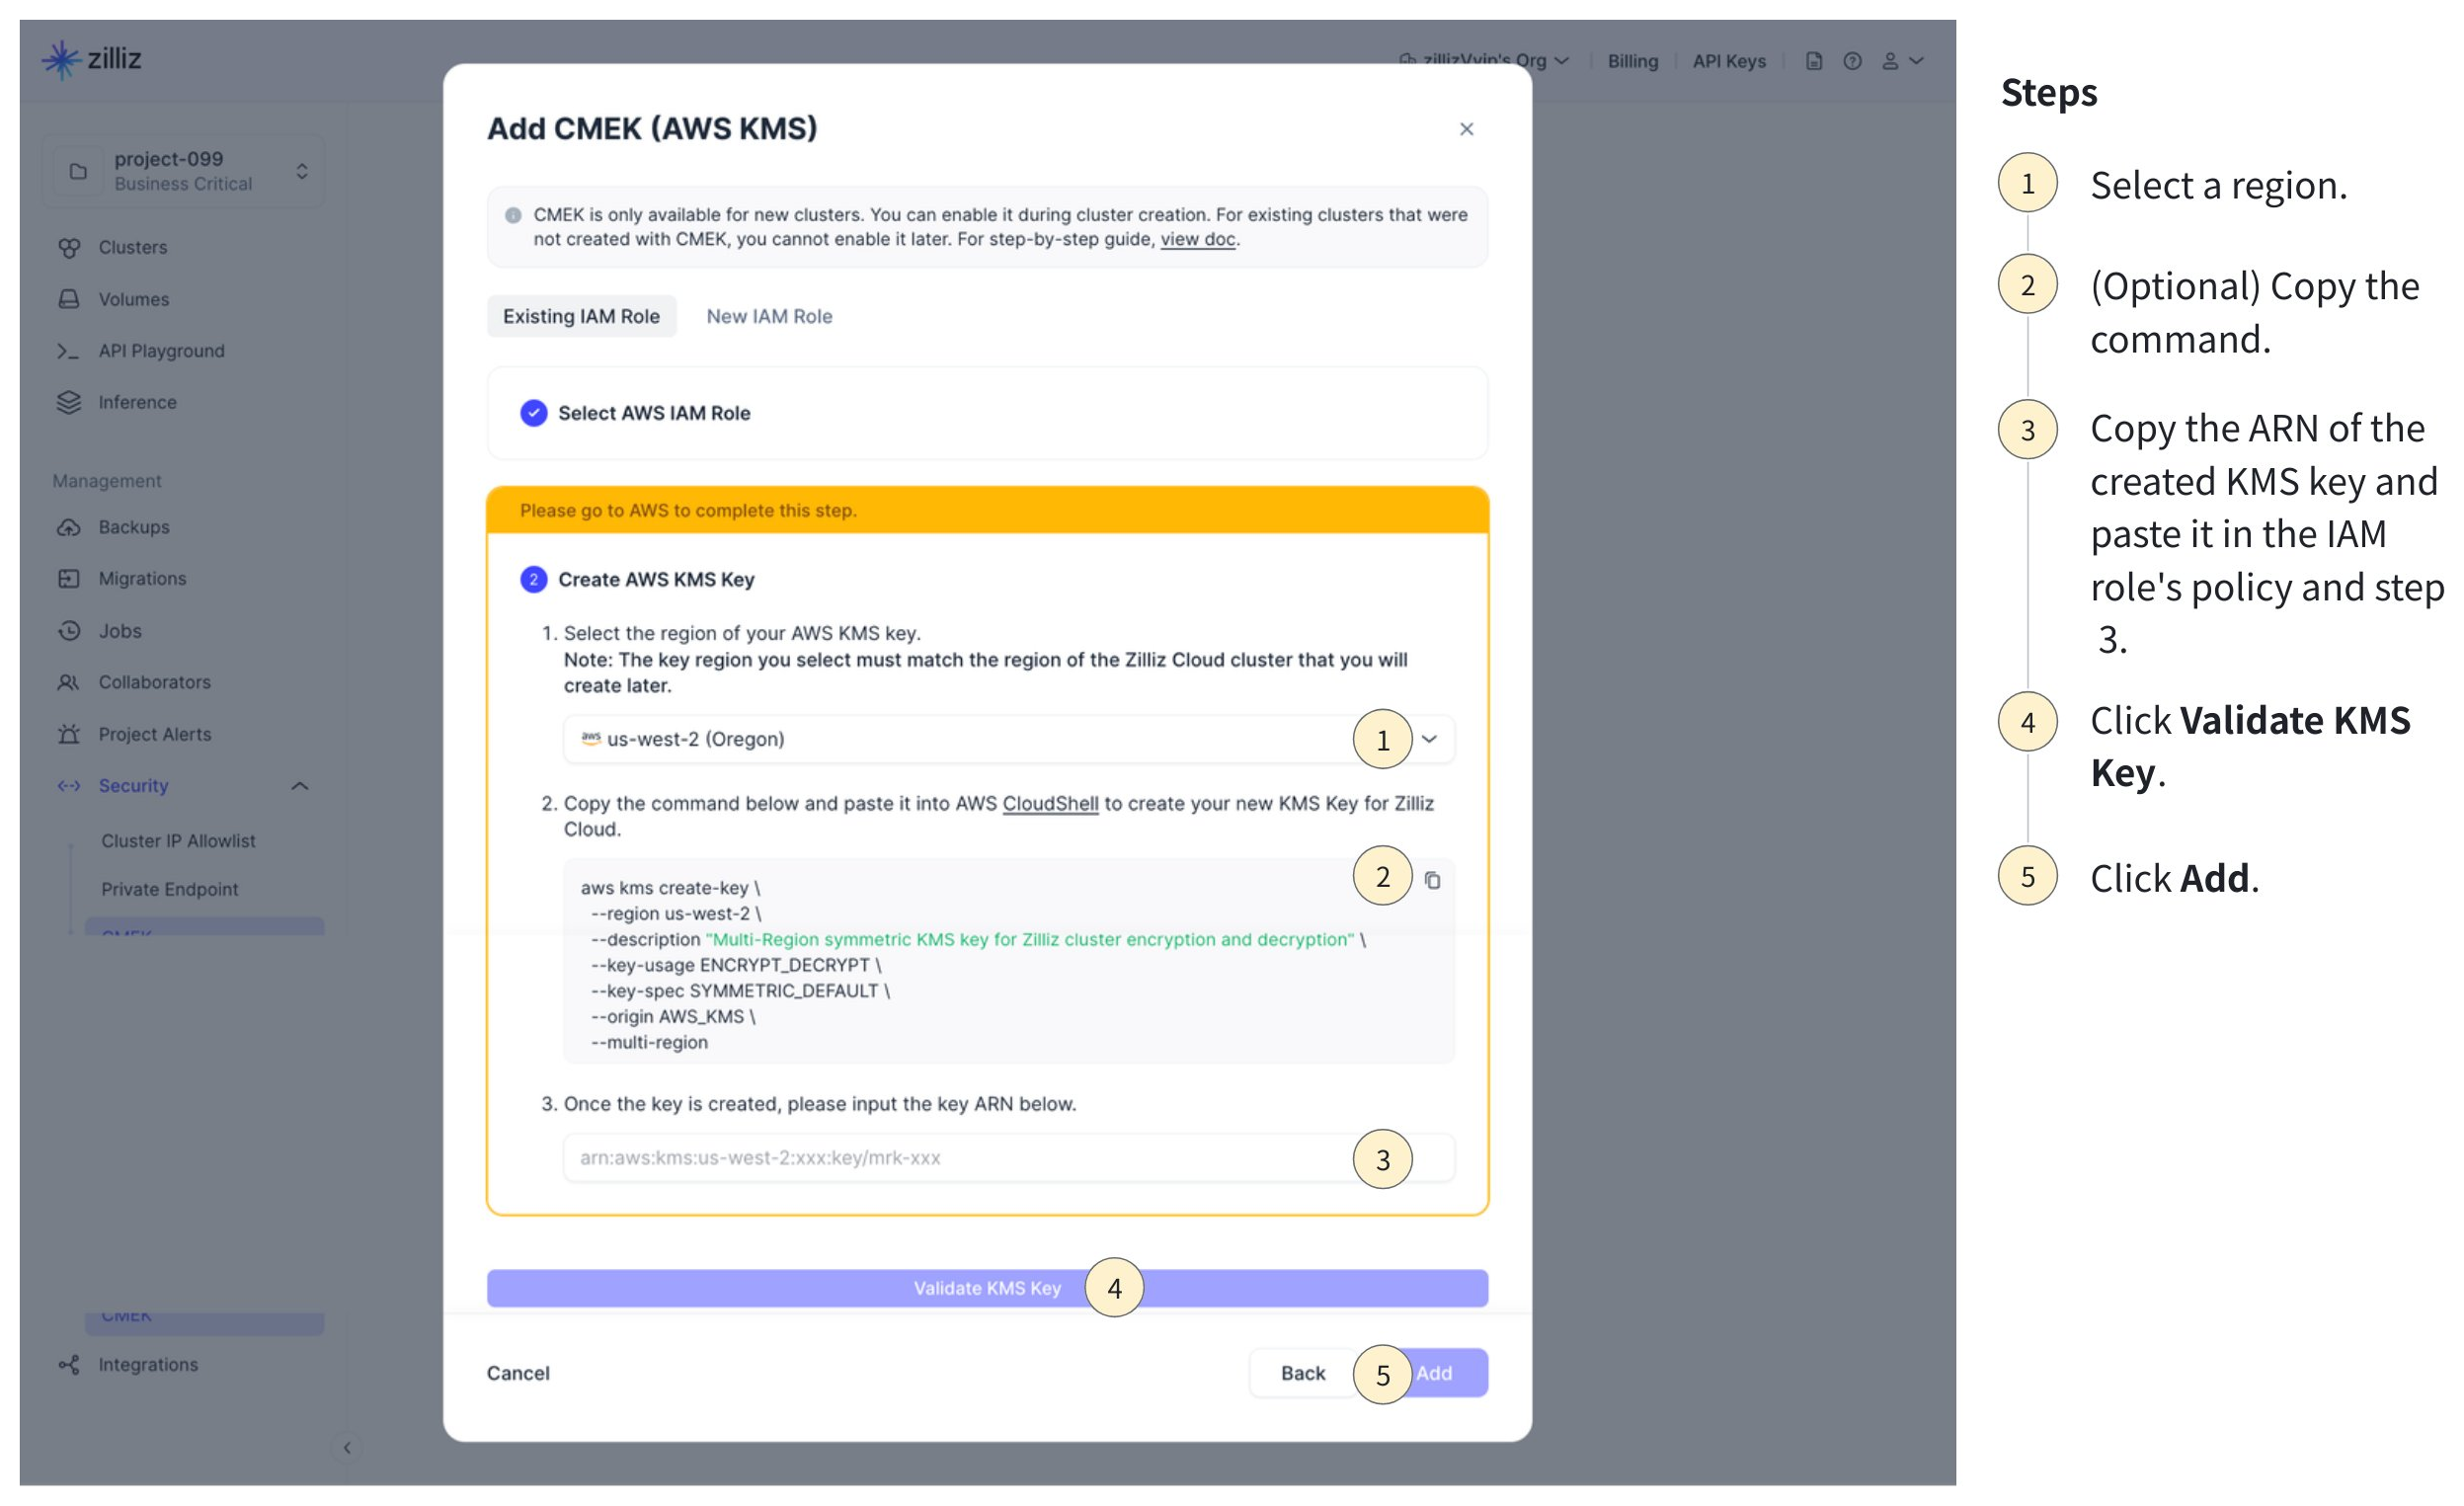
Add the KMS key.
-
Select the target region in step 1.
-
(Optional) Copy the command in step 2 and execute it in your AWS CloudShell.
This step is optional. If you already have a KMS key created with the specified IAM role, you can skip this step and proceed to the next. This is useful for adding multi-region replica keys.
📘NotesAfter you back up an encrypted Zilliz Cloud cluster from one cloud region to another, you must use the same key that encrypted the original cluster to decrypt the backup in the target region.
In this case, you can replicate the key to the region hosting the backup and submit it to Zilliz Cloud using an existing IAM role.
For details on creating multi-region replica keys, read this page in the AWS documentation.
-
Copy and paste the KMS key ARN in the following locations:
-
Your IAM role's policy on the AWS console.
Click the name of the role in the role list, find the role policy in the Permissions tab, and append the copied KMS key to the
Resourcenode.{"Version": "2012-10-17","Statement": [{"Effect": "Allow","Action": ["kms:Decrypt","kms:Encrypt","kms:DescribeKey"],"Resource": ["arn:aws:kms:us-west-2:xxxx:key/mrk-...","PASTE-THE-COPIED-KEY-ARN-HERE"]}]} -
Step 3 in the above dialog box on Zilliz Cloud.
-
-
Click Validate KMS Key at the bottom of the dialog box.
-
Once the validation succeeds, click Add.
Add a KMS key using a new role
If the drop-down list in Select AWS IAM Role on the Existing IAM Role tab does not contain the IAM role you need, follow the steps in this section.
Click New IAM Role.
Create an IAM role and add Zilliz Cloud to its trust policy.
Create an IAM role if you do not already have one listed on Zilliz Cloud. This requires executing commands in your AWS CloudShell.
-
Copy the file name of the trust policy from the Zilliz Cloud console, and run the
vicommand in your AWS CloudShell to create the trust policy file.vi role-trust-policy.json -
Press I to enter insert mode.
-
Copy the trust policy JSON in Step 1, and paste it into the terminal.
-
Press ESC and enter
:wqto save the JSON file. -
Enter the name of the role to create in Step 2.
-
Copy the command in Step 3, and paste it into the terminal.
-
Press Enter to run the command.
-
In the command output, copy the role's ARN and paste it into the text box in Step 4.
-
Click Next.
Create a KMS key
-
Select a cloud region in Step 1.
-
Copy the command in Step 2, and paste it into the terminal.
-
Press Enter to run the command.
-
In the command output, copy the key's ARN and paste it into the text box in Step 3.
-
Click Next.
Associate the KMS key with the IAM role.
-
Run the
vicommand to create the required role policy JSON file in Step 1. -
Copy the command in Step 2, and paste it into the terminal.
-
Press Enter to run the command.
-
Once the command is executed, click Validate KMS Key at the bottom of the dialog box.
-
Once the validation succeeds, click Add.
When you use a KMS key to encrypt a Zilliz Cloud cluster, the cluster checks the key's availability every 10 minutes. It becomes available only after it detects that the key is available.
Manage AWS KMS keys
You can view the added AWS KMS keys on the Zilliz Cloud console.
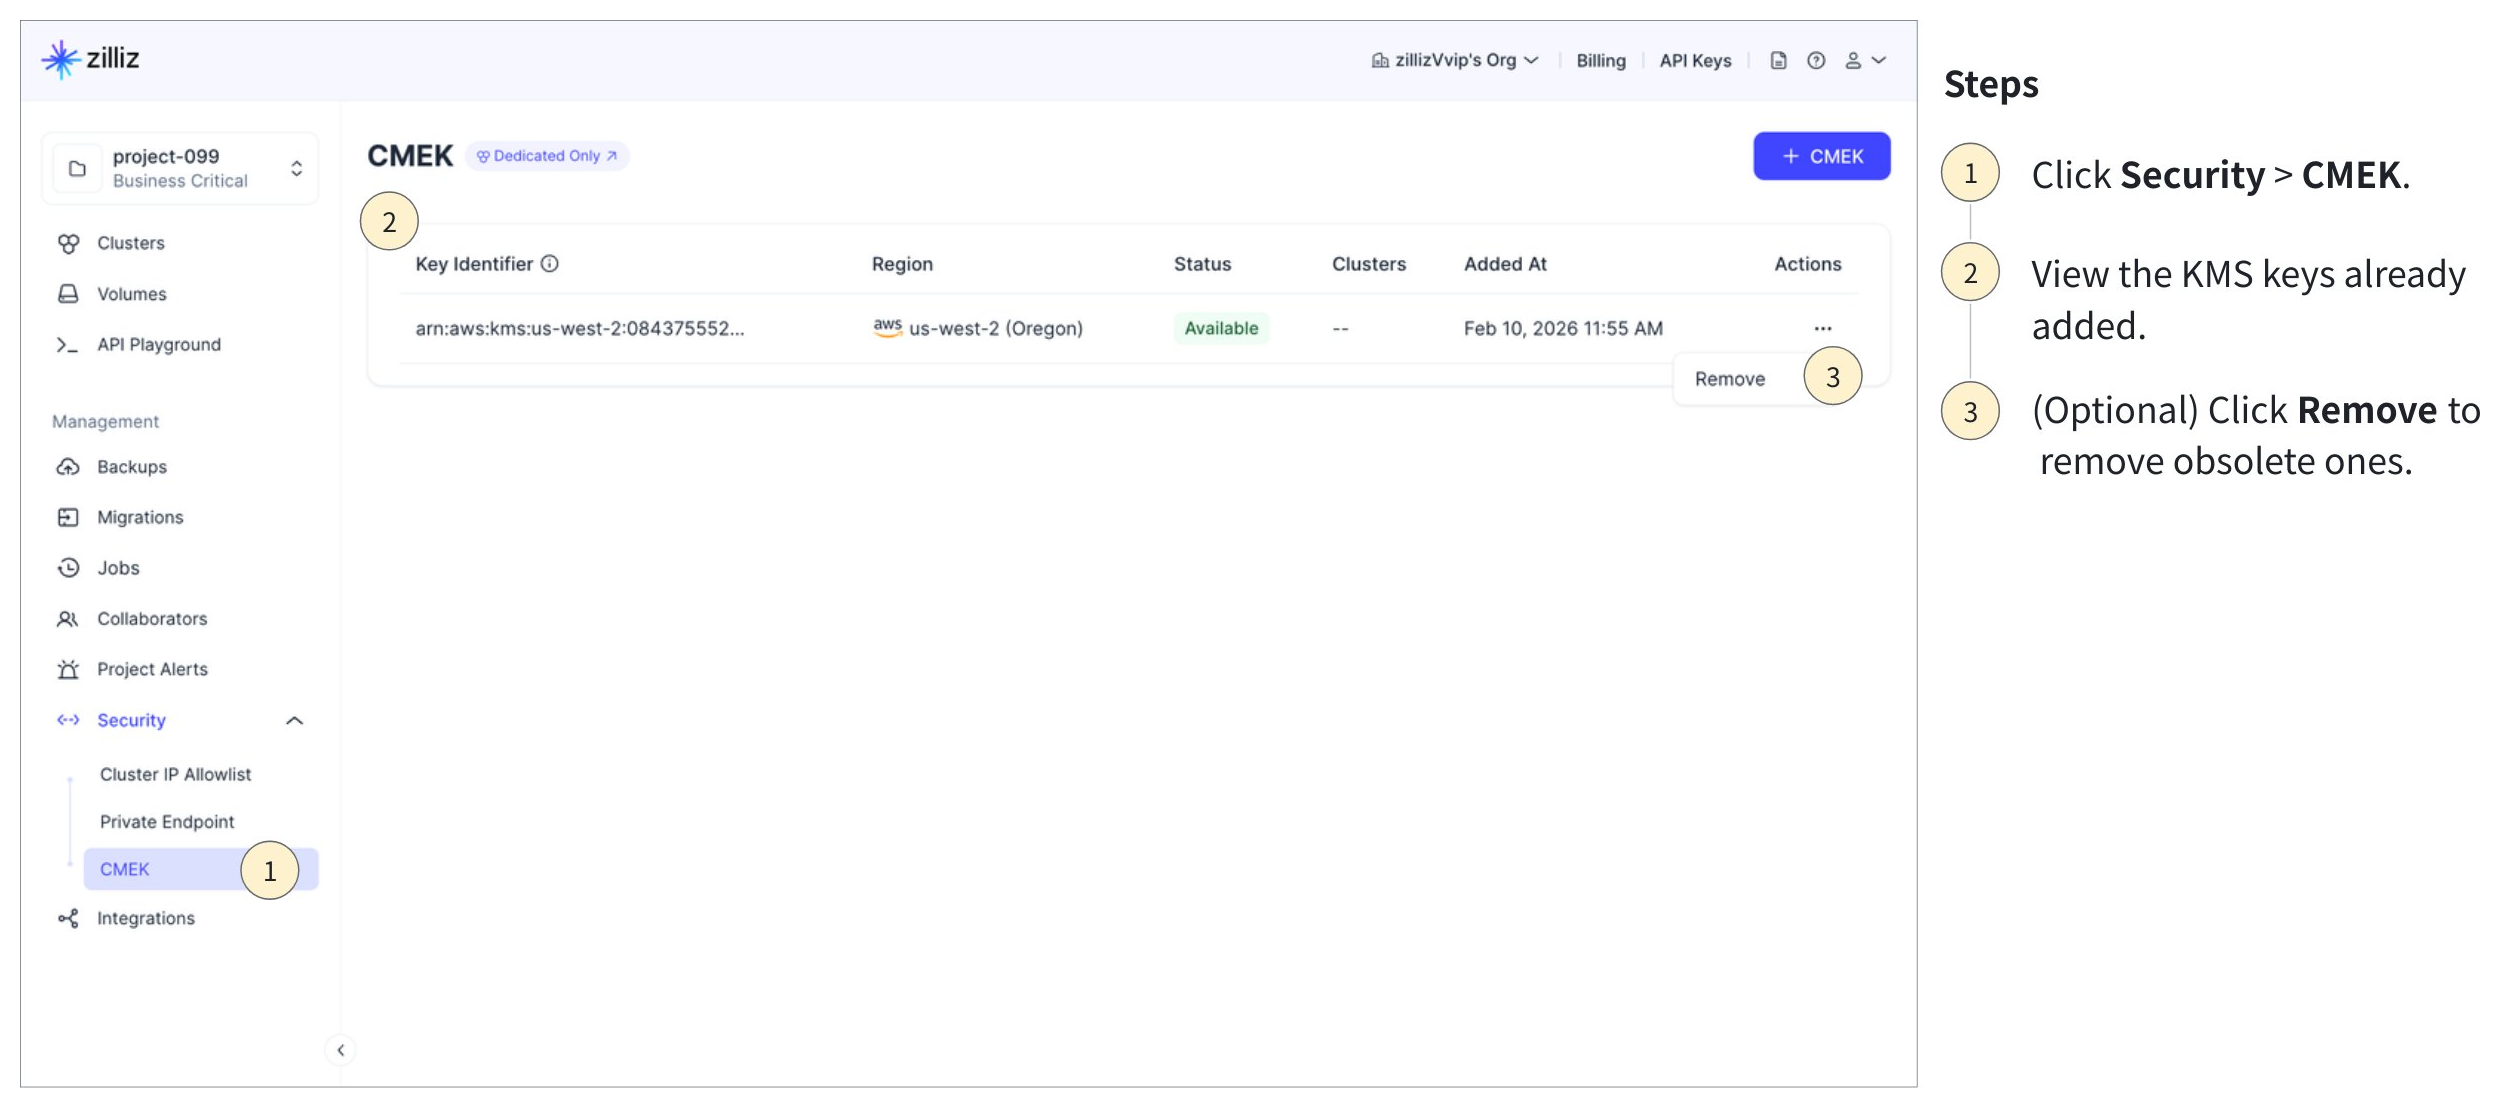
Zilliz Cloud will scan the availability of the listed keys every 10 minutes. You can also create project alerts regarding the status of the listed KMS keys. For details, refer to Manage Project Alerts.
When a KMS key is no longer needed, you can delete it if any clusters do not use it.
Use AWS KMS keys
Once you have added a KMS key to Zilliz Cloud, you can use it to create encrypted clusters and to back up and restore them.
Create an encrypted cluster
You can select a KMS key available in the region where you want to create the cluster to encrypt it.

Once you have added a KMS key, you can create an encrypted cluster as follows:
Click Dedicated in the Choose Deployment Option section.
Choose the cloud provider and region for the cluster.
Enable Encryption at Rest with CMEK and select an existing KMS key. Only a KMS key in the same region as the cluster to create can be selected.
Review the summary, then click Create Cluster.

On the Overview page of an encrypted cluster, there is a key icon to the right of the cluster name, as shown in the above figure. All collections created in an encrypted cluster are encrypted by default.
Restore from an encrypted backup file
When you restore an encrypted backup to a new cluster, Zilliz Cloud will use the KMS key associated with the backup file to decrypt the data before restoration. Therefore, you can restore the backup to a new cluster with or without encryption.

The restoration procedure from an encrypted backup is almost the same as a normal restoration, except for whether to enable Encryption at Rest with CMEK.

-
When this option is enabled, the cluster created after the restoration is encrypted using the KMS key specified below.
-
When this option is disabled, the cluster created after the restoration is unencrypted.