BYOC Overview
Bring Your Own Cloud (BYOC) is a deployment option for organizations to host applications and data in their own cloud accounts instead of using Zilliz Cloud's infrastructure. This solution is ideal for organizations with specific security requirements or regulatory compliance needs that require maintaining full data control sovereignty.
Zilliz BYOC is currently available in General Availability. For access and implementation details, please contact Zilliz Cloud support.
Why use Zilliz BYOC
Zilliz BYOC delivers unique deployment options that let you keep complete control over your data while eliminating operational overhead with the following benefits:
-
Operations
-
You can create BYOC projects and deploy the infrastructure on the Zilliz Cloud console.
-
You can use the well-tuned metrics and alert settings for monitoring your BYOC clusters in projects.
-
-
Scalability
-
You can always scale your BYOC projects by purchasing more licenses.
-
Clusters in BYOC projects are also scalable with manual and automatic scaling mechanisms.
-
-
Data management & security
-
Role-based access control (RBAC) at the organization, project, and cluster levels.
-
All data is securely stored and processed within your cloud accounts.
-
How it works
BYOC involves deploying Milvus alongside Zilliz-managed backend services, such as the upgrade workflow, resource scheduler, Open API service, and the web console, within your cloud environment, typically inside your own Virtual Private Cloud (VPC). This setup ensures that your data is stored and processed within your own infrastructure.
Zilliz BYOC implements two deployment modes to adapt to diversified enterprise governance requirements, and they are
BYOC
In this fully managed mode of Zilliz BYOC, you employ the cross-account role assumption mechanism offered by the cloud provider, allowing Zilliz Cloud to take on permissions to manage the EKS cluster and EC2 instances for you.
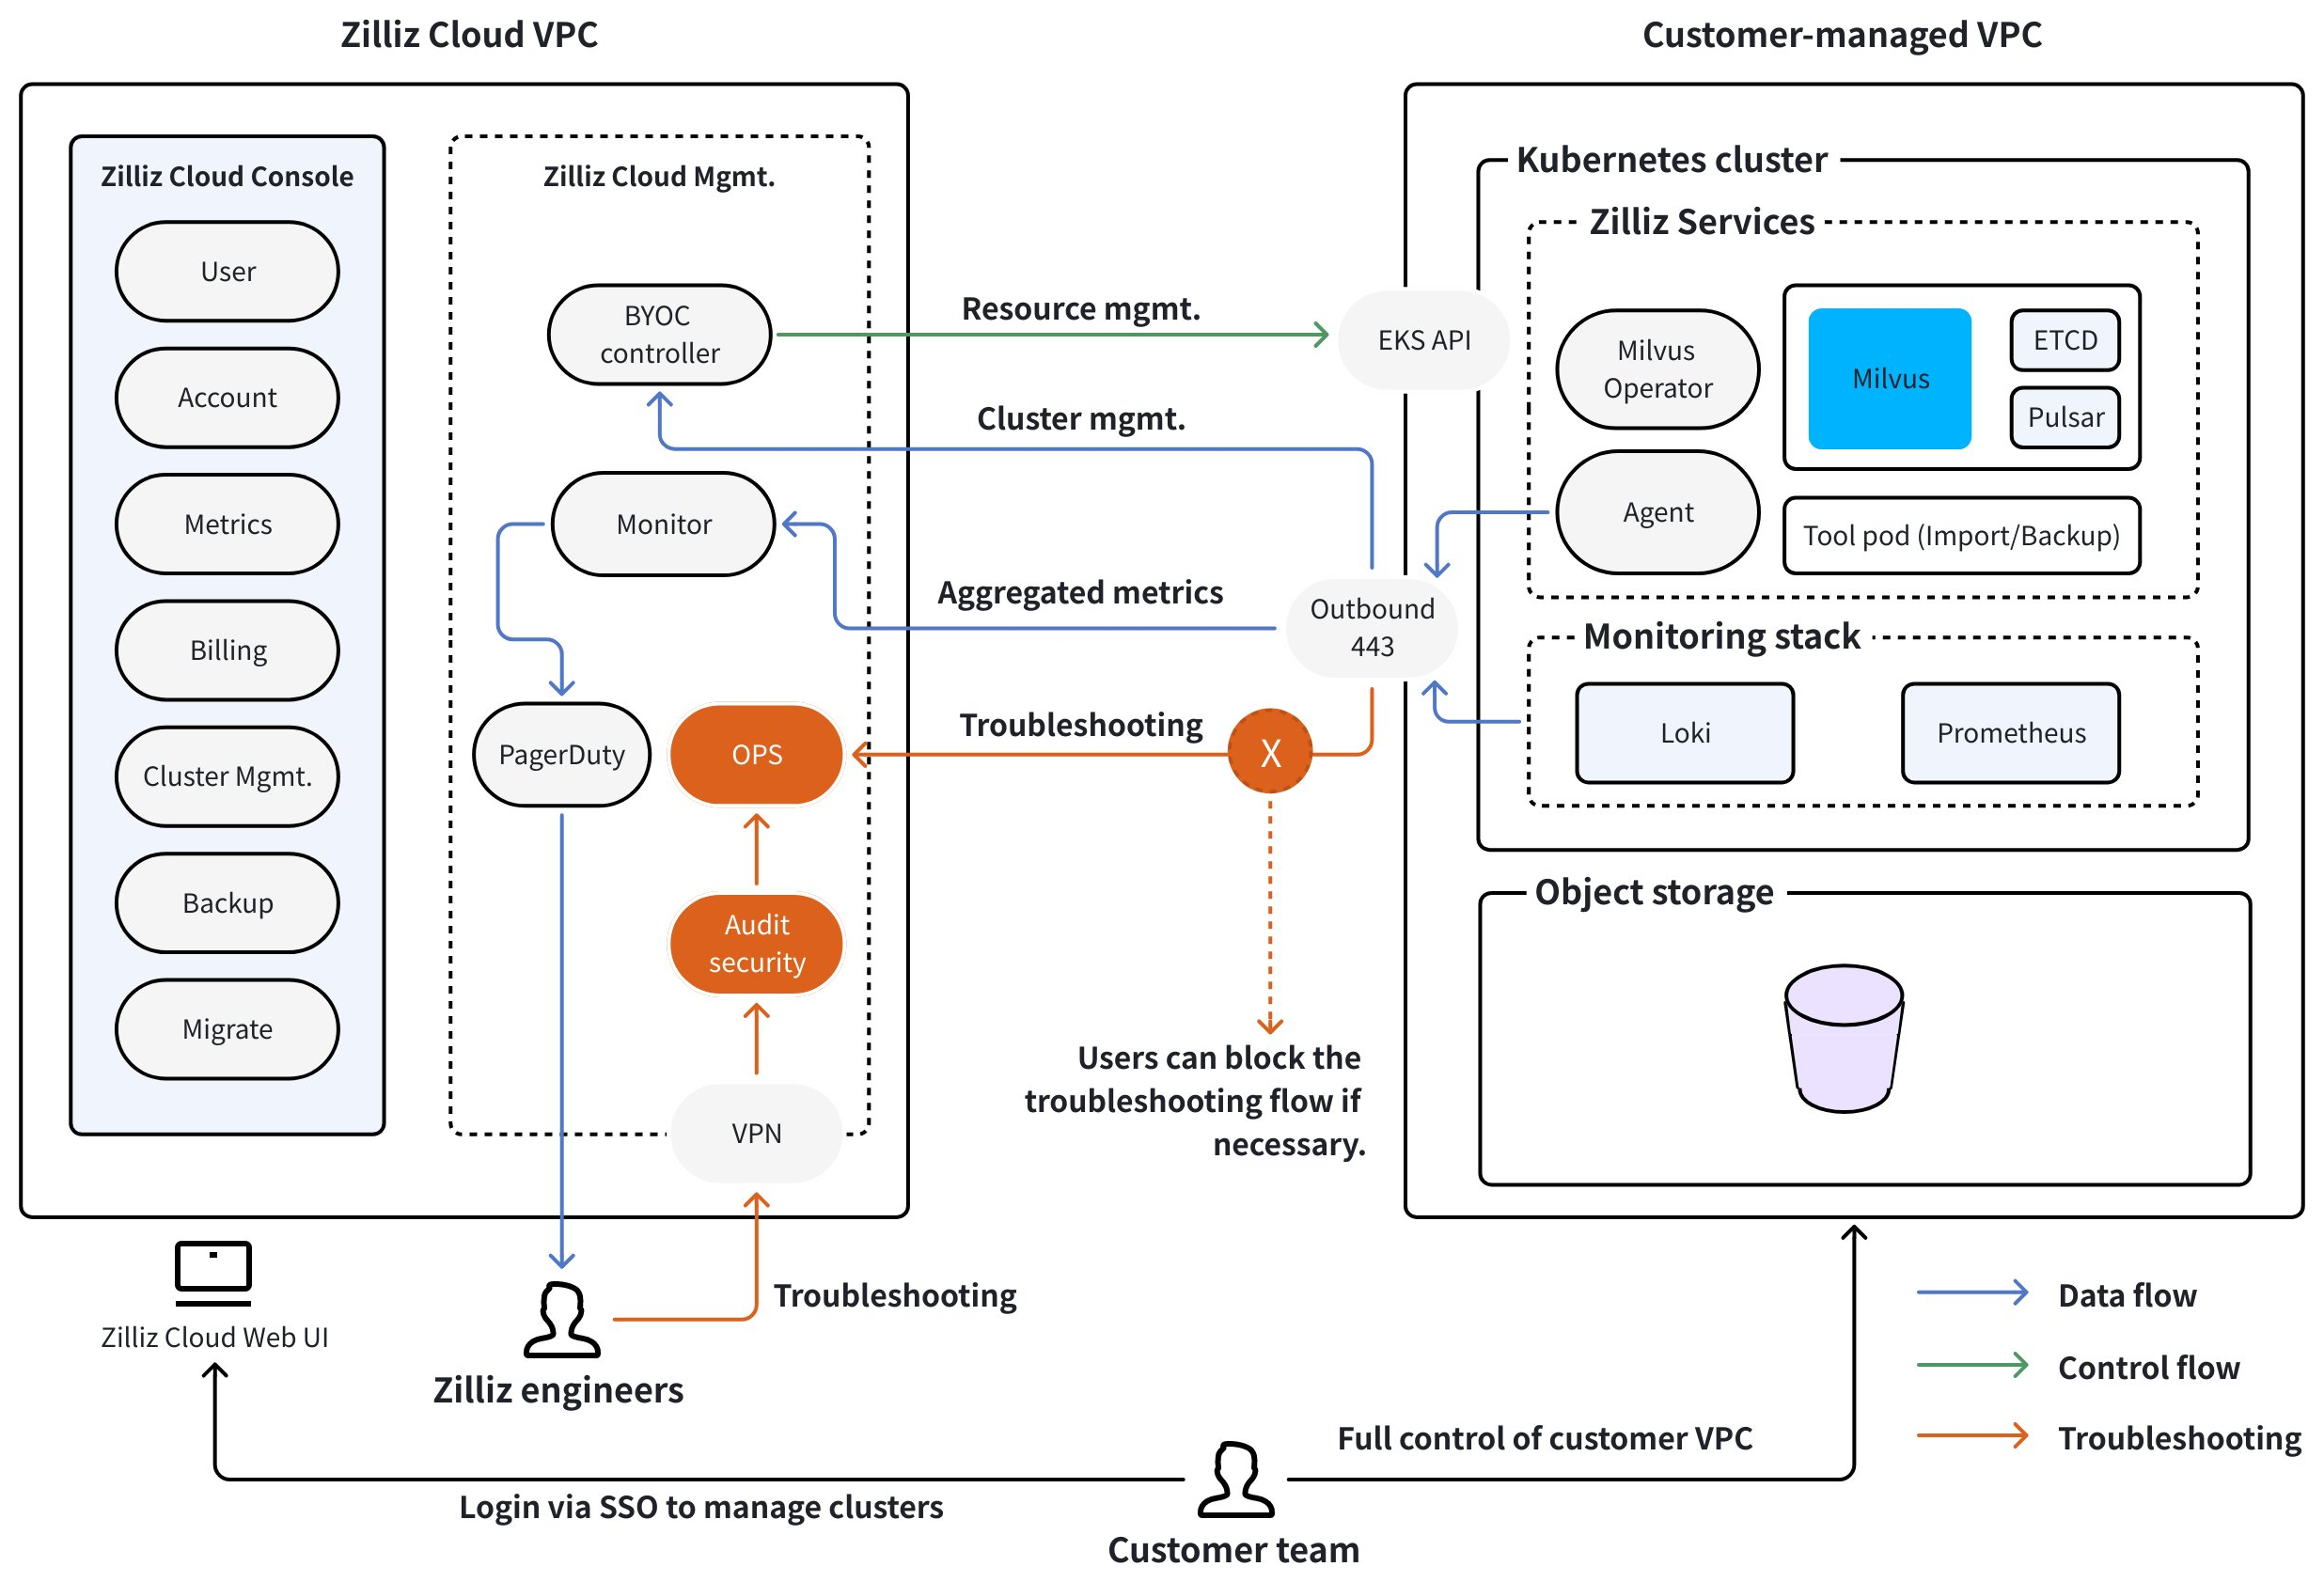
According to the architecture outlined above, you need to provide a VPC, an S3 bucket, and the minimum permissions for Zilliz Cloud to start an EKS cluster and deploy the necessary components, such as the Milvus Operator, Import/Backup tools, the monitoring stack, including Grafana and Prometheus, and a Milvus instance on your behalf.
Notes that the monitoring stack is integrated locally within your BYOC infrastructure, not through the Zilliz Cloud control plane. To enable and configure monitoring integrations, please contact Zilliz Technical Support.
Additionally, Zilliz Cloud establishes two separate planes for communication with the components deployed in your VPC, and they are
-
Control Plane
The control plane facilitates communication between Zilliz Cloud and the components deployed in your VPC for scheduling resources, upgrading Milvus instances, and providing access to the Zilliz Cloud console and control-plane open API services.
-
Data Plane
The data plane allows communication between your applications/services and the Milvus instance deployed in your VPC, specifically for data storage and retrieval.
BYOC-I
This mode deploys a BYOC agent in your environment for comprehensive operation and maintenance capabilities instead of using the cross-account role assumption method in a fully managed Zilliz BYOC deployment. An encrypted point-to-point (P2P) reverse tunnel is created between the Cloud Plane and the BYOC agent to improve communication security.
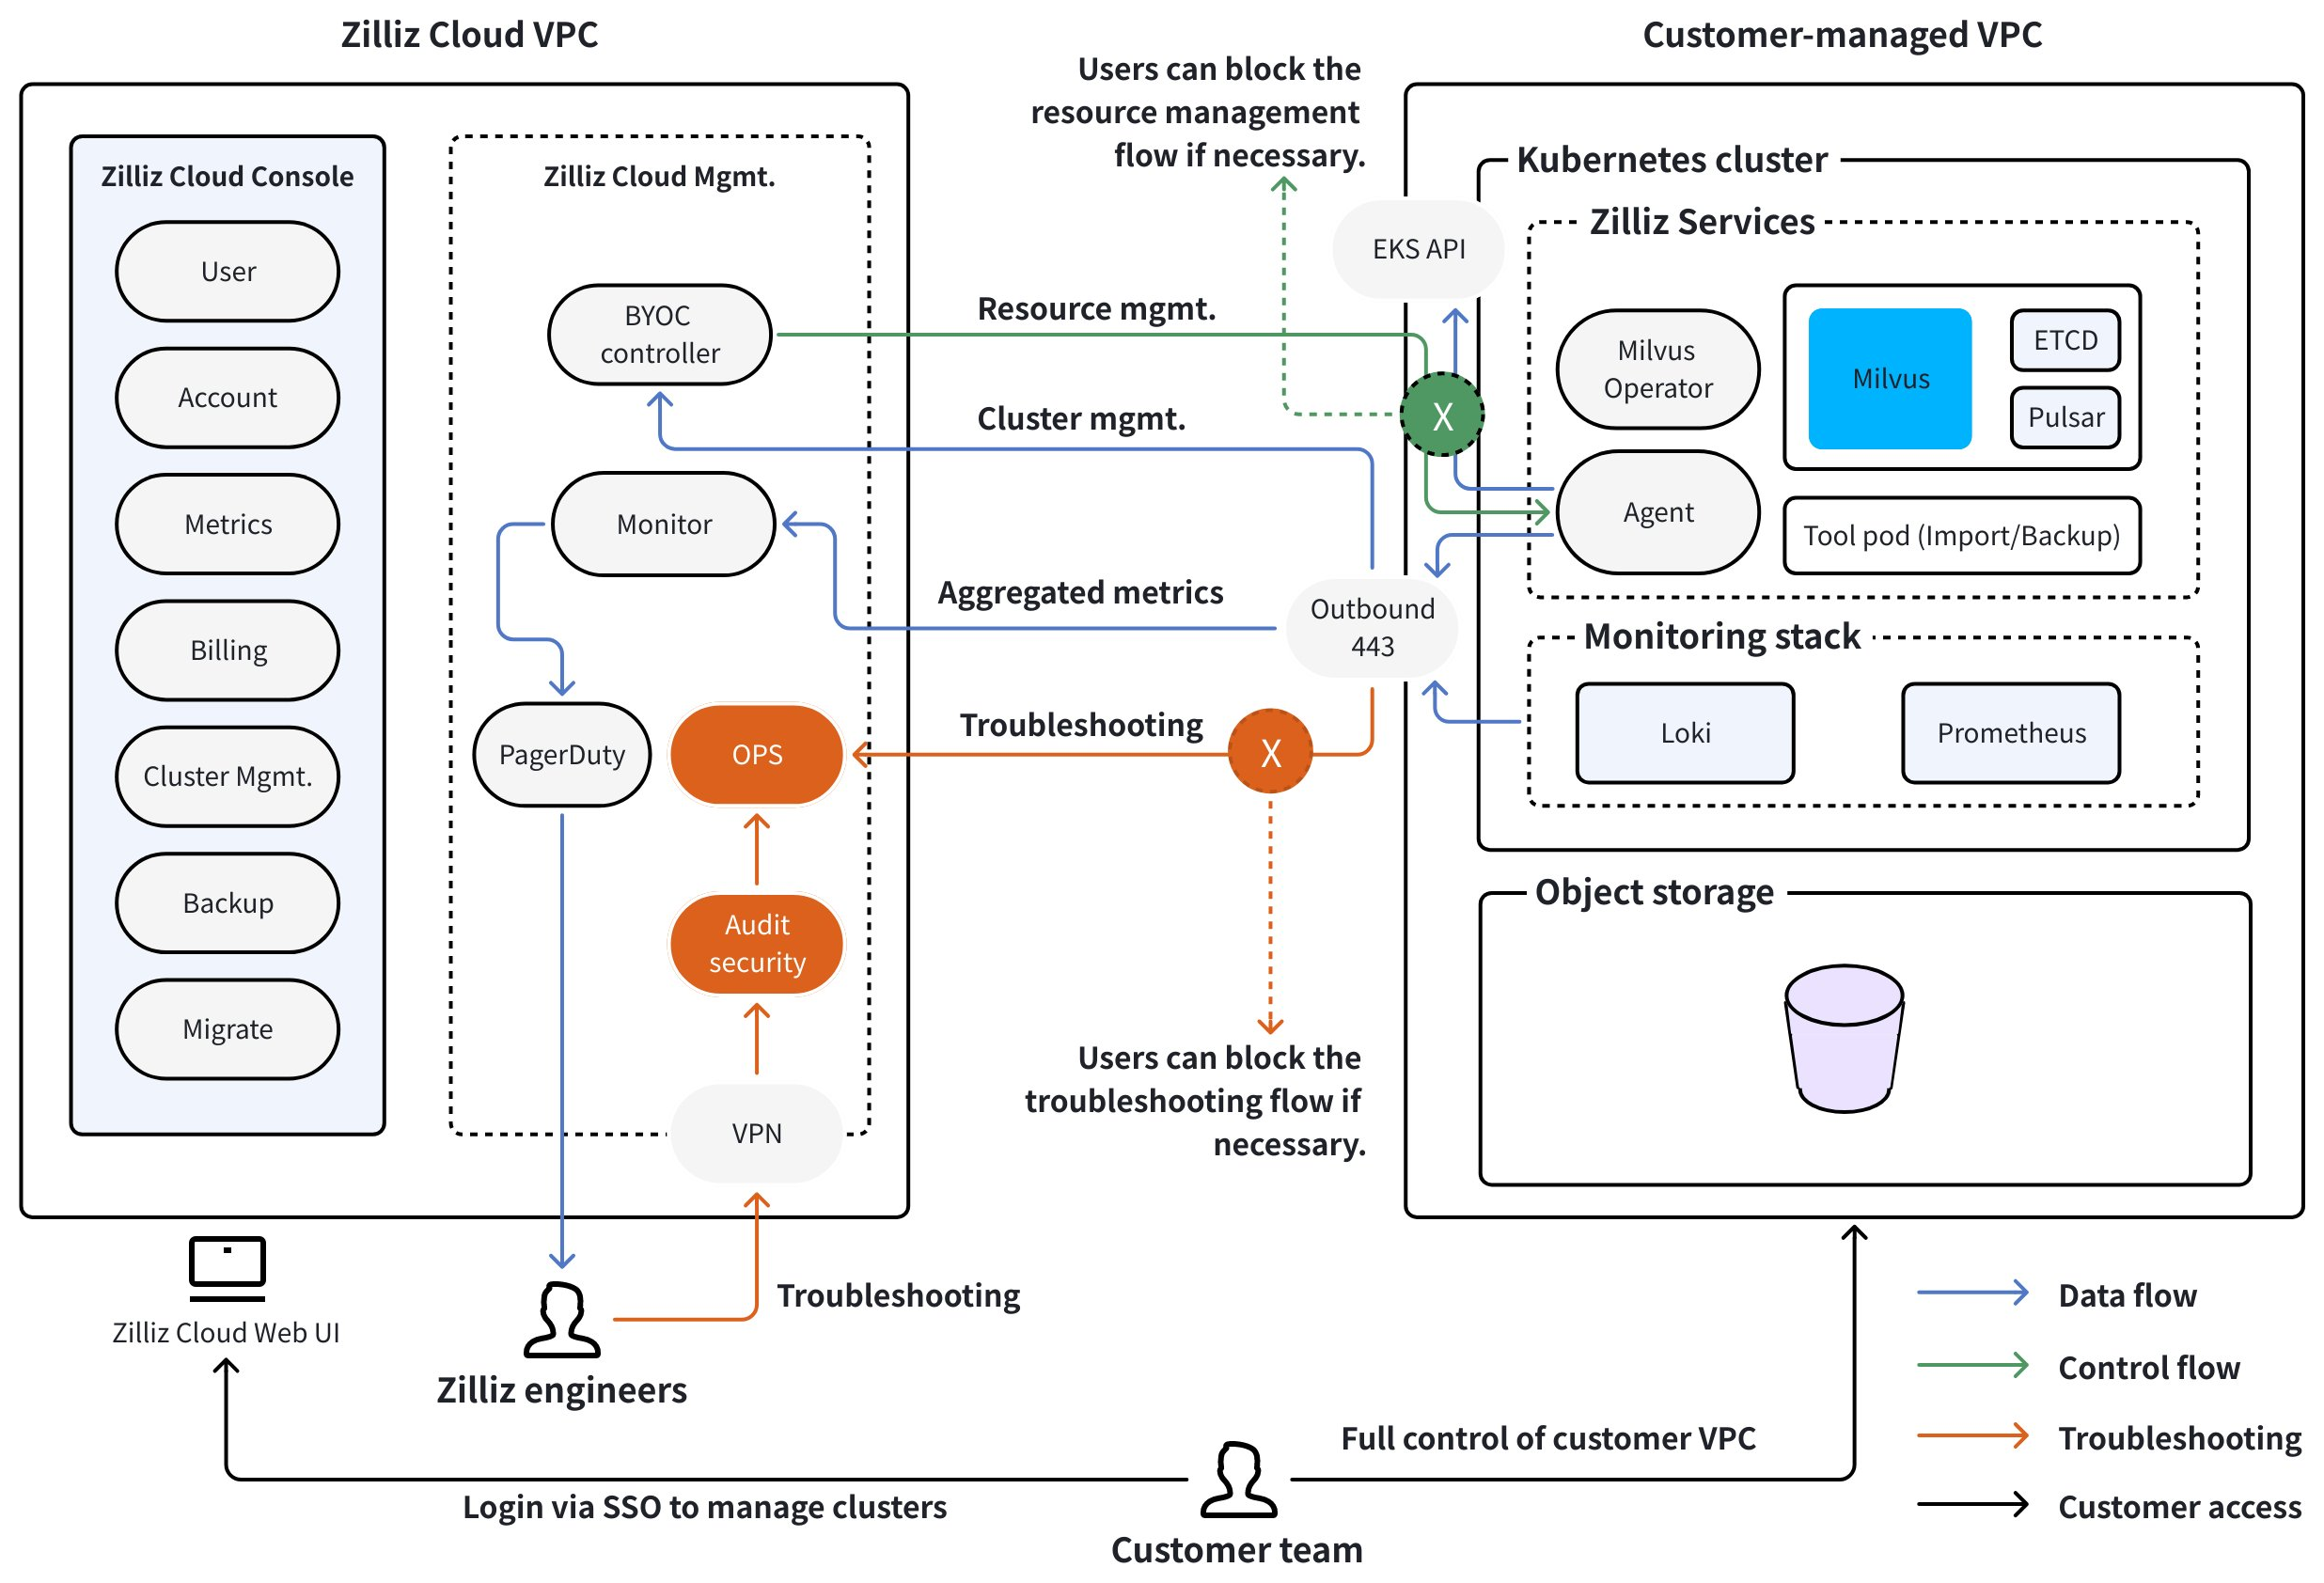
In the BYOC-I mode, instead of asking for cross-account permissions to manage infrastructure resources on your behalf, Zilliz leaves infrastructure management entirely in your hands, thereby enhancing data control sovereignty.
However, you may choose to grant the agent the necessary permissions so that Zilliz can assist you with infrastructure management if necessary.
Security assurance
Zilliz Cloud ensures secure communication across network boundaries through comprehensive encryption and strict access controls.
Network security
-
Internal Traffic: Full TCP/UDP communication within the cluster security group.
-
External Traffic: Encrypted outbound-only TCP connections on port 443 enable:
-
Connectivity to the Zilliz control plane.
-
Access to data sources and image repositories.
-
-
Same Security Group: TCP/UDP connections allowed for intra-cluster communication.
Access control
-
Secure VPN and, just-in-time, certificate-based authentication for Zilliz engineers.
-
Every access requires approvals and is logged for audits.
-
The control plane monitors and collects metrics through the outbound-only TCP connections.
These robust measures protect data integrity and confidentiality, ensuring secure and reliable operations in the cloud.
Encryption in transit
Client establish HTTPS or gRPC connections to the Zilliz Cluster. HTTPS/gRPC connections use the TLS 1.2 (or better) protocol with AES-256 (256-bit Advanced Encryption Standard ) to encrypt user data in transit.
Encryption at rest
The data plane of Zilliz Cloud encrypts the stored data on AWS S3 using the AES-256 (256-bit Advanced Encryption Standard ) encryption algorithm.
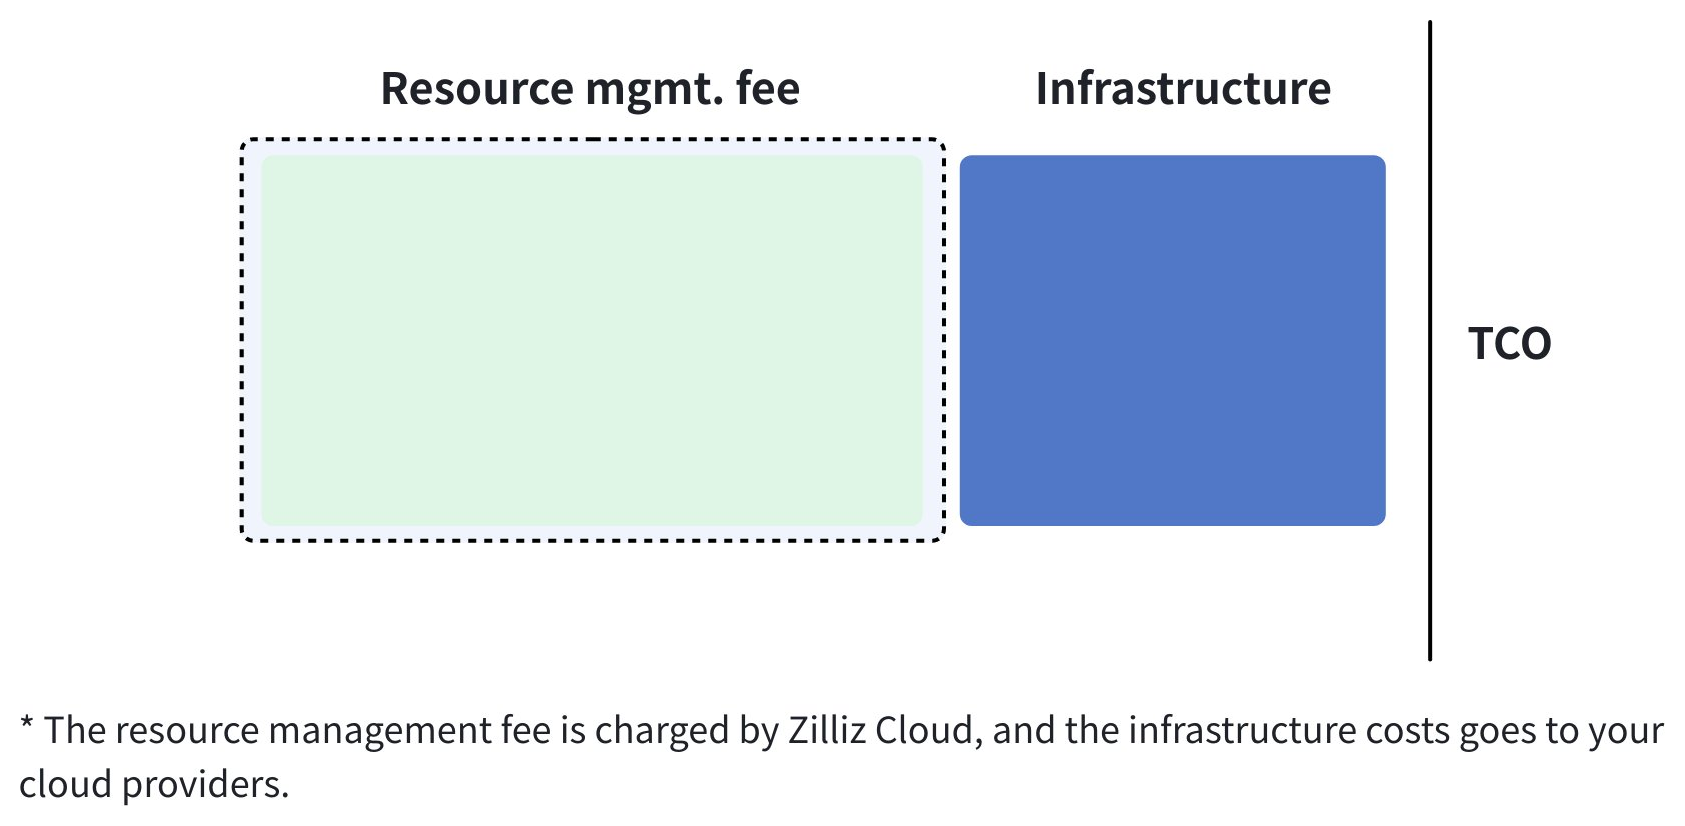
Cost management
Zilliz BYOC charges for the services you use in a BYOC project through resource management. However, you will still incur infrastructure expenses from cloud service providers, as illustrated in the following diagram.