Integrate with Amazon S3
This page explains how to authorize a Zilliz Cloud AWS BYOC or BYOC-I project to access an external Amazon S3 bucket. You create a customer-managed IAM policy and role in the AWS account that owns the bucket, then register the role in Zilliz Cloud.
The policy and trust-policy examples on this page contain placeholders. When configuring AWS, copy the JSON generated in the Zilliz Cloud console. It contains the correct bucket name, trusted AWS principal, and unique external ID for your BYOC project.
Access flow

Before you start
Ensure that:
-
Your AWS BYOC or BYOC-I data plane is running.
-
You have Organization Owner or Project Admin access to the Zilliz Cloud project.
-
You can create IAM policies and roles in the AWS account that owns the external S3 bucket.
-
You can update the IAM permission policy attached to the selected BYOC data plane's storage role.
-
The S3 bucket is in the same AWS Region as the BYOC data plane that will use the integration.
A bucket integration is Region-specific. If your project has data planes in multiple Regions, create a separate bucket and integration for each Region.
Step 1: Start the integration in Zilliz Cloud
Log in to the Zilliz Cloud console.
Open your BYOC project and select Integrations in the left navigation.
Under Amazon S3, click + Integration.
Enter a unique Integration Name and, optionally, an Integration Description.
Select the bucket permission that matches how you will use the integration.
| Bucket permission | Use for | Granted access |
|---|---|---|
| Read only | External volumes and external collections | s3:GetObject, s3:ListBucket, and s3:GetBucketLocation |
| Read write | Backup export, audit log forwarding, and access log forwarding | Read-only actions plus s3:PutObject |
Step 2: Specify the external S3 bucket
In Region, select the Region of the BYOC data plane that will access the bucket.
Confirm in the Amazon S3 console that the external bucket is in the same Region.
In Bucket Name, enter only the bucket name. Do not include s3://, an object prefix, or a trailing slash.
Click Next. Zilliz Cloud generates a bucket-scoped IAM policy.
Step 3: Create the IAM permission policy
In the Zilliz Cloud Create IAM Policy step, copy the generated JSON.
Open IAM > Policies in the AWS account that owns the bucket.
Click Create policy, select the JSON editor, and paste the generated policy.
Click Next, give the policy a recognizable name, such as ZillizBucketIntegration-my-bucket, and create it.
The following examples show the policies generated for each permission level.
Read-write policy
{
  "Version": "2012-10-17",
  "Statement": [
    {
      "Sid": "Statement1",
      "Effect": "Allow",
      "Action": [
        "s3:GetObject",
        "s3:PutObject",
        "s3:ListBucket",
        "s3:GetBucketLocation"
      ],
      "Resource": [
        "arn:aws:s3:::<BUCKET_NAME>",
        "arn:aws:s3:::<BUCKET_NAME>/*"
      ]
    }
  ]
}
Read-only policy
{
  "Version": "2012-10-17",
  "Statement": [
    {
      "Sid": "Statement1",
      "Effect": "Allow",
      "Action": [
        "s3:GetObject",
        "s3:ListBucket",
        "s3:GetBucketLocation"
      ],
      "Resource": [
        "arn:aws:s3:::<BUCKET_NAME>",
        "arn:aws:s3:::<BUCKET_NAME>/*"
      ]
    }
  ]
}
If the bucket uses server-side encryption with a customer-managed AWS KMS key, also grant the role the required KMS permissions and allow the role in the KMS key policy. For a write workflow, the policy generated by the current console may need an additional kms:GenerateDataKey permission on that key.
Step 4: Create the IAM role and trust policy
Return to Zilliz Cloud and click Next to open Create IAM Role.
Copy the generated custom trust policy. It contains the AWS principal for the selected BYOC data plane and a unique external ID.
In the bucket owner's AWS account, open IAM > Roles and click Create role.
Select Custom trust policy, paste the generated JSON, and click Next.
Attach the permission policy created in step 3.
Enter a role name, such as ZillizBucketIntegrationRole, review the configuration, and create the role.
{
  "Version": "2012-10-17",
  "Statement": [
    {
      "Effect": "Allow",
      "Action": "sts:AssumeRole",
      "Principal": {
        "AWS": "<ZILLIZ_BYOC_AWS_PRINCIPAL>"
      },
      "Condition": {
        "StringEquals": {
          "sts:ExternalId": "<ZILLIZ_GENERATED_EXTERNAL_ID>"
        }
      }
    }
  ]
}
The external ID binds the role to this integration and protects the cross-account trust relationship. Copy both the principal and external ID exactly as displayed in Zilliz Cloud.
Step 5: Allow the BYOC storage role to assume the customer role
The customer role's trust policy is only one side of the authorization. The selected data plane's storage role must also have an identity-based policy that allows sts:AssumeRole on the new customer role.
The role name typically ends with -storage-role. Locate the exact role ARN in Zilliz Cloud:
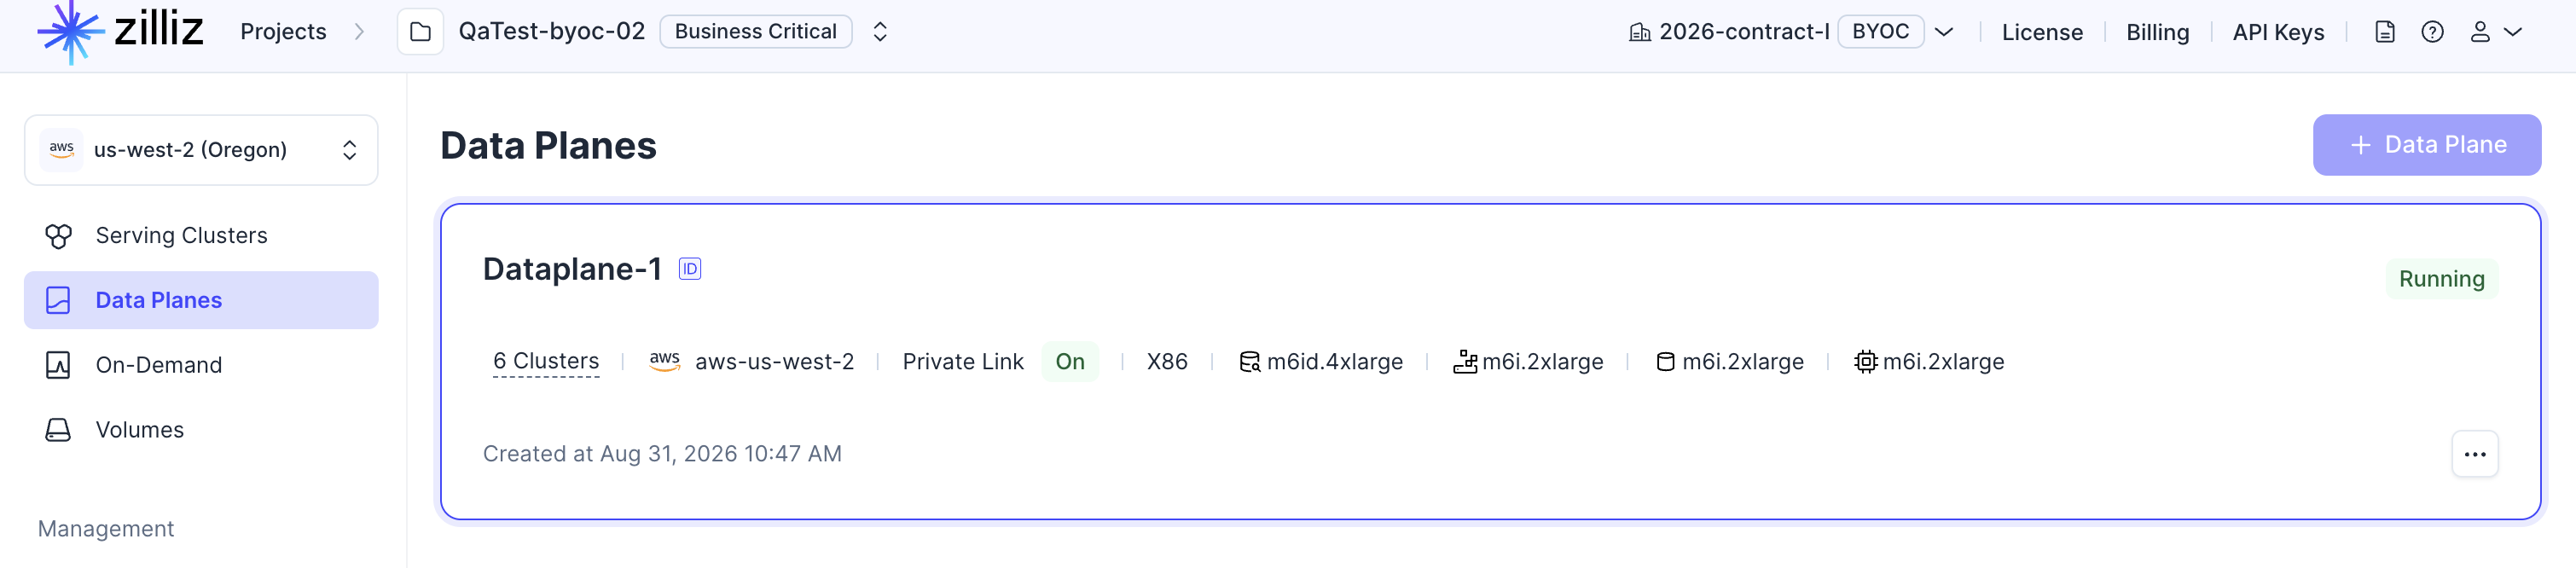
Open your project, and click Data Planes in the left navigation.
Click the data plane that will use the bucket integration to open View Data Plane Details.
Scroll to Credential Settings > Storage.
Copy the complete IAM Role ARN. Use this ARN even if the role name does not end with -storage-role.
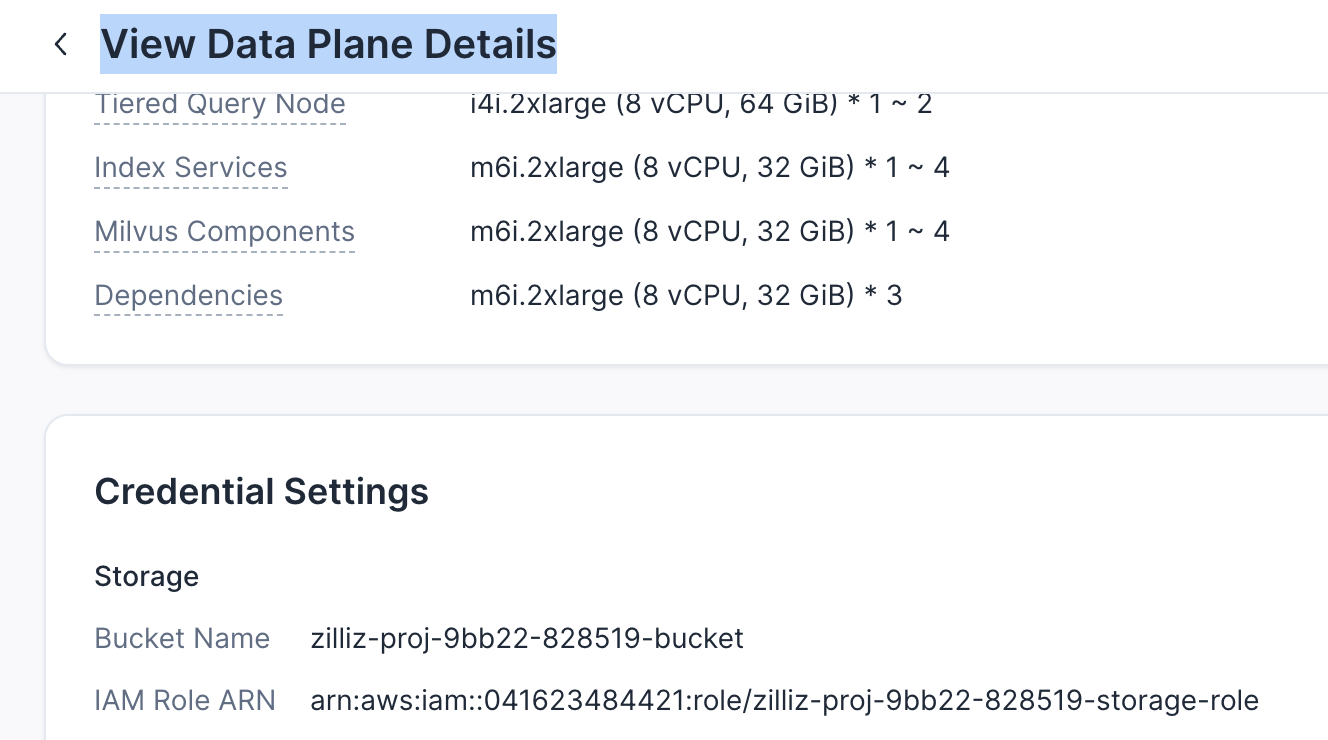
In the AWS account that contains the BYOC data plane, open the IAM role identified by that ARN.
Create or update a customer-managed permission policy attached to that storage role.
Set Resource to the exact role ARN created in step 4. Do not use *.
{
  "Version": "2012-10-17",
  "Statement": [
    {
      "Sid": "AllowAssumeExternalBucketRole",
      "Effect": "Allow",
      "Action": "sts:AssumeRole",
      "Resource": "<CUSTOMER_BUCKET_ROLE_ARN>"
    }
  ]
}
The storage role's permission policy must allow the call, and the customer role's trust policy must trust the caller with the correct external ID. Missing either side causes role assumption to fail.
Step 6: Validate and add the integration
On the AWS role details page, copy the role ARN. It has the following format: arn:aws:iam::<BUCKET_ACCOUNT_ID>:role/<ROLE_NAME>.
Return to Zilliz Cloud and paste the ARN into Role ARN.
Click Validate Integration.
When the status changes to Successful, click Add. The Amazon S3 integration is now available to supported workflows in the same Zilliz Cloud project and Region.
Security recommendations
-
Create a dedicated IAM role for each bucket integration.
-
On the BYOC storage role, grant
sts:AssumeRoleonly on the exact customer role ARN. -
Keep the policy scoped to the exact bucket and choose Read only unless the workflow must write objects.
-
Keep S3 Block Public Access enabled. Bucket integration does not require public bucket access.
-
Do not add long-lived AWS access keys to Zilliz Cloud. Access is obtained by assuming the customer role with temporary STS credentials.
-
If an organization-level service control policy, permissions boundary, S3 bucket policy, or KMS key policy applies, ensure it does not deny the actions granted to this role.
Troubleshooting
| Validation result | Likely cause | What to check |
|---|---|---|
bucket region not match | The bucket and selected BYOC data plane are in different Regions. | Select the matching Region or use a bucket in the data plane's Region. |
NoSuchBucket | The bucket name is incorrect or the bucket no longer exists. | Enter only the exact bucket name, without s3:// or a path. |
AccessDenied for GetBucketLocation | The IAM permission policy is missing, not attached, or blocked by another AWS policy. | Confirm the role has s3:GetBucketLocation on the bucket and review permission boundaries, bucket policies, and service control policies. |
| Role assumption failed | The storage role lacks sts:AssumeRole, or the role ARN, trusted principal, or external ID does not match. | Check both sides: the storage role's identity policy must allow the customer role ARN, and the customer role's trust policy must contain the generated principal and external ID. |