Create Cluster
A Dedicated cluster provides isolated, reserved environments for production workloads that demand consistent and predictable performance. This option is ideal for sustained high-throughput and latency-sensitive applications.
This topic describes how to create a Dedicated cluster. To create a Free or Serverless cluster, see Free & Serverless Clusters.
Prerequisites
Ensure:
-
Registration with Zilliz Cloud. Refer to Register with Zilliz Cloud.
-
Ownership of the organization or project where the cluster is to be established. For details on roles and permissions, see Access Control Explained.
Create a Dedicated cluster
- Cloud Console
- cURL
The following demo shows how to create a Dedicated cluster.
You need to configure the following information of the Dedicated cluster.
| Parameter | Description |
|---|---|
| Cluster Name | Assign a unique identifier for your cluster. |
| Cluster Description (optional) | Enter the description of your cluster, up to 255 characters. |
| Cluster Type | Select a cluster type that aligns with your cluster's performance requirements. For more information, refer to Select the Right Cluster Type. To select a Tiered-storage cluster, your cluster must have at least 8 query CUs. |
| Query CU | Select the number of query CUs of the cluster. For organizations created with a personal email address, the maximum query CU size for a Dedicated cluster is 32, even if a payment method is configured. If you are creating a cluster in an Enterprise project, auto-scaling is enabled by default. You can configure the minimum and maximum number of Query CUs for auto-scaling by entering values in the input boxes or dragging the slider. For details about auto-scaling, see Auto-scaling. |
| Backup Policy (optional) | Decide the automatic backup policy for the cluster to create. For more details about the backup policy, see Schedule Automatic Backups. |
| Replica | The number of replicas of the cluster. |
While the cluster is being created, you need to save the cluster credentials (user and password) which will be shown only once.
When the cluster status turns into "Running", the cluster is created successfully. You can then copy the cluster endpoint and token and use them to connect to the cluster.
Your request should resemble the following example, where {API_KEY} is your API key used for authentication. For further details, see Create Dedicated Cluster.
curl --request POST \
--url "${BASE_URL}/v2/clusters/createDedicated" \
--header "Authorization: Bearer ${TOKEN}" \
--header "Accept: application/json" \
--header "Request-Timeout: 5" \
--header "Content-Type: application/json" \
-d '{
    "clusterName": "Cluster-05",
    "projectId": "proj-xxxxxxxxxxxxxxxxxxxxxx",
    "regionId": "aws-us-west-2",
    "plan": "Standard",
    "cuType": "Performance-optimized",
    "cuSize": 1,
    "description": "A cluster for vector search workloads."
}'
In the command above,
-
{API_KEY}: The credential used to authenticate API requests. Replace the value with your own. -
clusterName: The name of the cluster to create. -
projectId: The ID of the project in which you want to create a cluster. To list project IDs, call the List Projects operation. -
regionId: The ID of the cloud region where you want to create a cluster. To obtain available cloud region IDs, call the List Cloud Regions operation. -
cuType: The type of the cluster. Valid values: Performance-optimized, Capacity-optimized, and Tiered-storage. -
cuSize: The number of query CUs used for the cluster. Value range: 1 to 2,048. For organizations created with a personal email address, the maximum query CU size for a Dedicated cluster is 32, even if a payment method is configured. -
description(optional): Description of the cluster.
The following is an example output.
{
    "code": 0,
    "data": {
        "clusterId": "inxx-xxxxxxxxxxxxxxx",
        "username": "db_admin",
        "password": "****************",
        "prompt": "successfully submitted, cluster is being created. You can access data about the creation progress and status of your cluster by DescribeCluster API. Once the cluster status is RUNNING, you may access your vector database using the SDK with the admin account and the initial password you specified."
    }
}
Create an encrypted cluster
This feature is available only on Business Critical (SaaS) and BYOC deployments.
This feature is available in AWS. It is not available on Google Cloud and Microsoft Azure.
To create an encrypted cluster, you need to add at least a customer-managed encryption key (CMEK) to Zilliz Cloud. For details, refer to Customer-managed Keys for Data Encryption.
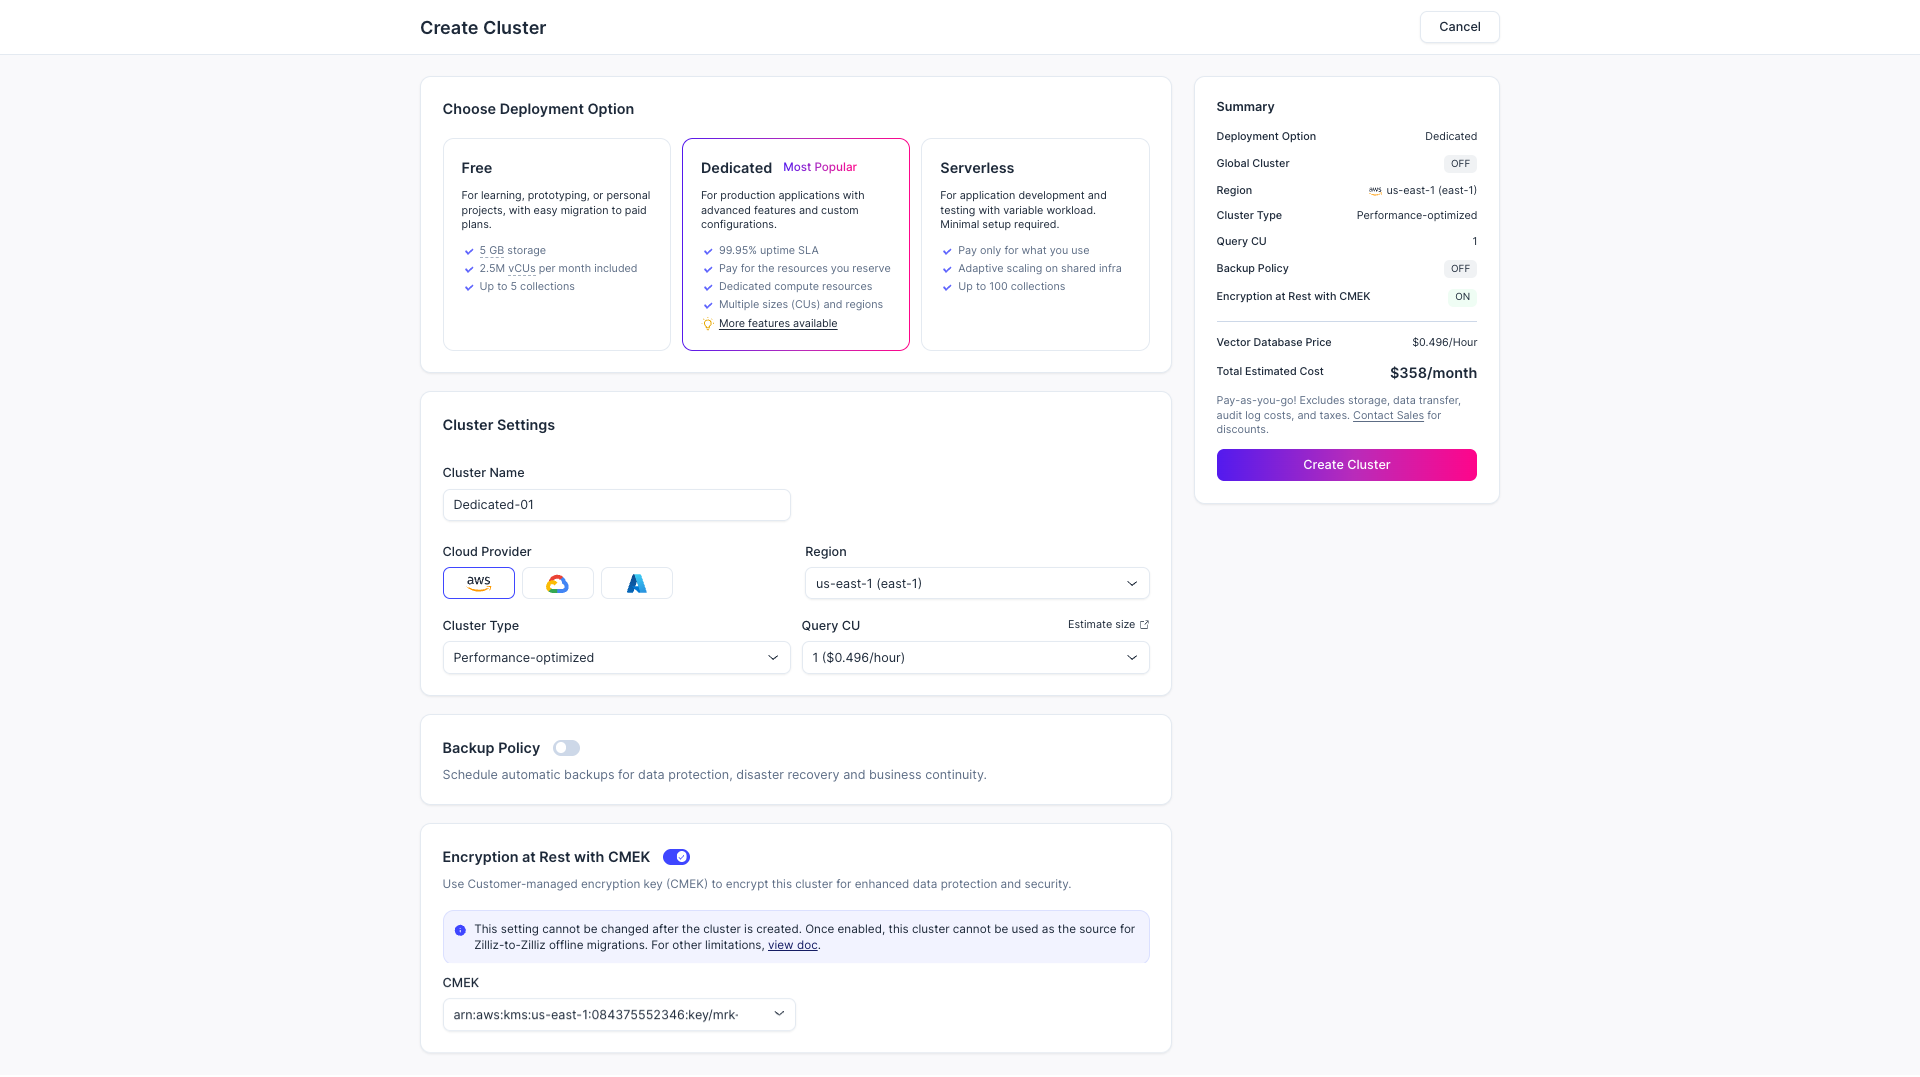
Once you have added a KMS key, you can create an encrypted cluster as follows:
Click Dedicated in the Choose Deployment Option section.
Choose the cloud provider and region for the cluster.
Enable Encryption at Rest with CMEK and select an existing KMS key. Only a KMS key in the same region as the cluster to create can be selected.
Review the summary, then click Create Cluster.
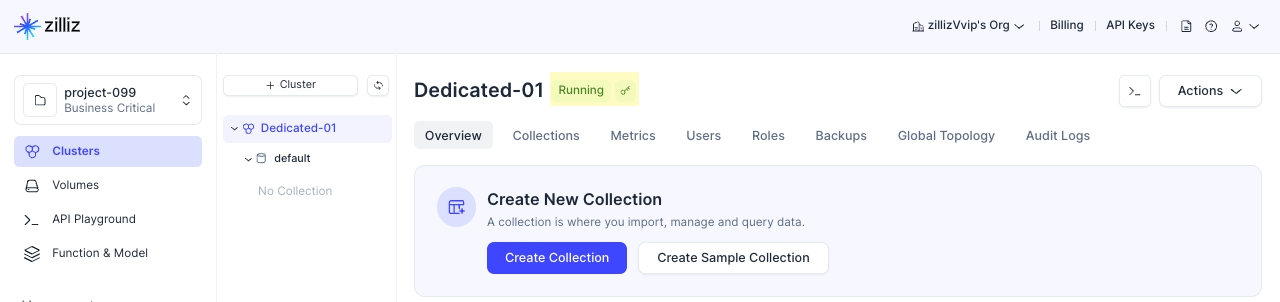
On the Overview page of an encrypted cluster, there is a key icon to the right of the cluster name, as shown in the above figure. All collections created in an encrypted cluster are encrypted by default.
FAQ
Can I specify the Milvus version when creating a cluster?
No. Zilliz Cloud automatically provisions clusters on the latest supported Milvus version and keeps them up to date through managed rolling upgrades. If you need a specific version, contact support and explain your use case.