Set up a Private Link (Azure)
This guide demonstrates the procedure for setting up a private link from a Zilliz Cloud cluster to your service hosted in different Microsoft Azure VPCs.
This feature is available only to Dedicated clusters.
A private link is set up at the project level and is effective for all clusters deployed within the same cloud provider and region under this project.
Zilliz Cloud does not charge you for private links. However, your cloud provider may charge you for each endpoint that you create to access Zilliz Cloud.
Before you start
Make sure the following condition is met:
- Note that the private endpoint created in this guide is accessible globally. Your service in a region different from the target Zilliz Cloud cluster can still connect to the cluster.
Create private endpoint
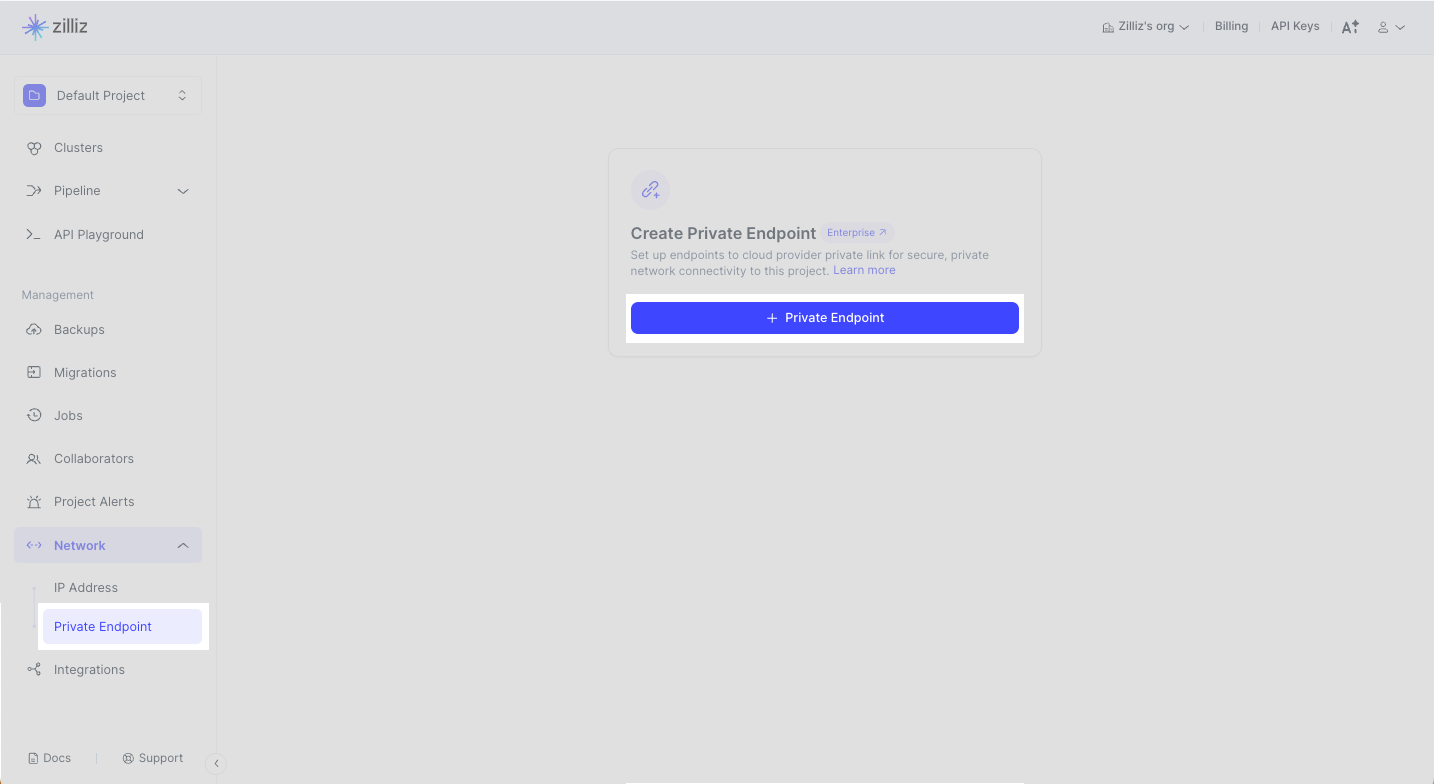
Zilliz Cloud offers you an intuitive web console to add a private endpoint. Navigate to your target project and click Network > Private Endpoint in the left navigation. Click + Private Endpoint.
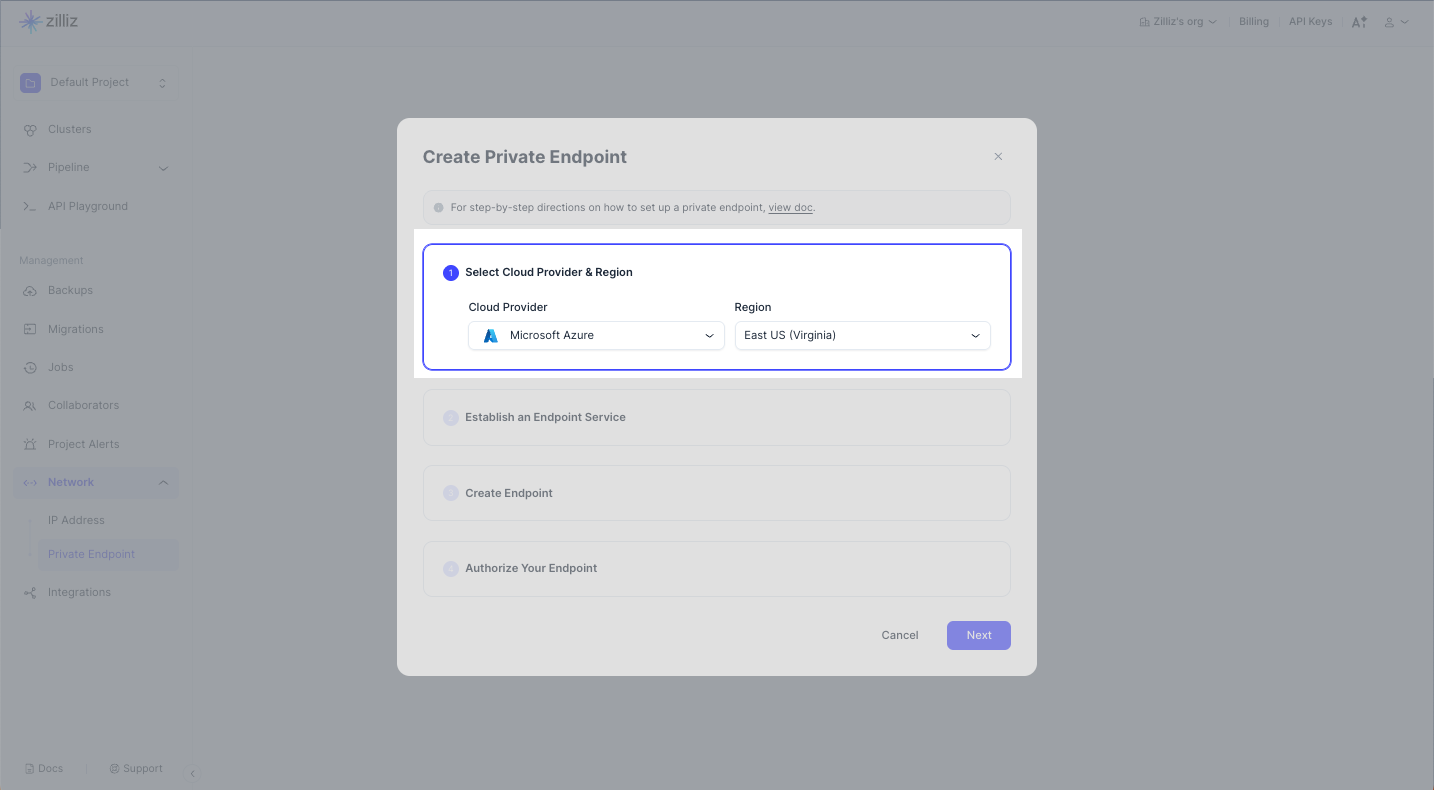
Step 1: Select a cloud provider and region
To create a private endpoint for a cluster deployed in an Azure region, select Azure from the Cloud Provider drop-down list. In Region, select the region that accommodates the cluster you want to access privately. Click Next.
For more information on available cloud providers and regions, see Cloud Providers & Regions.
Step 2: Establish an endpoint service
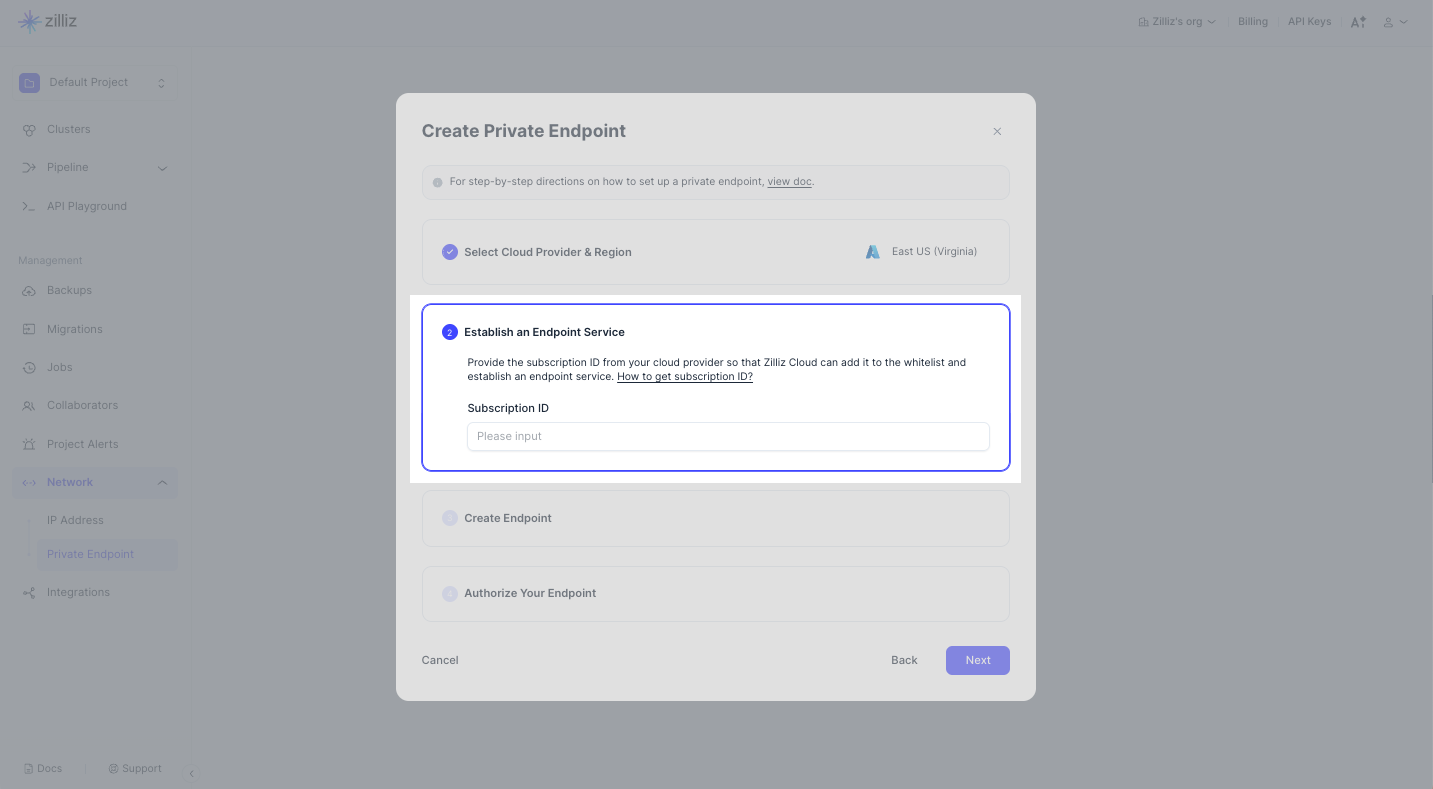
Enter the subscription ID copied from the Microsoft Azure Subscription page. Below is an example.

Step 3: Create an endpoint
You need to complete this step on your cloud provider console.
Go to Private Link Center, and click + Create.
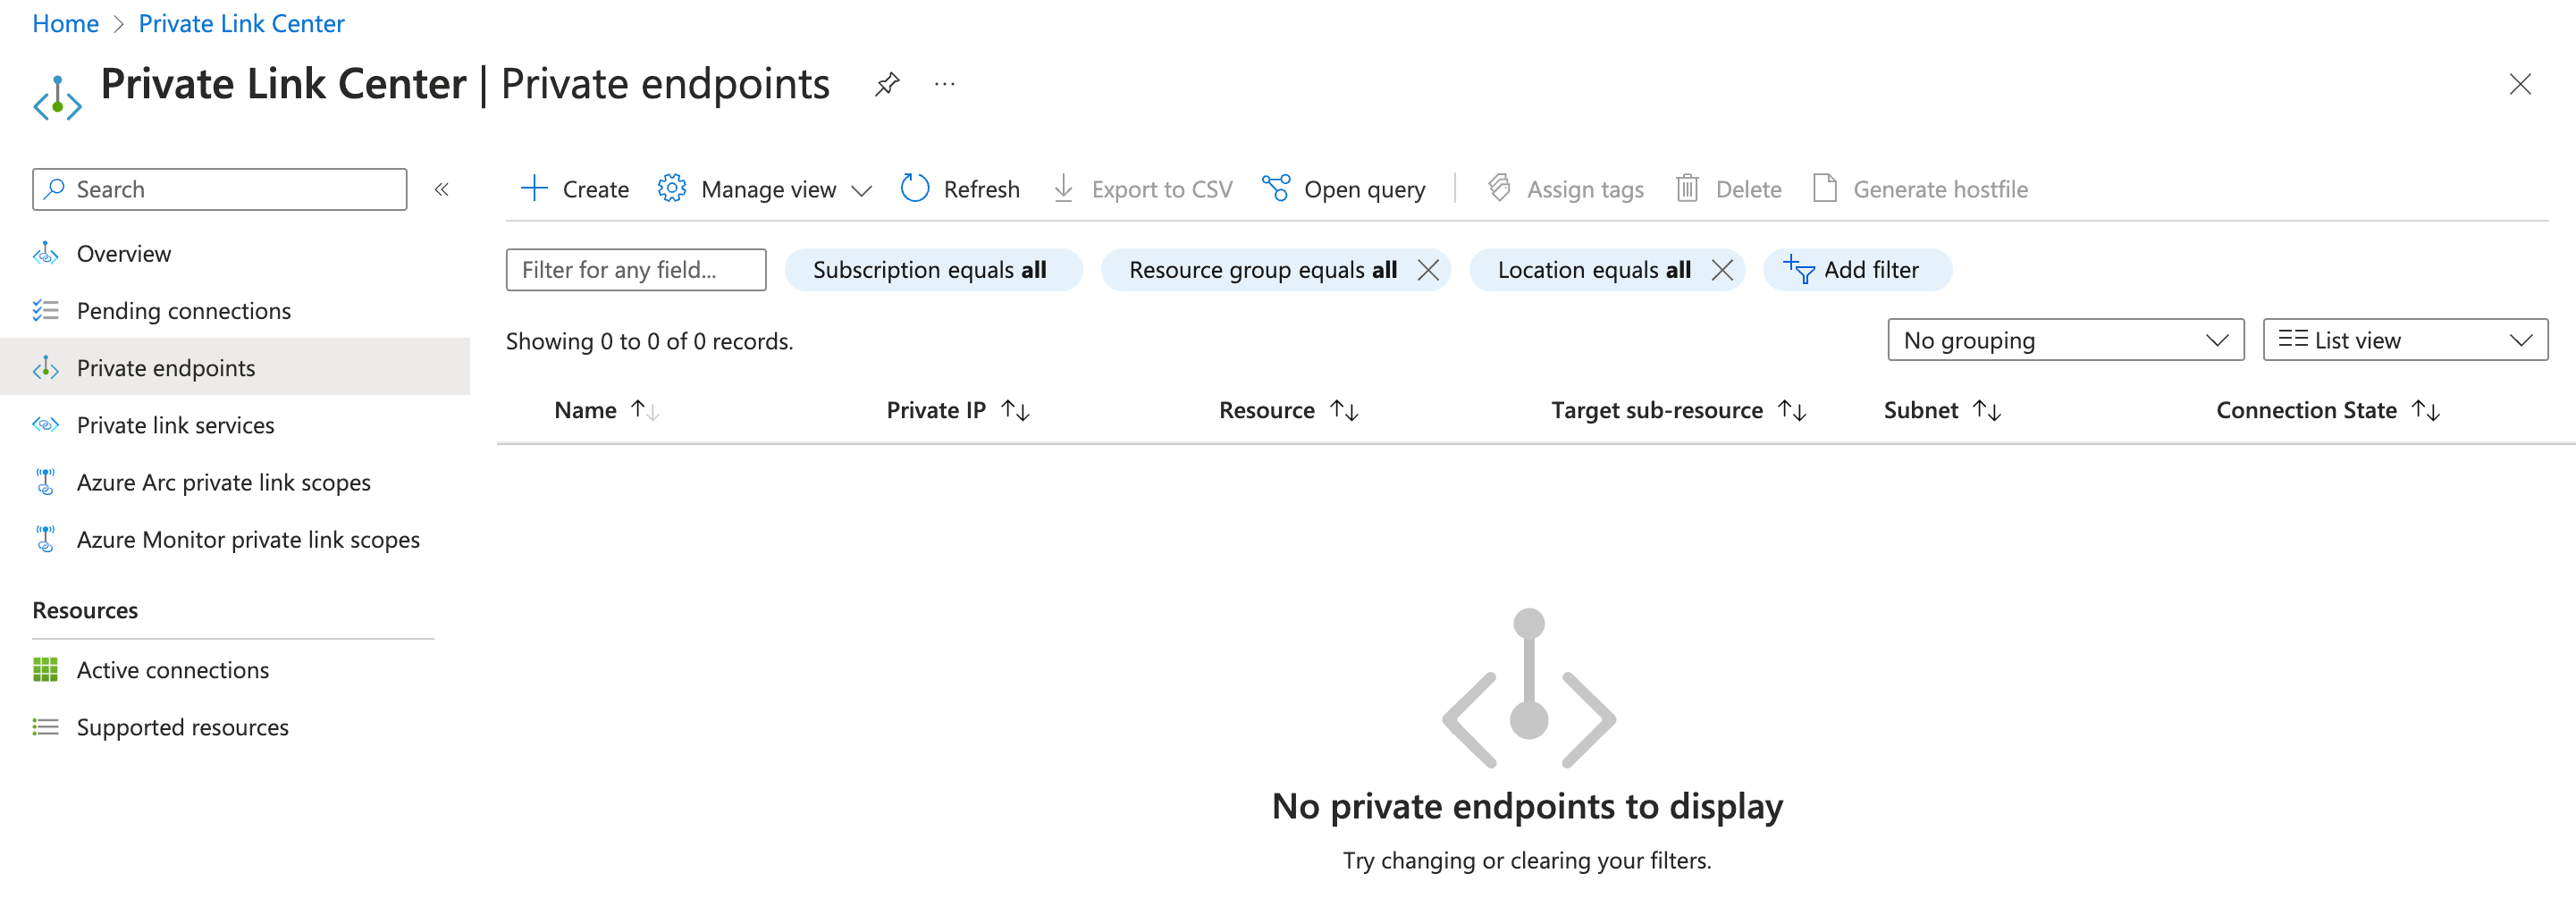
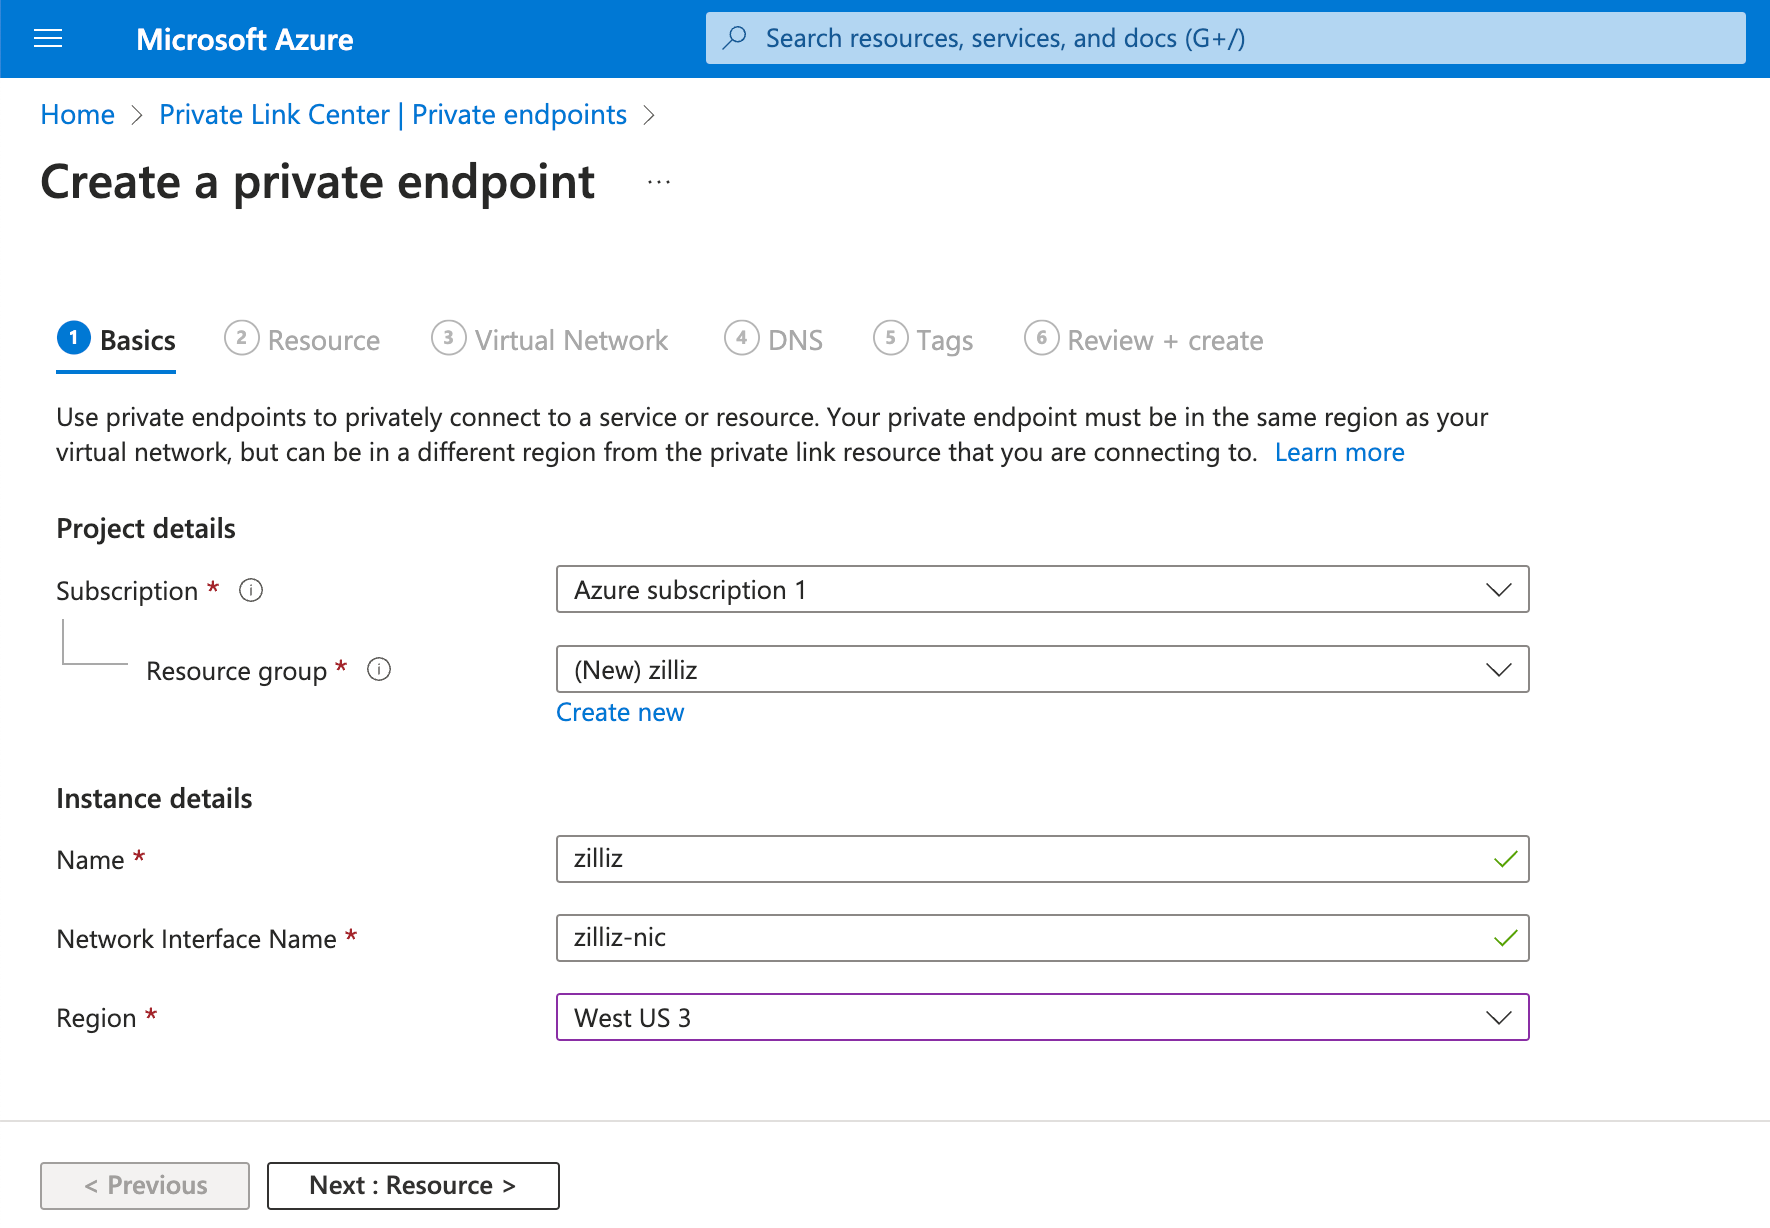
Fill in the basic information for the private endpoint to create.
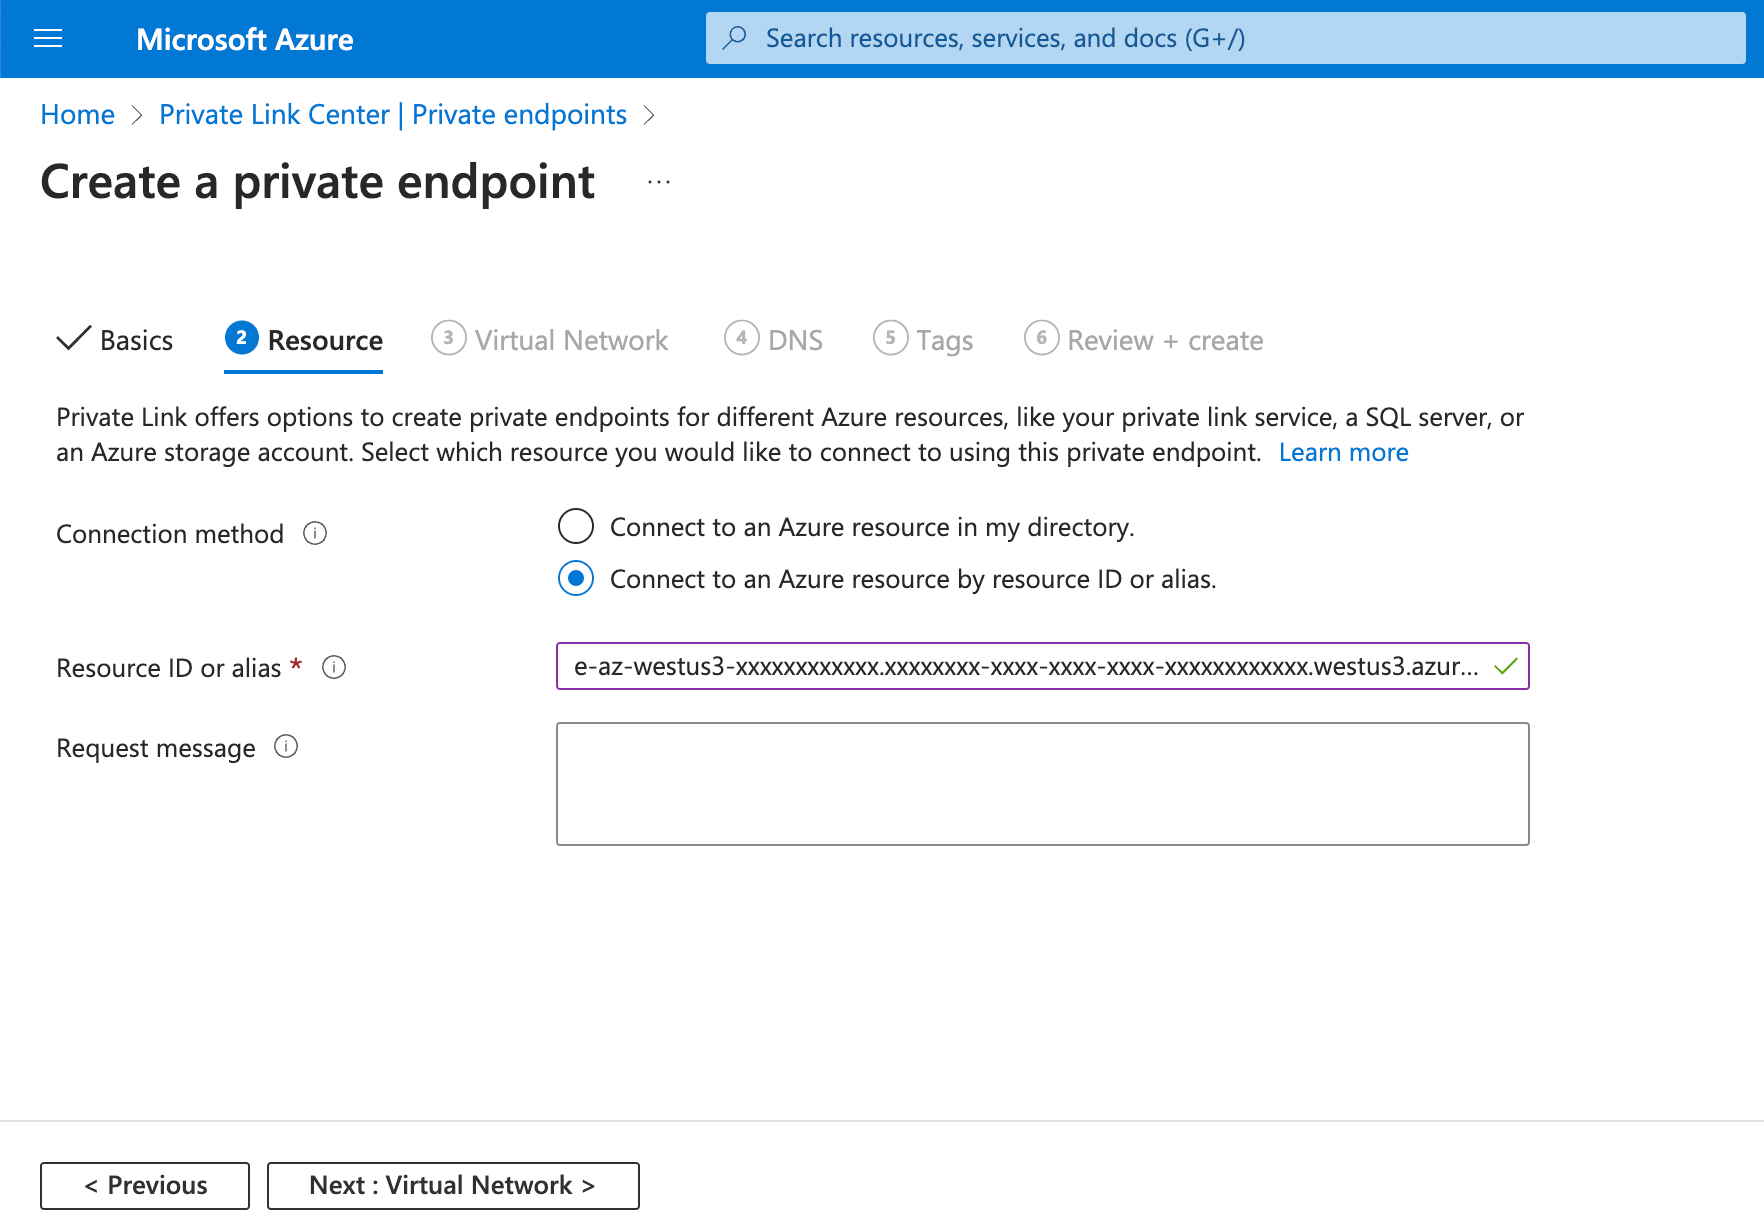
Click Next: Resource > and choose Connect to an Azure resource by resource ID or alias. Then paste the one copied from the Zilliz Cloud console into Resource ID or alias.
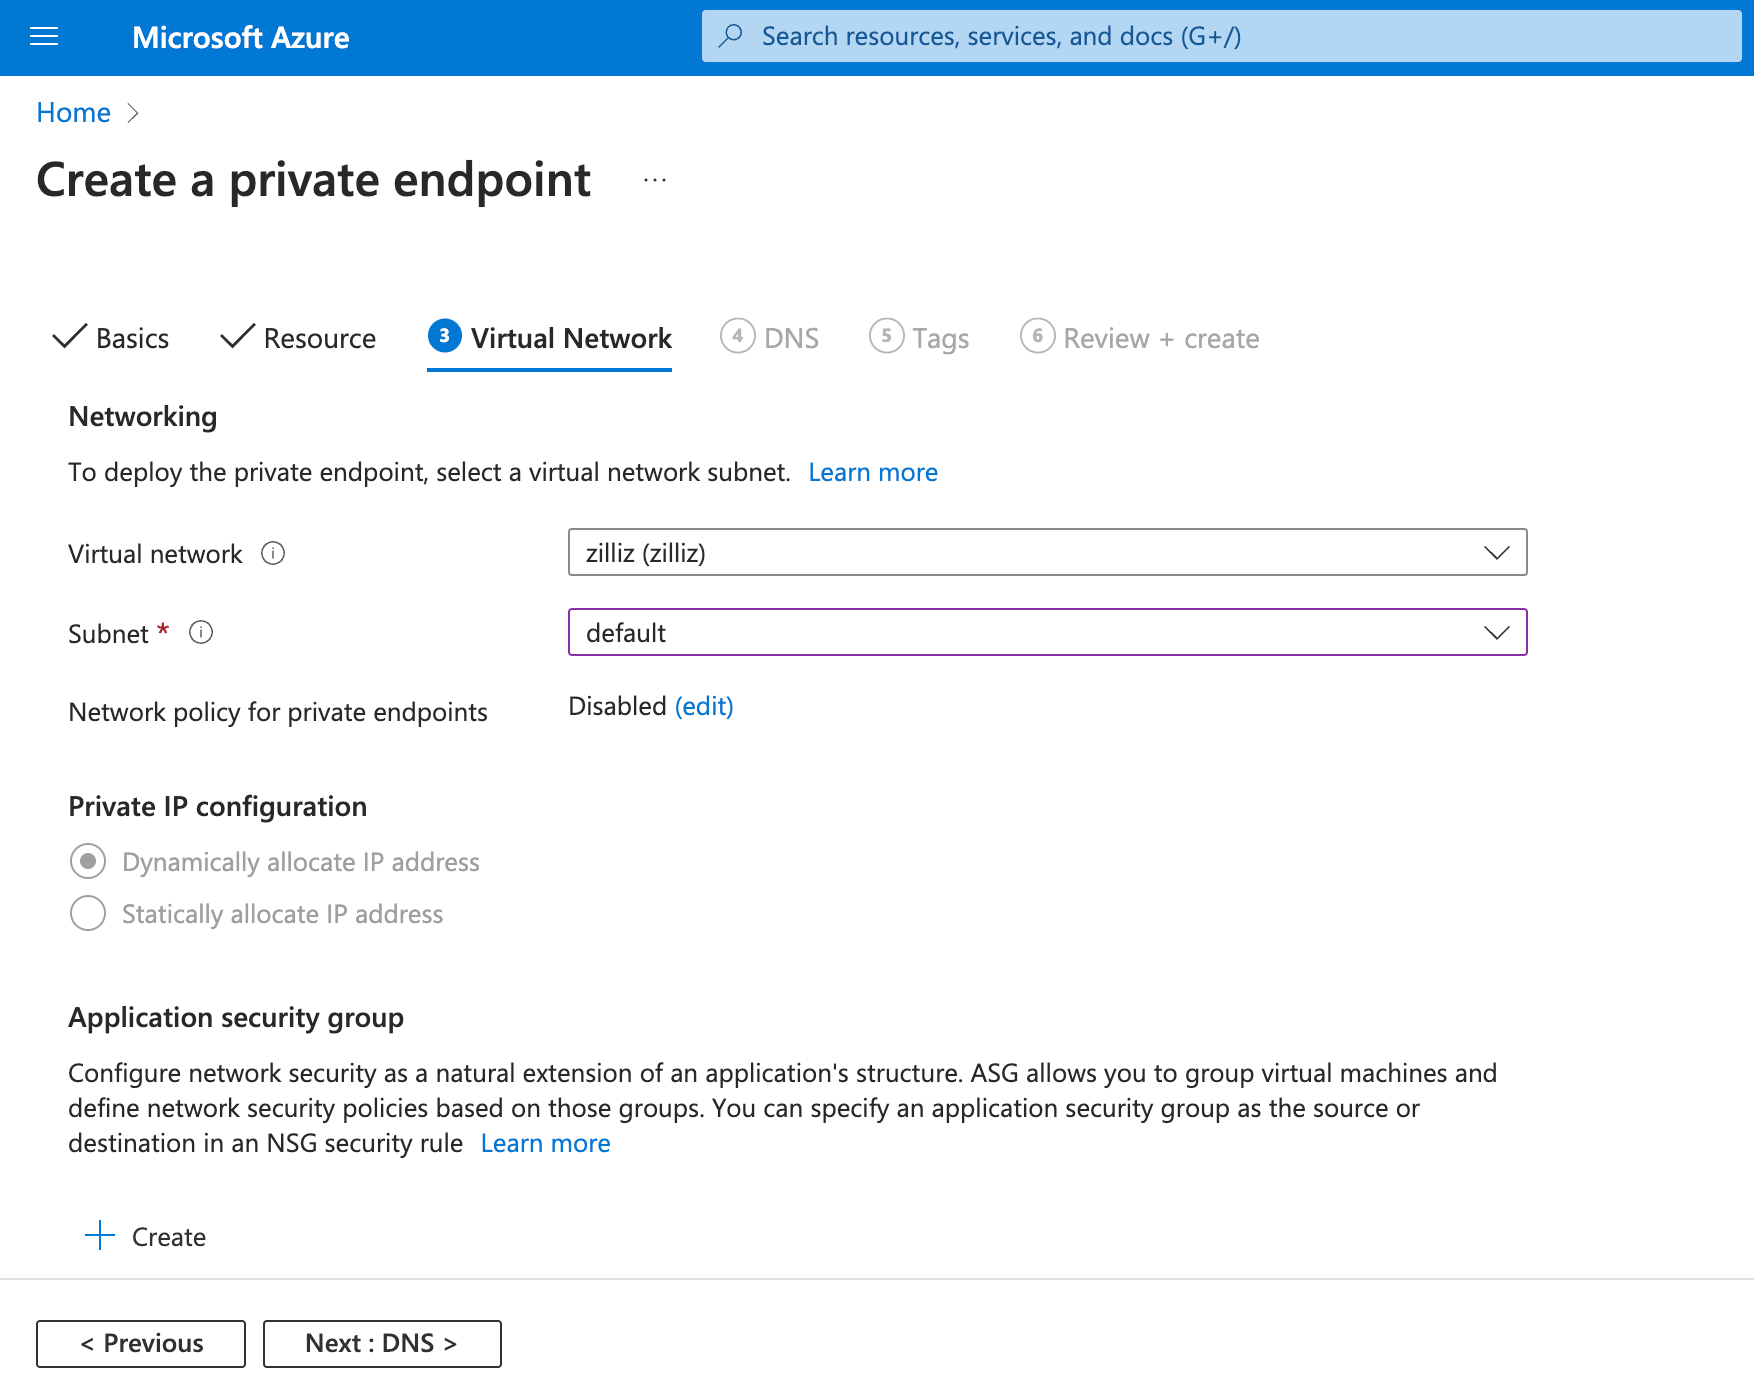
Select proper values in Virtual network and Subnet, and keep the default for other settings on this tab.
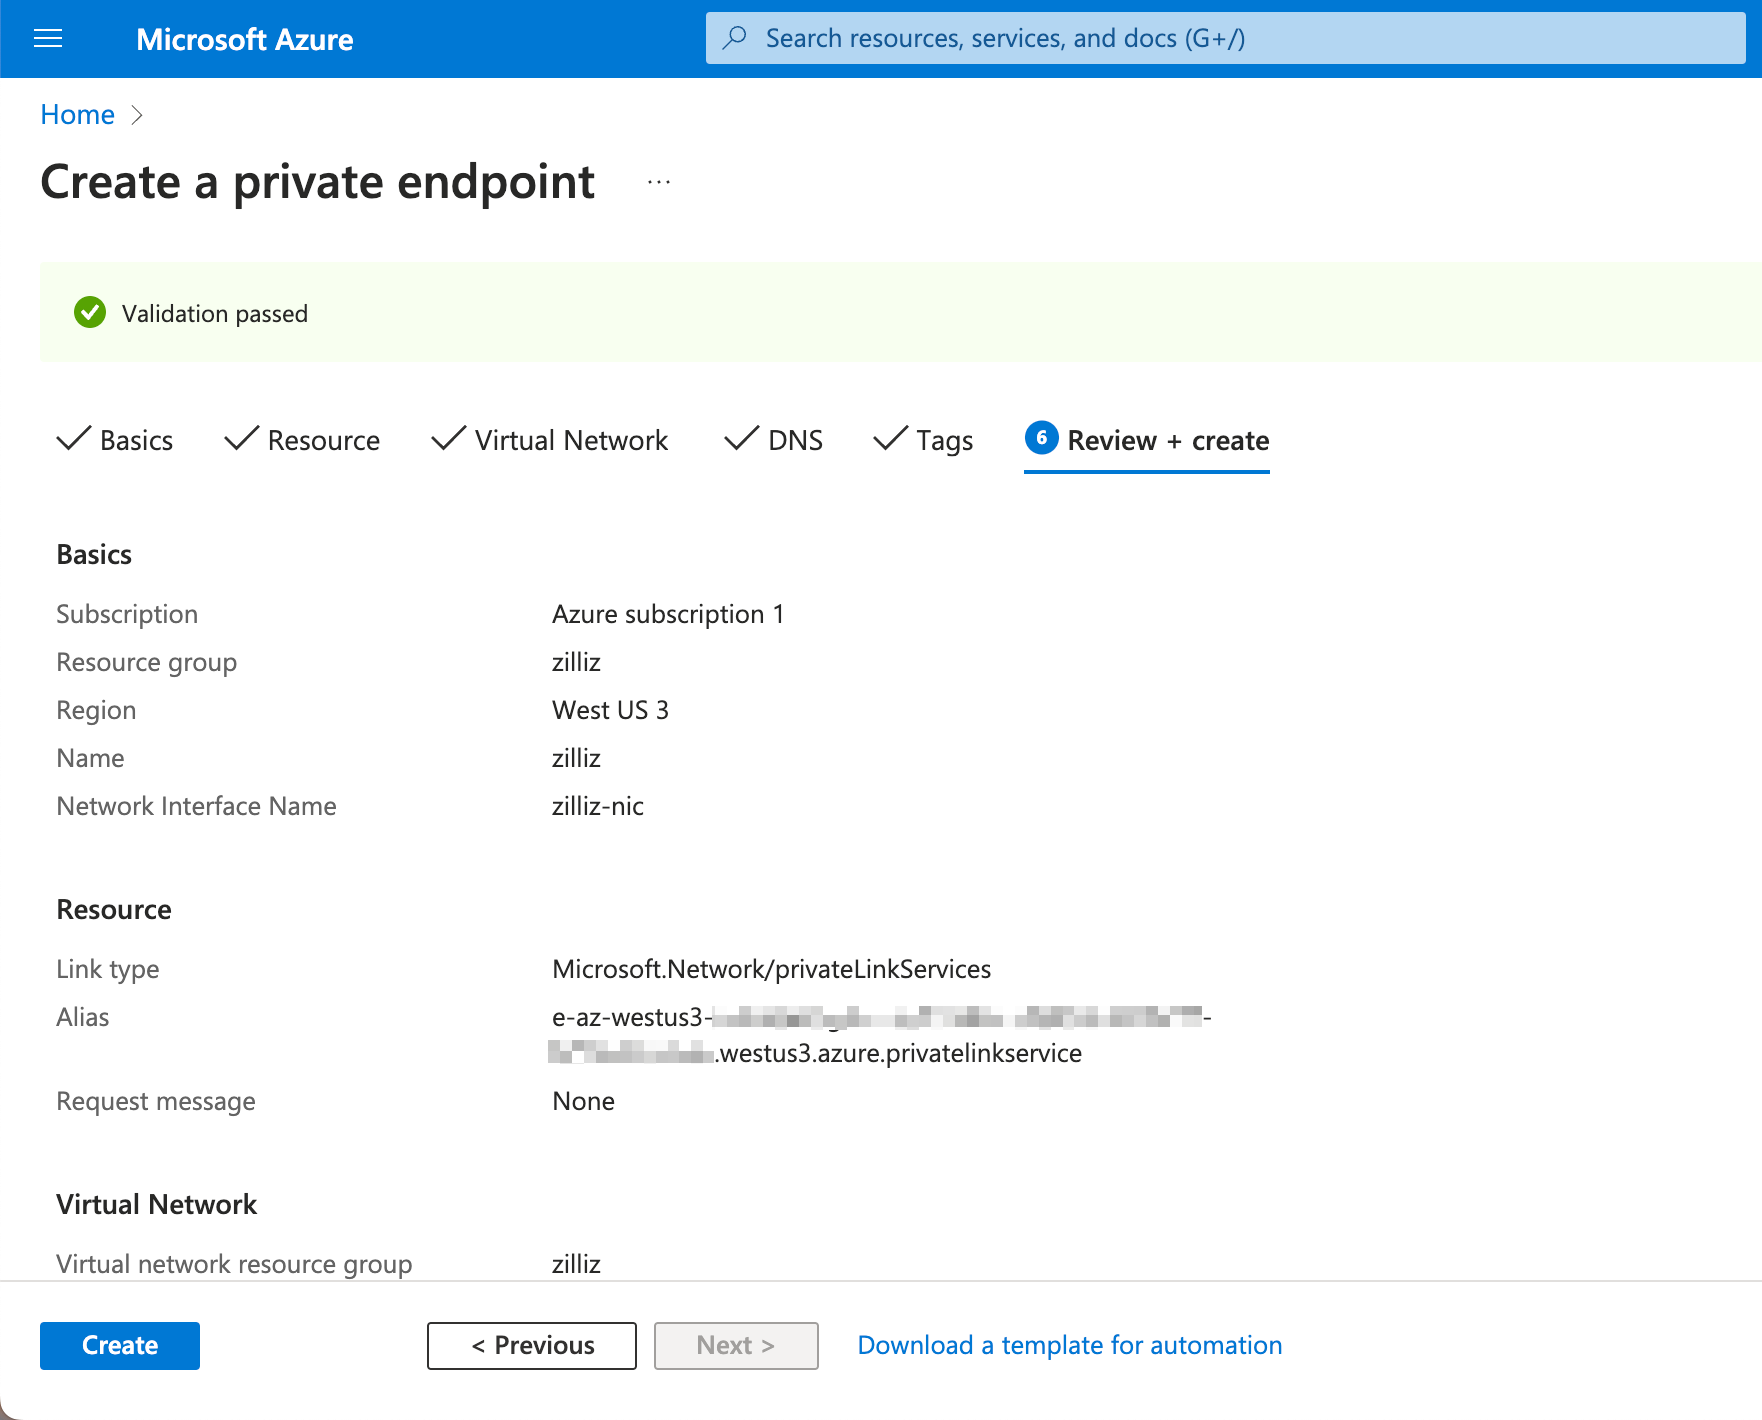
Click Next until you reach the Review + create tab. If the validation passes, click Create to create the private endpoint.
Once the deployment succeeds, you will see the following.
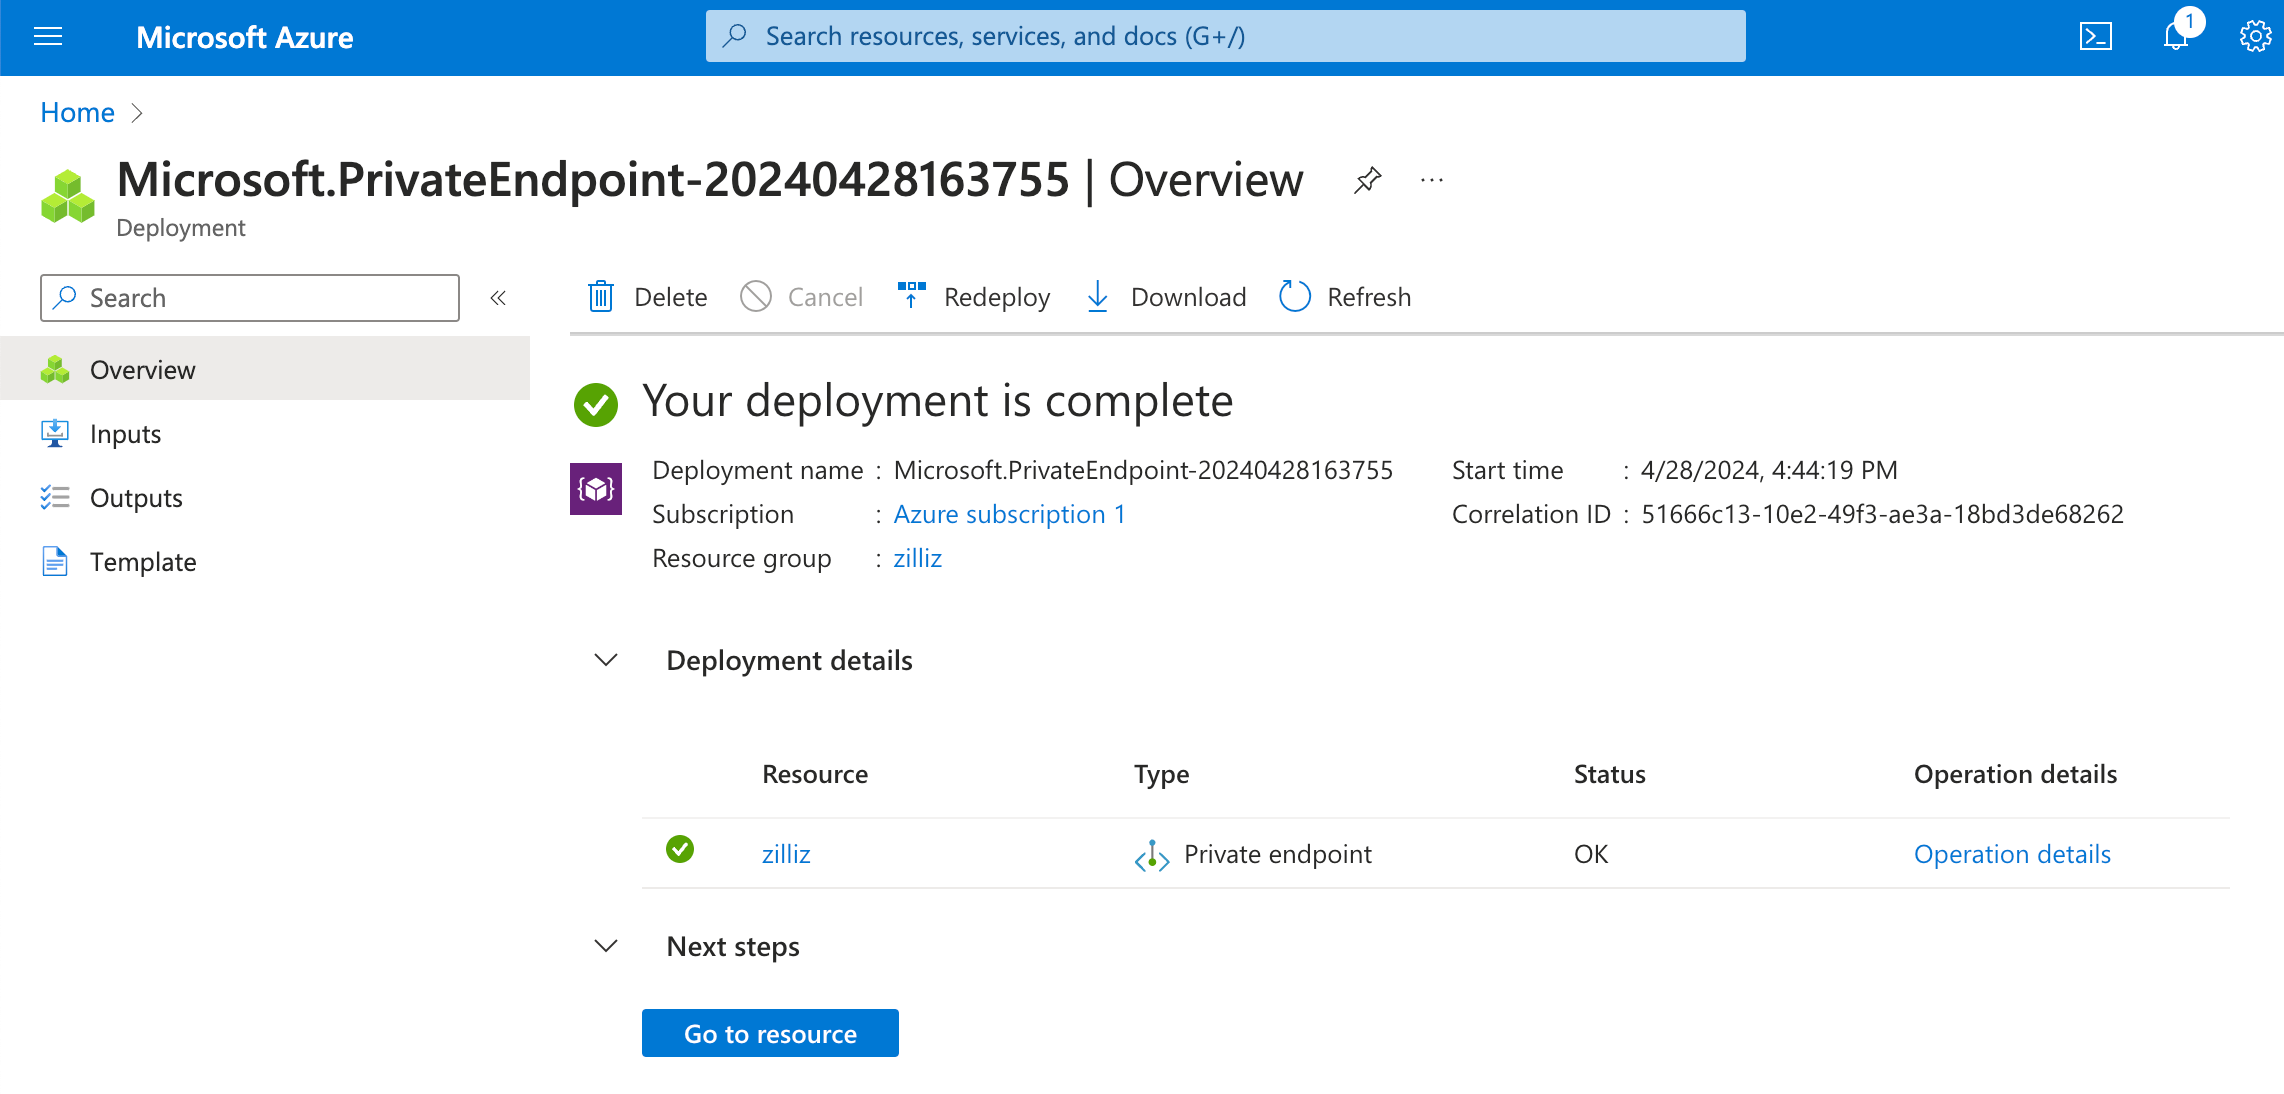
Click Go to resource and see the overview page of the created Private Endpoint.
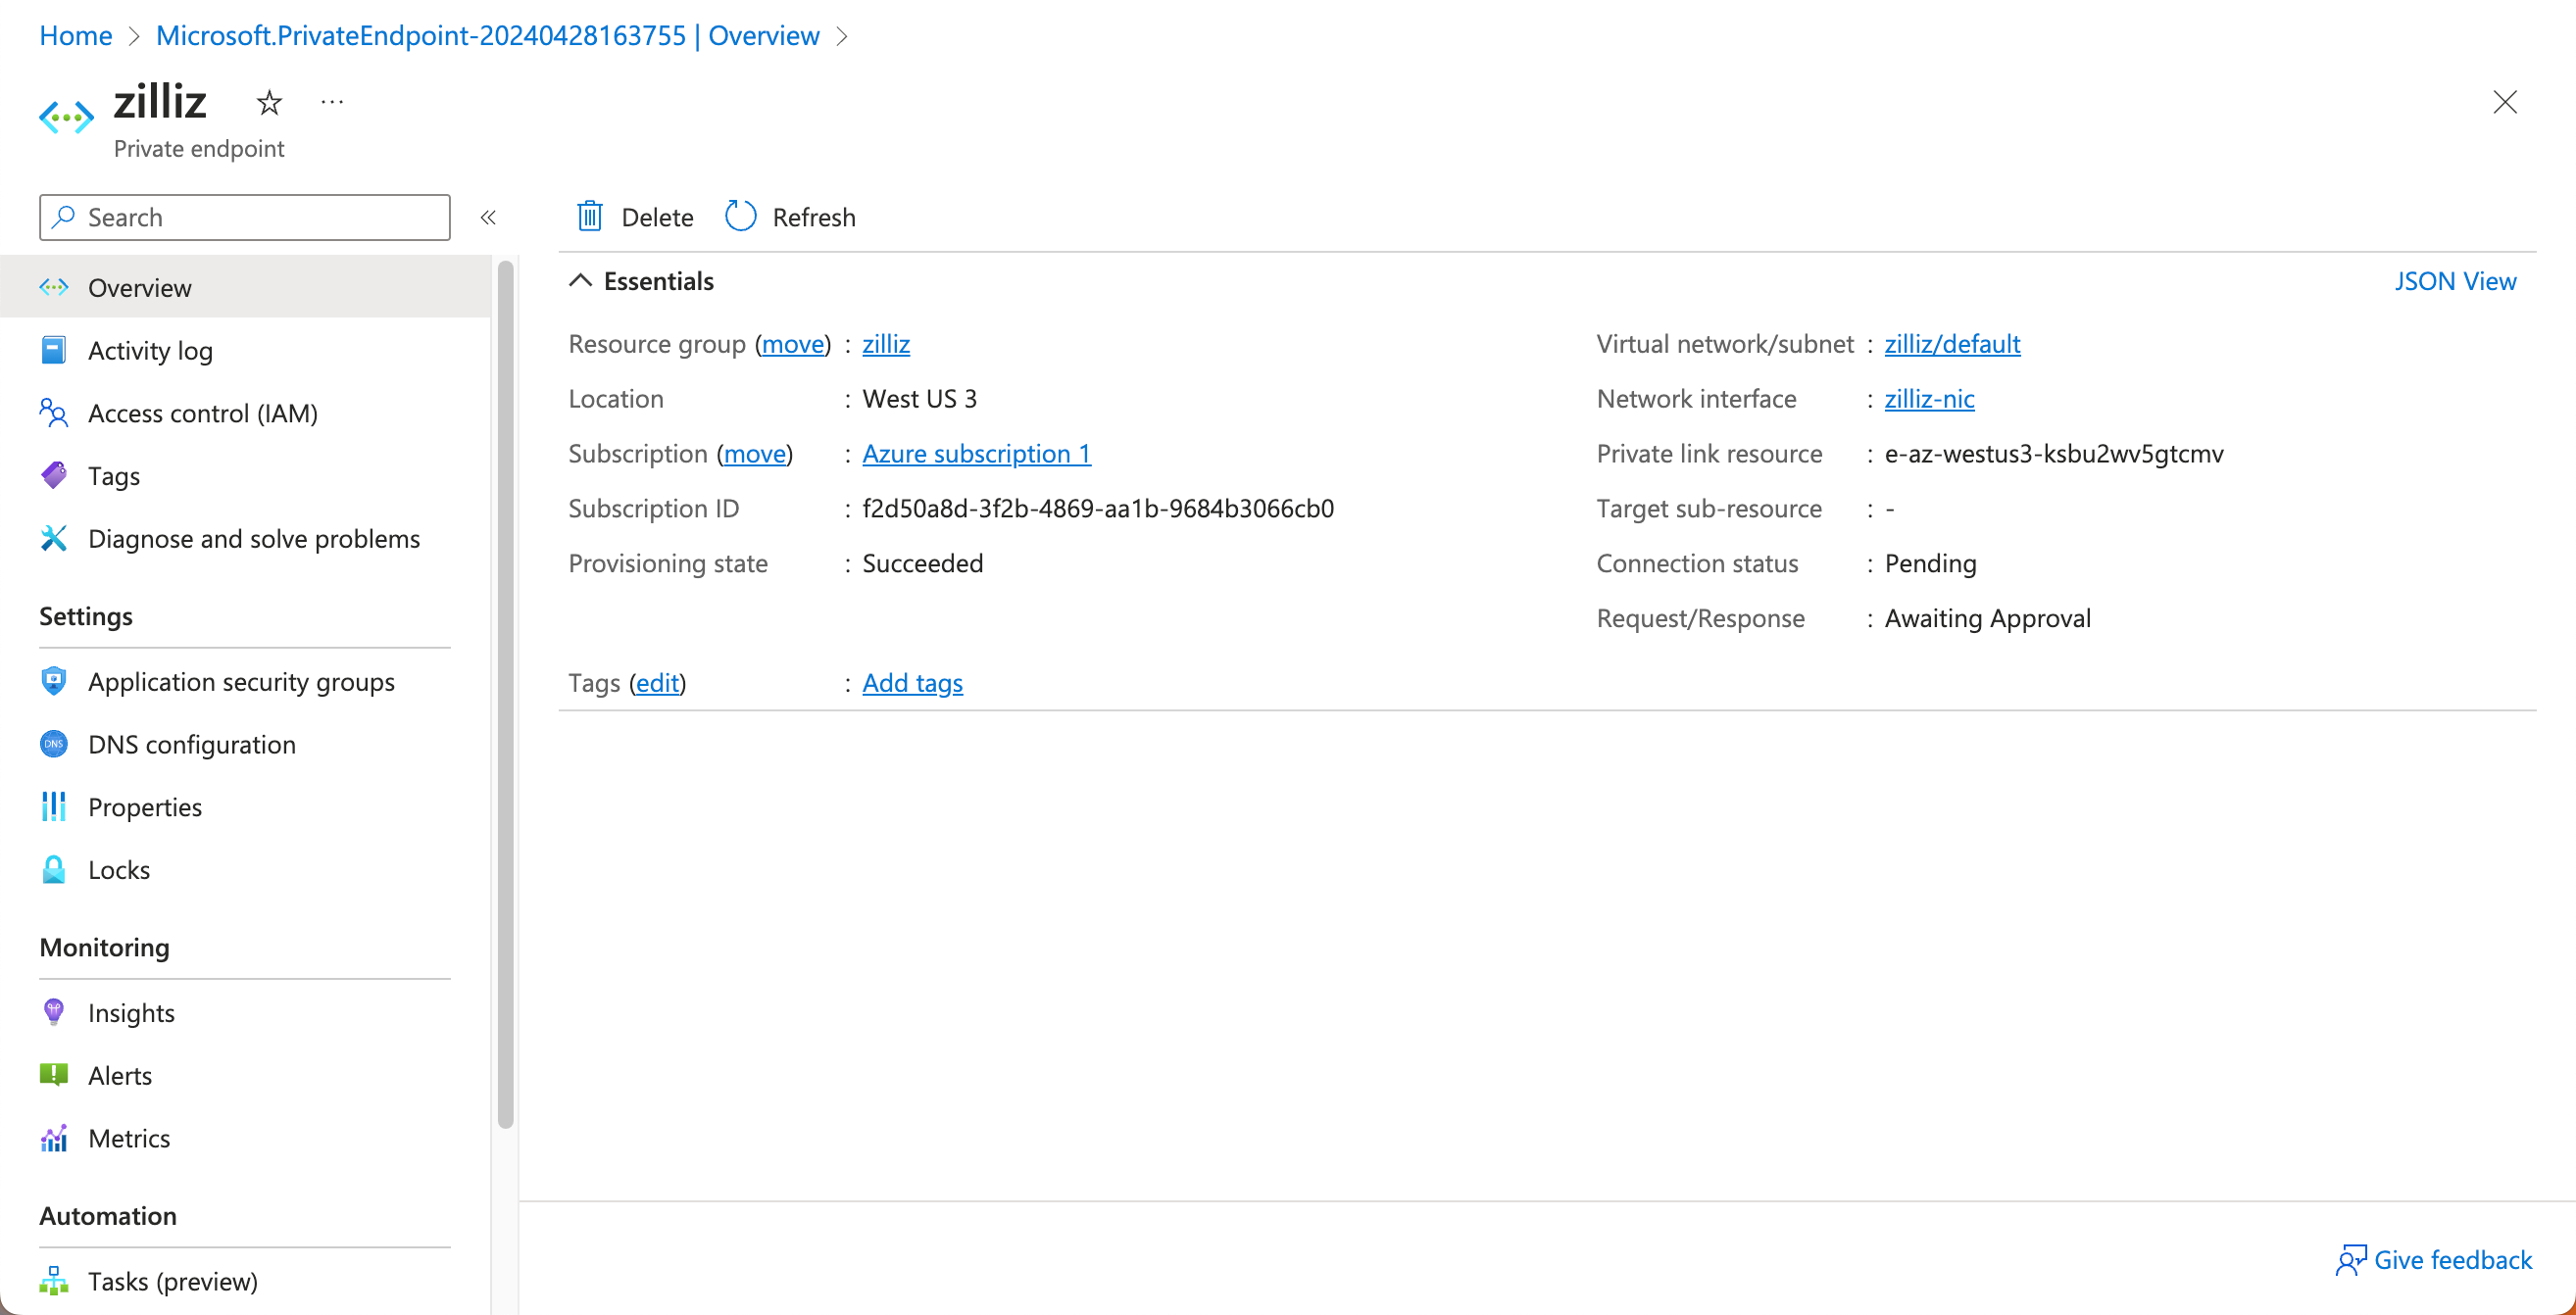
Click JSON View in the upper right corner on the Overview page. Note that the Connection Status is displayed as Pending.
In the Resource JSON panel, copy the values of name and properties.resourceGuid. Your endpoint ID should be these two values joined by a period (.).
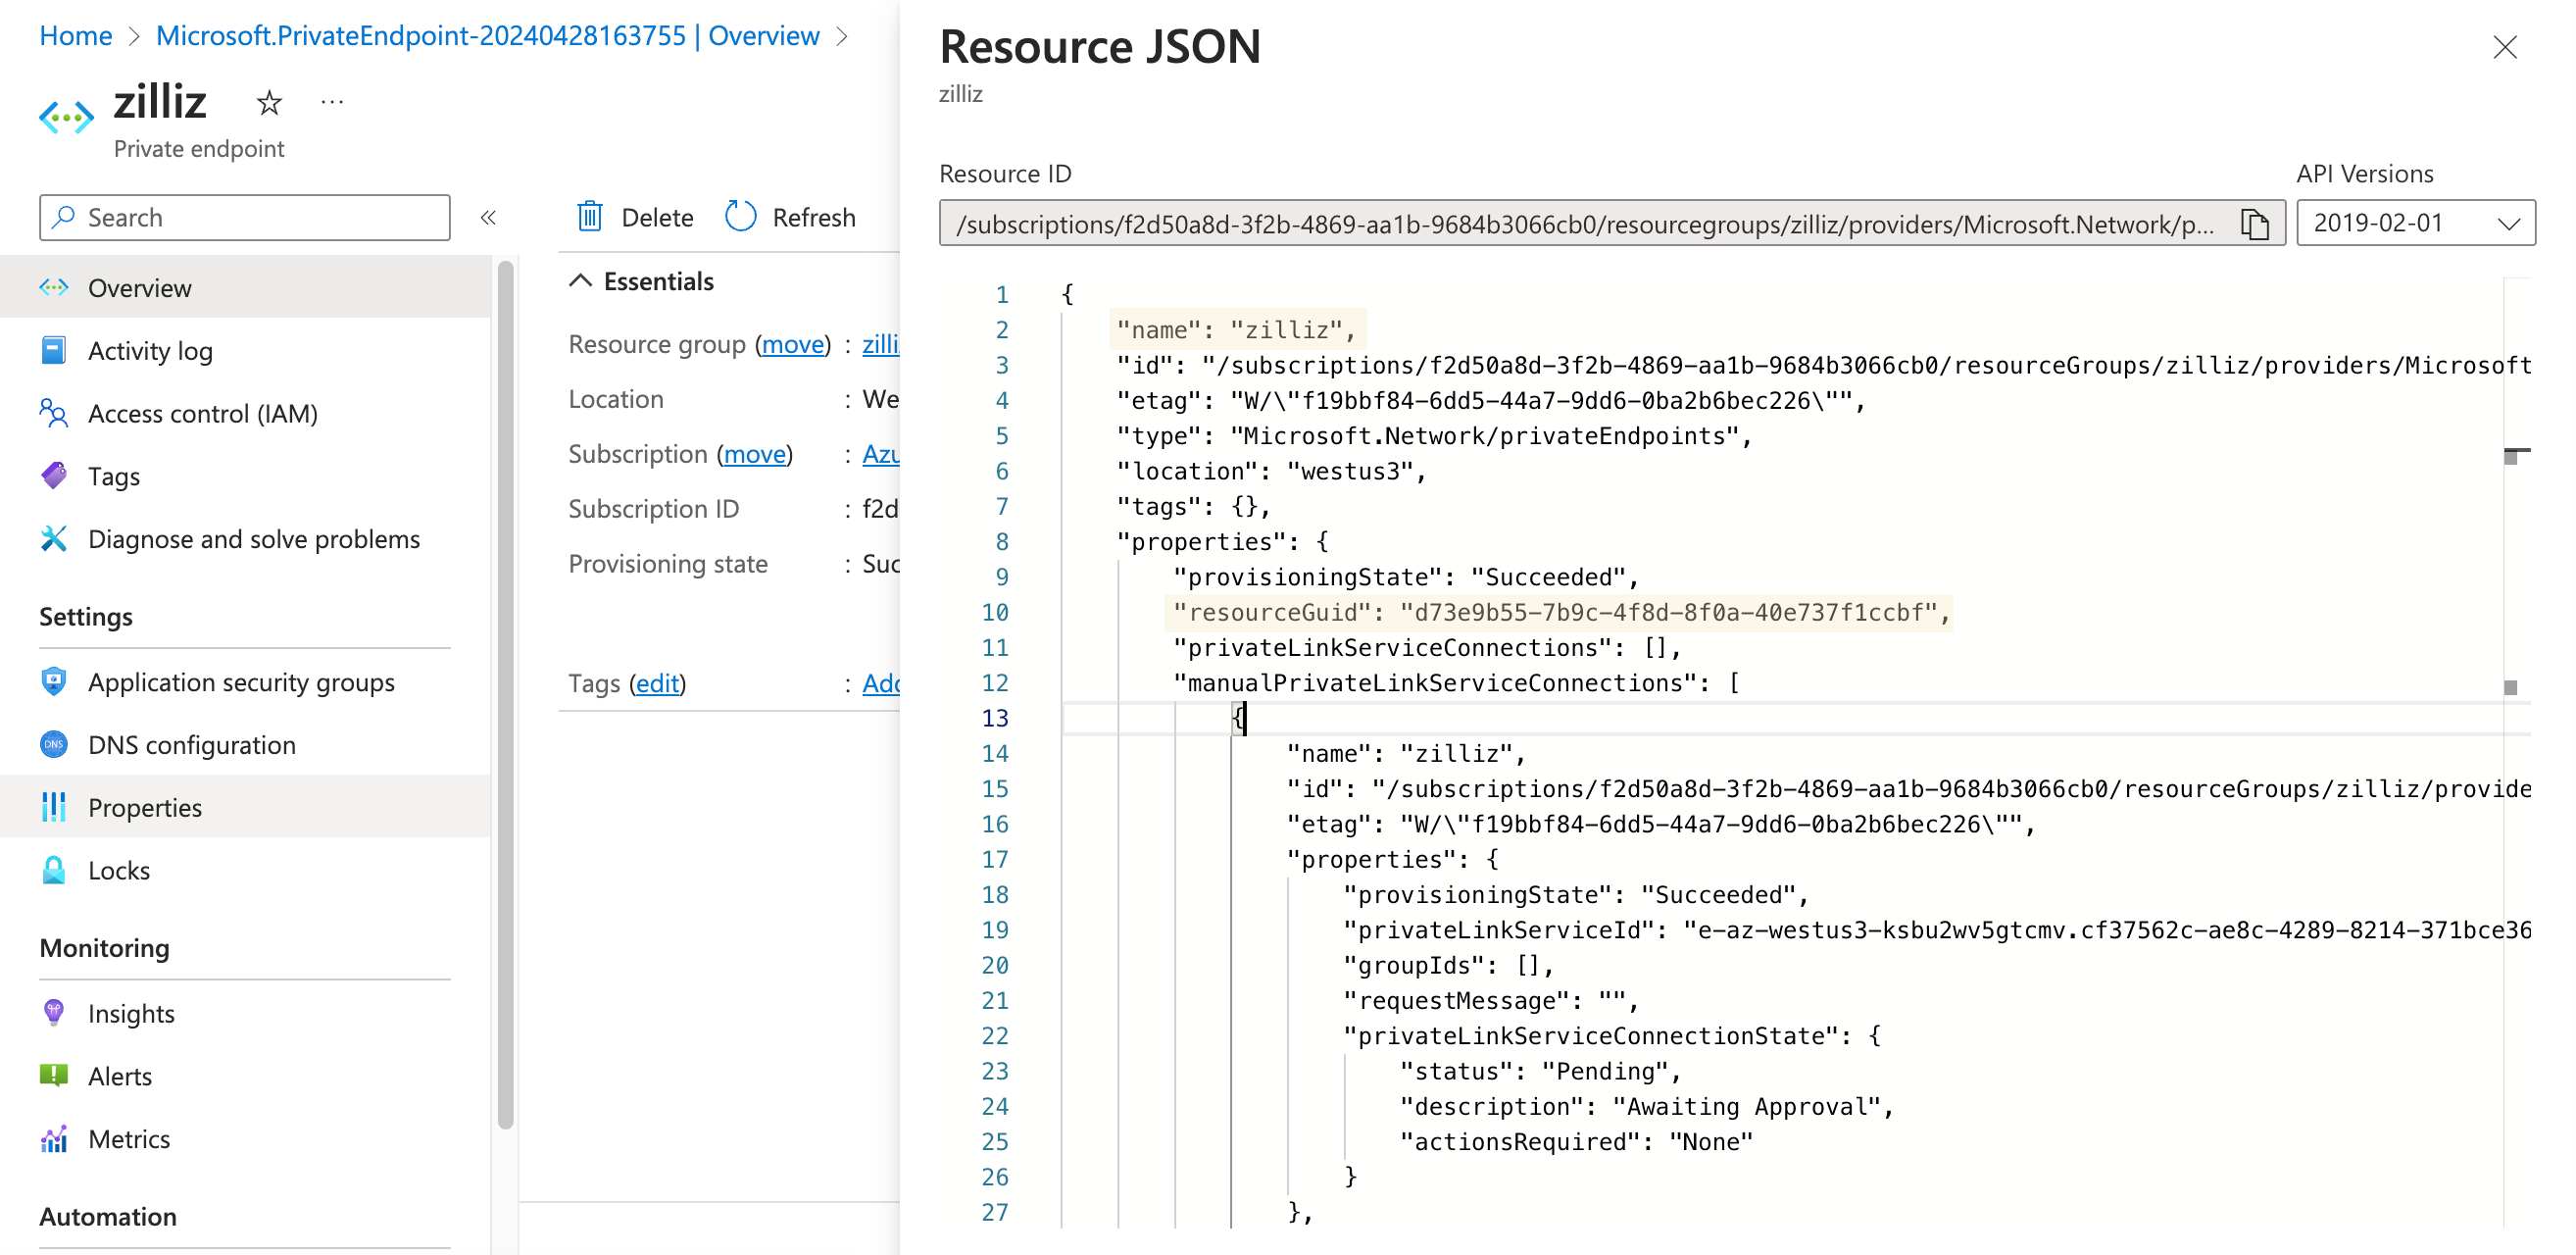
For example, the value of the key name is zilliz, and the value of the key properties.resourceGuid is d73e9b55-7b9c-4f8d-8f0a-40e737f1ccbf. Your Private Endpoint ID should be zilliz.d73e9b55-7b9c-4f8d-8f0a-40e737f1ccbf.
Step 4: Authorize your endpoint
Paste the endpoint ID you obtained from the Azure console into the Endpoint ID box on Zilliz Cloud. Click Create.
Obtain a private link
After verifying and accepting the preceding attributes you have submitted, Zilliz Cloud allocates a private link for this endpoint. This process takes about 5 minutes.
When the private link is ready, you can view it on the Private Link page on Zilliz Cloud.
Set up DNS
Before you can access your cluster via the private link allocated by Zilliz Cloud, it is necessary to set up DNS.
Step 1: Create a Private DNS Zone on the Azure portal
On the Overview page of the created Private Endpoint, choose Settings > DNS configuration, and copy the IP address of the network interface created along with the Private Endpoint.
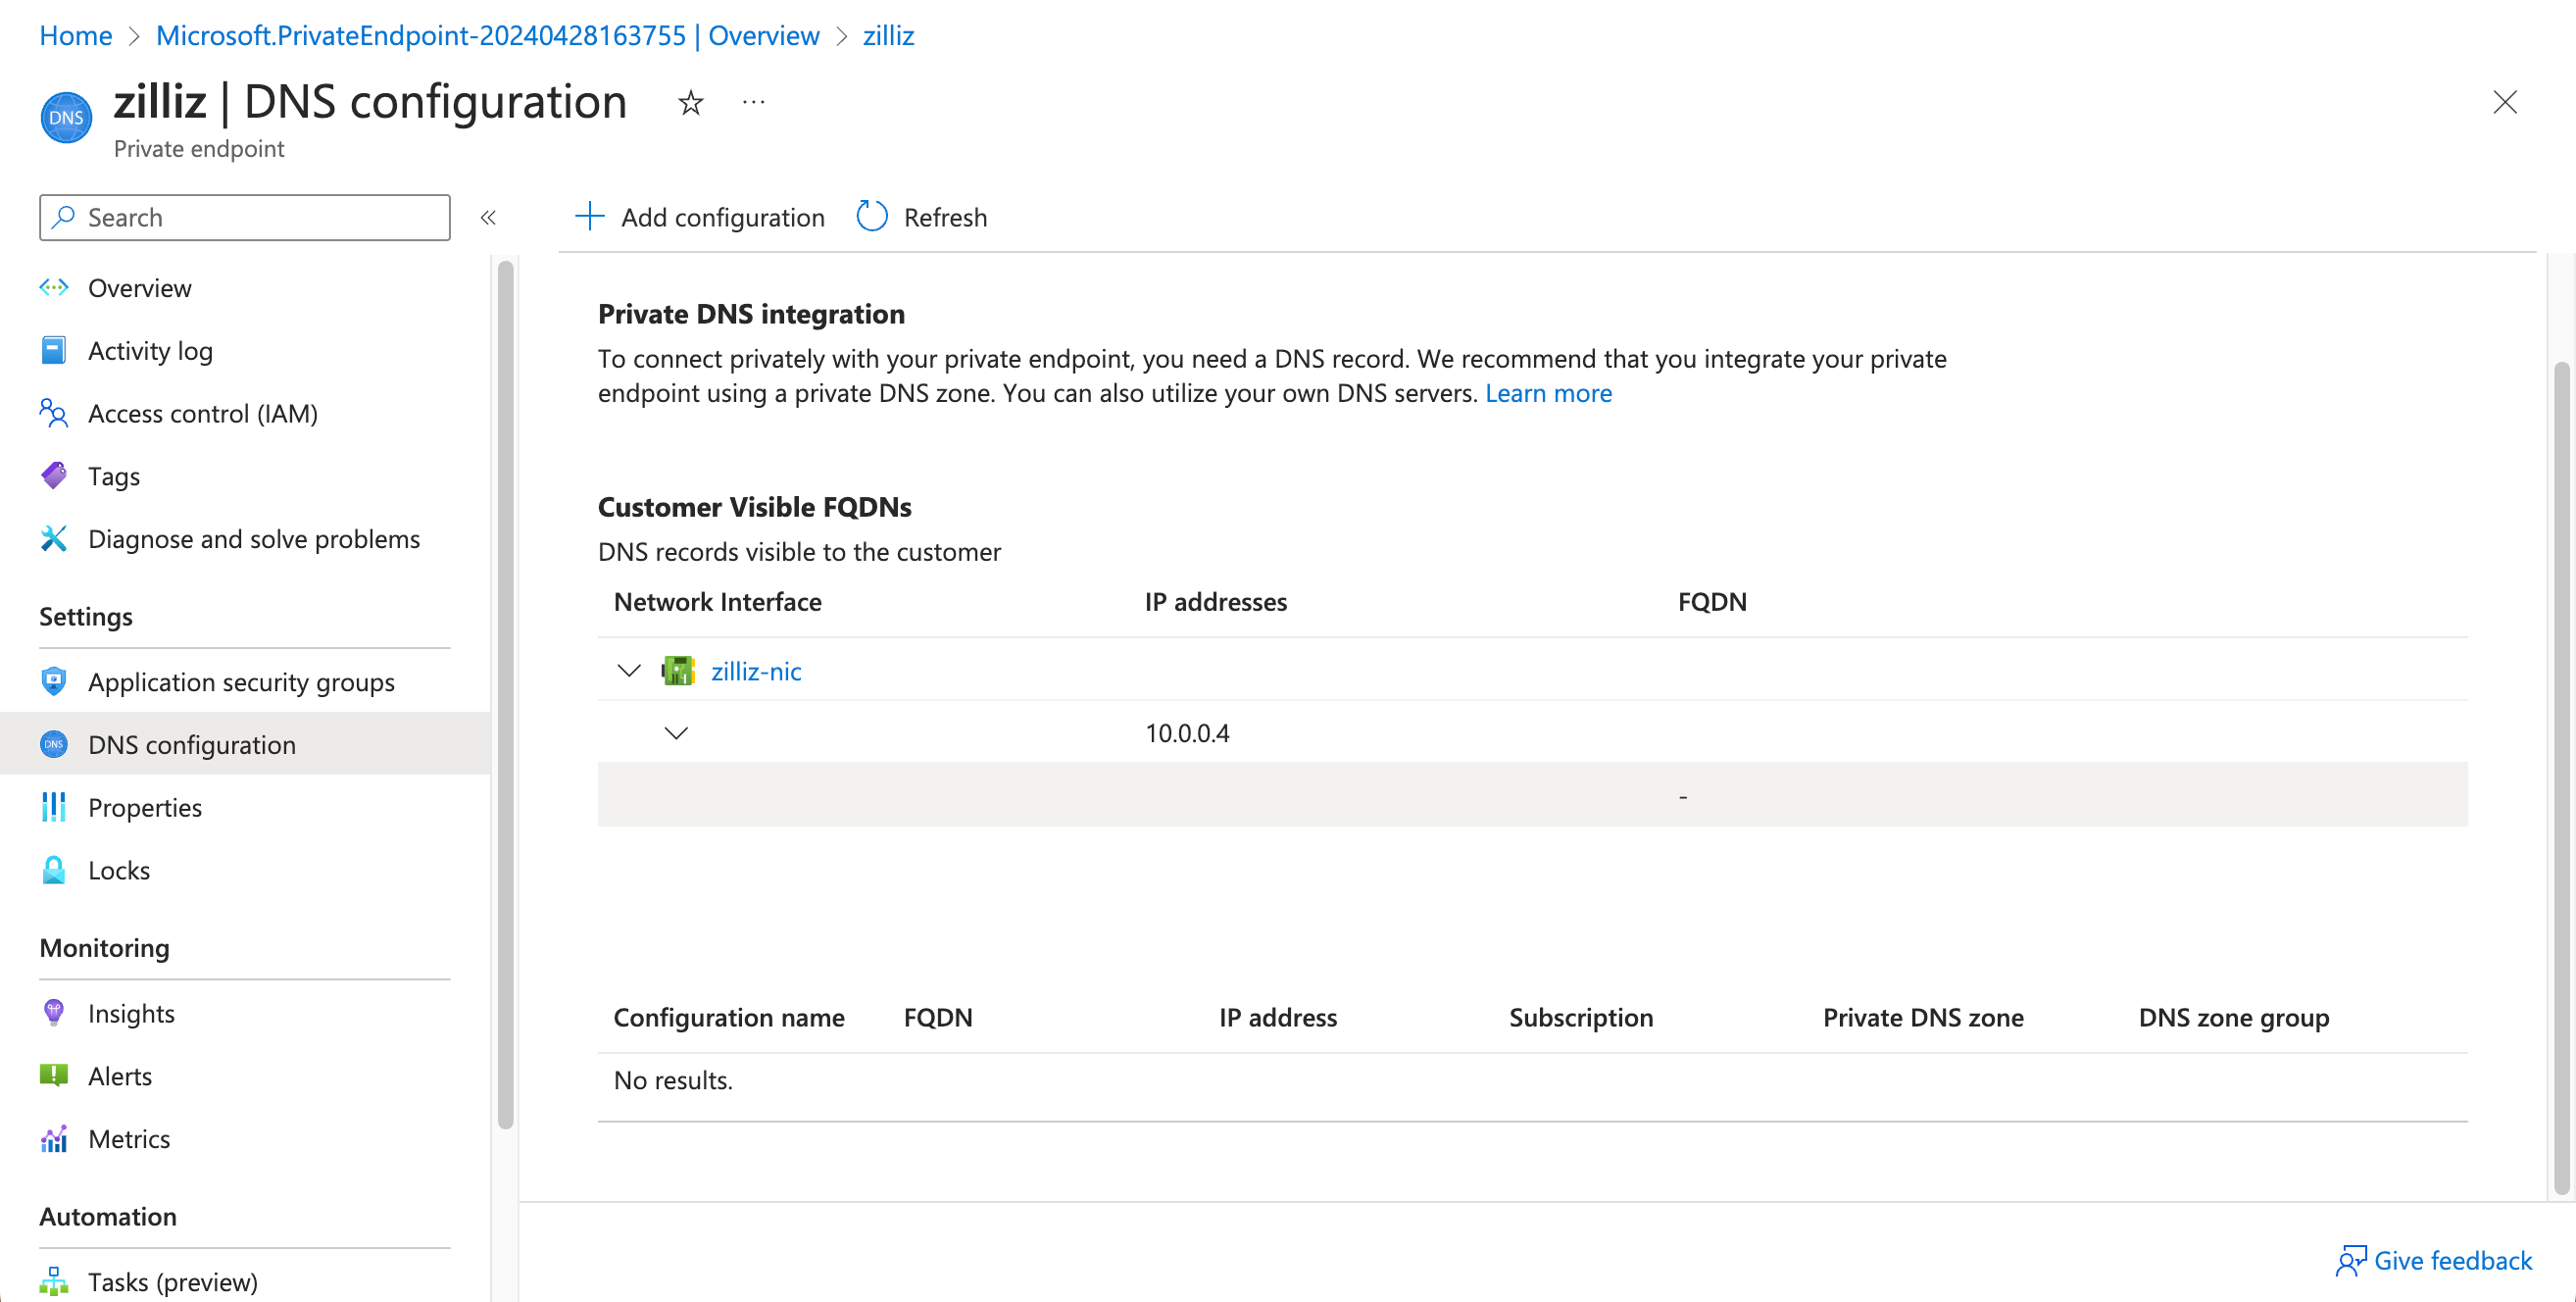
The example value in the screen shot above is 10.0.0.4.
Go to Create a Private DNS zone, and click + Create to start the process.
In the Basics tab, select the subscription and resource group used above, and paste the Private Link URI copied from the Zilliz Cloud console in Instance details > Name. Then click Review create.
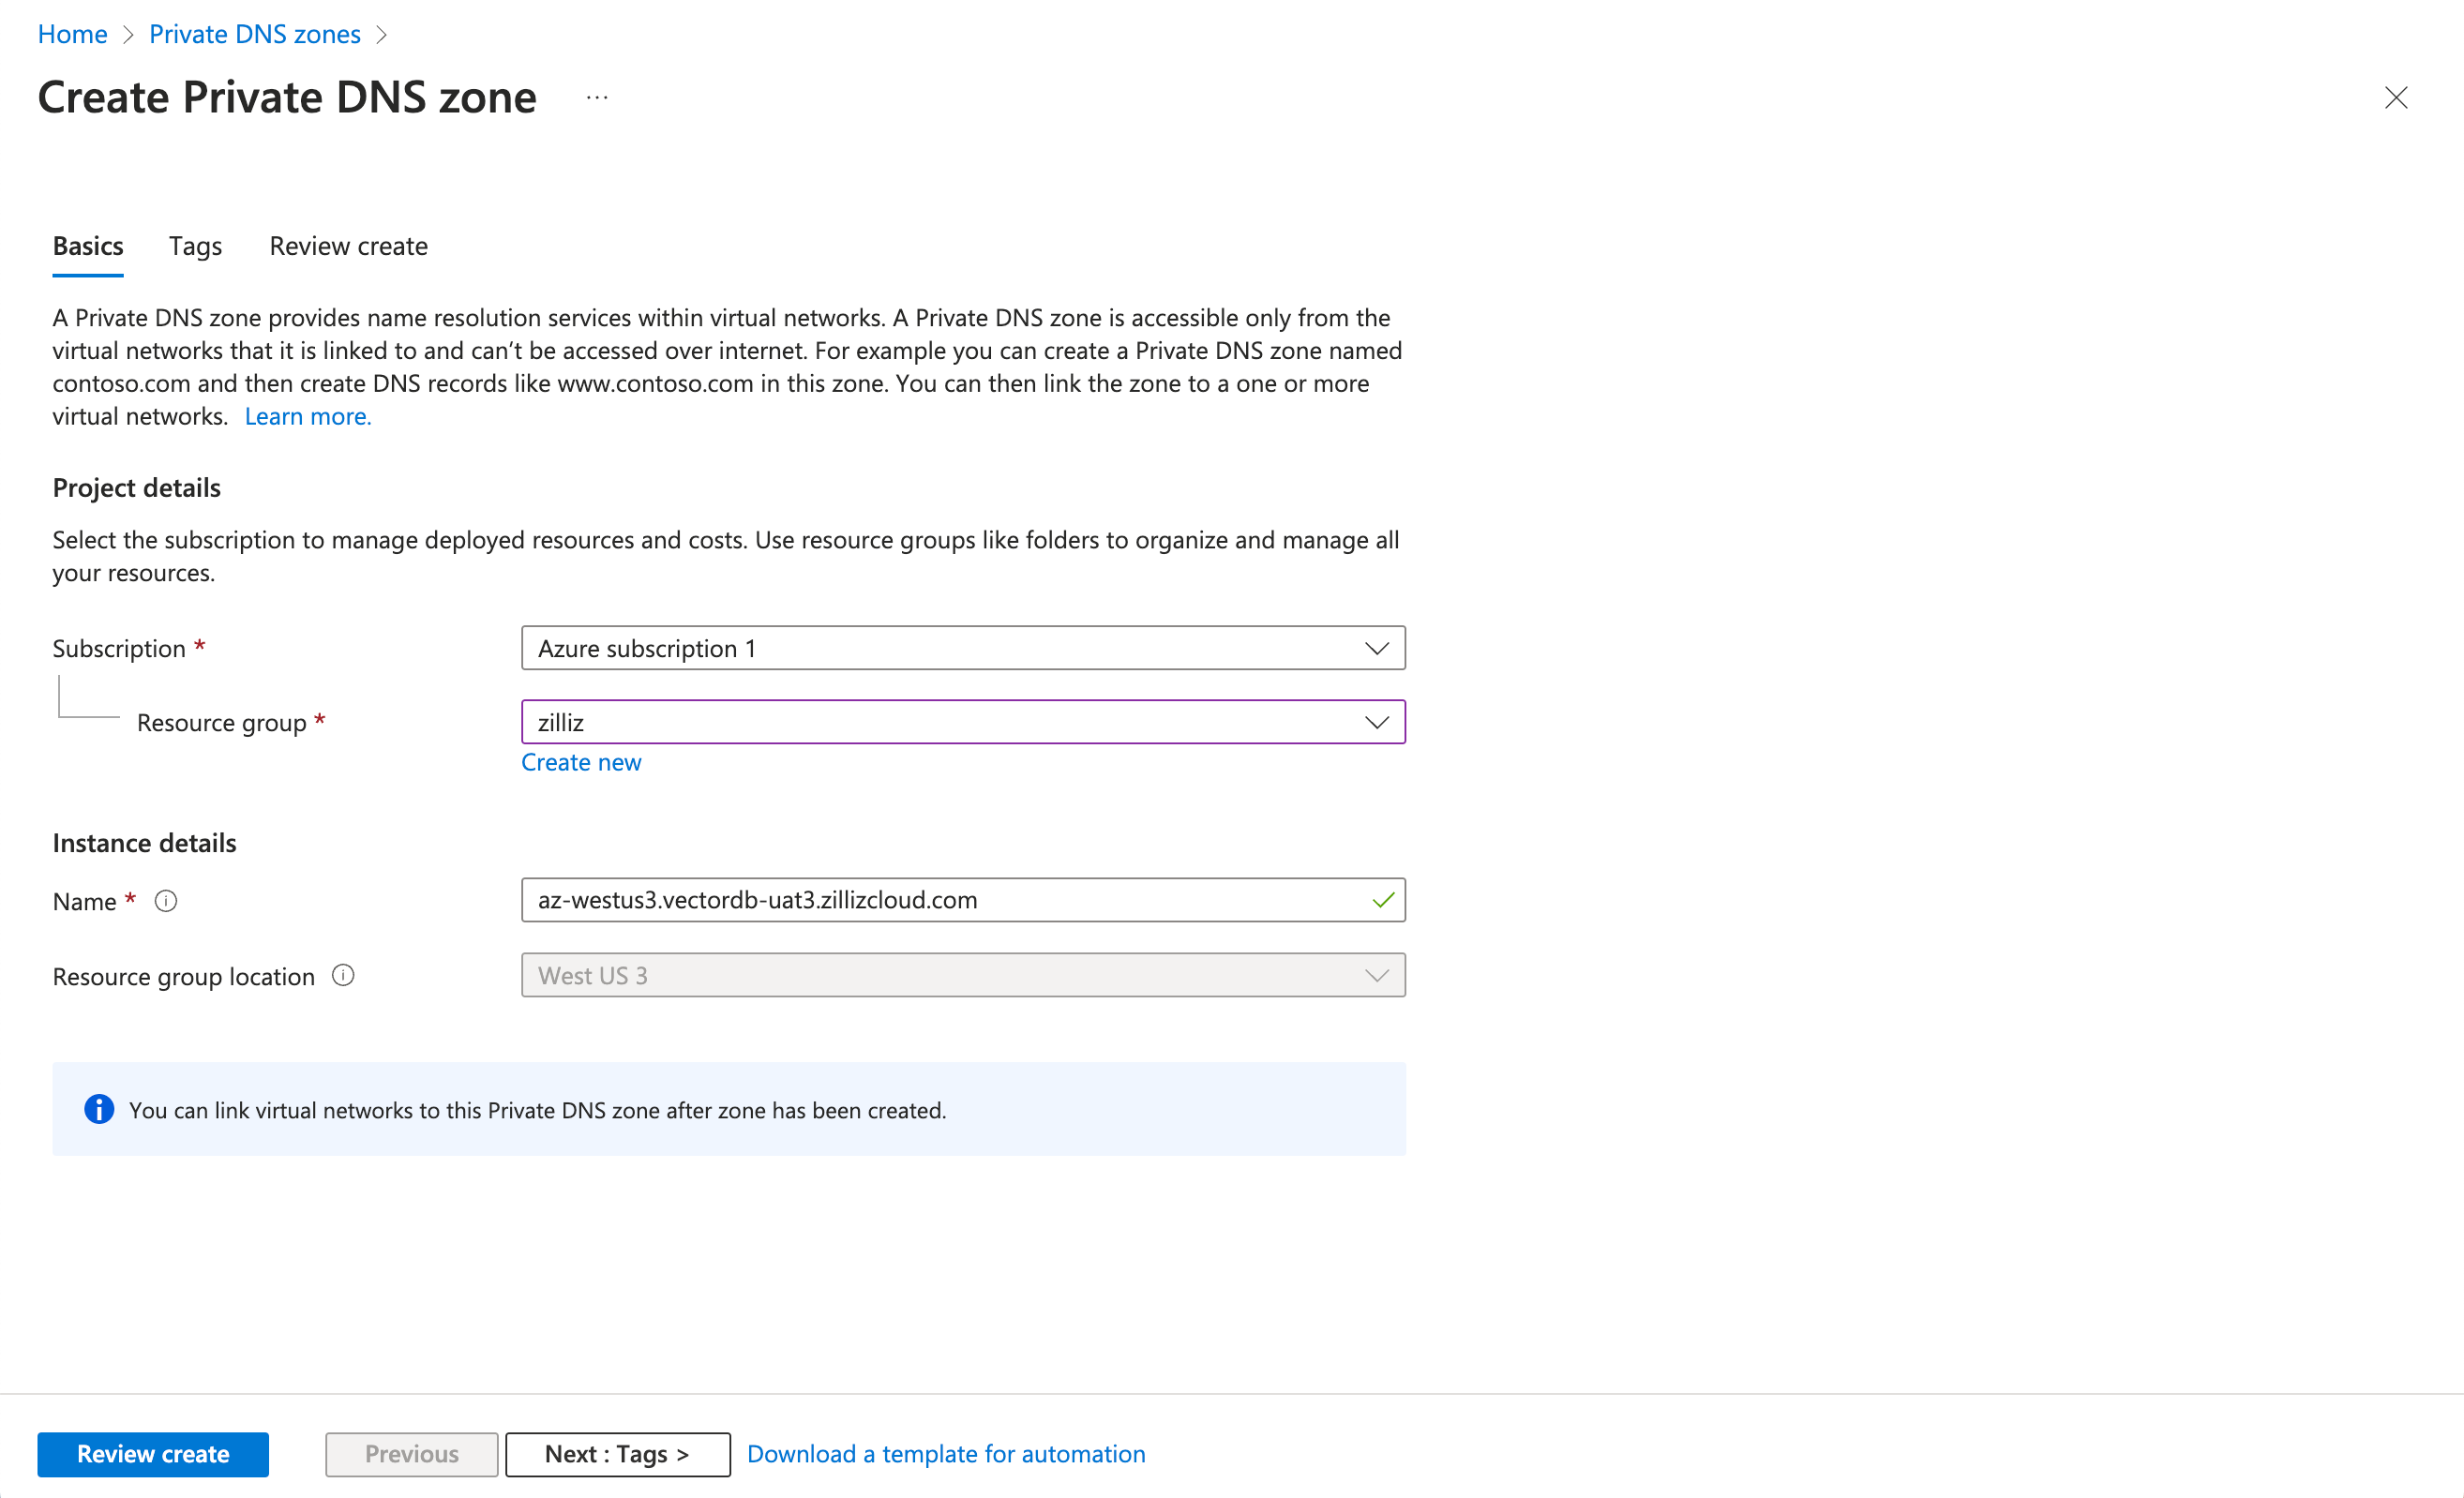
Once the validation passes, click Create to start the process.
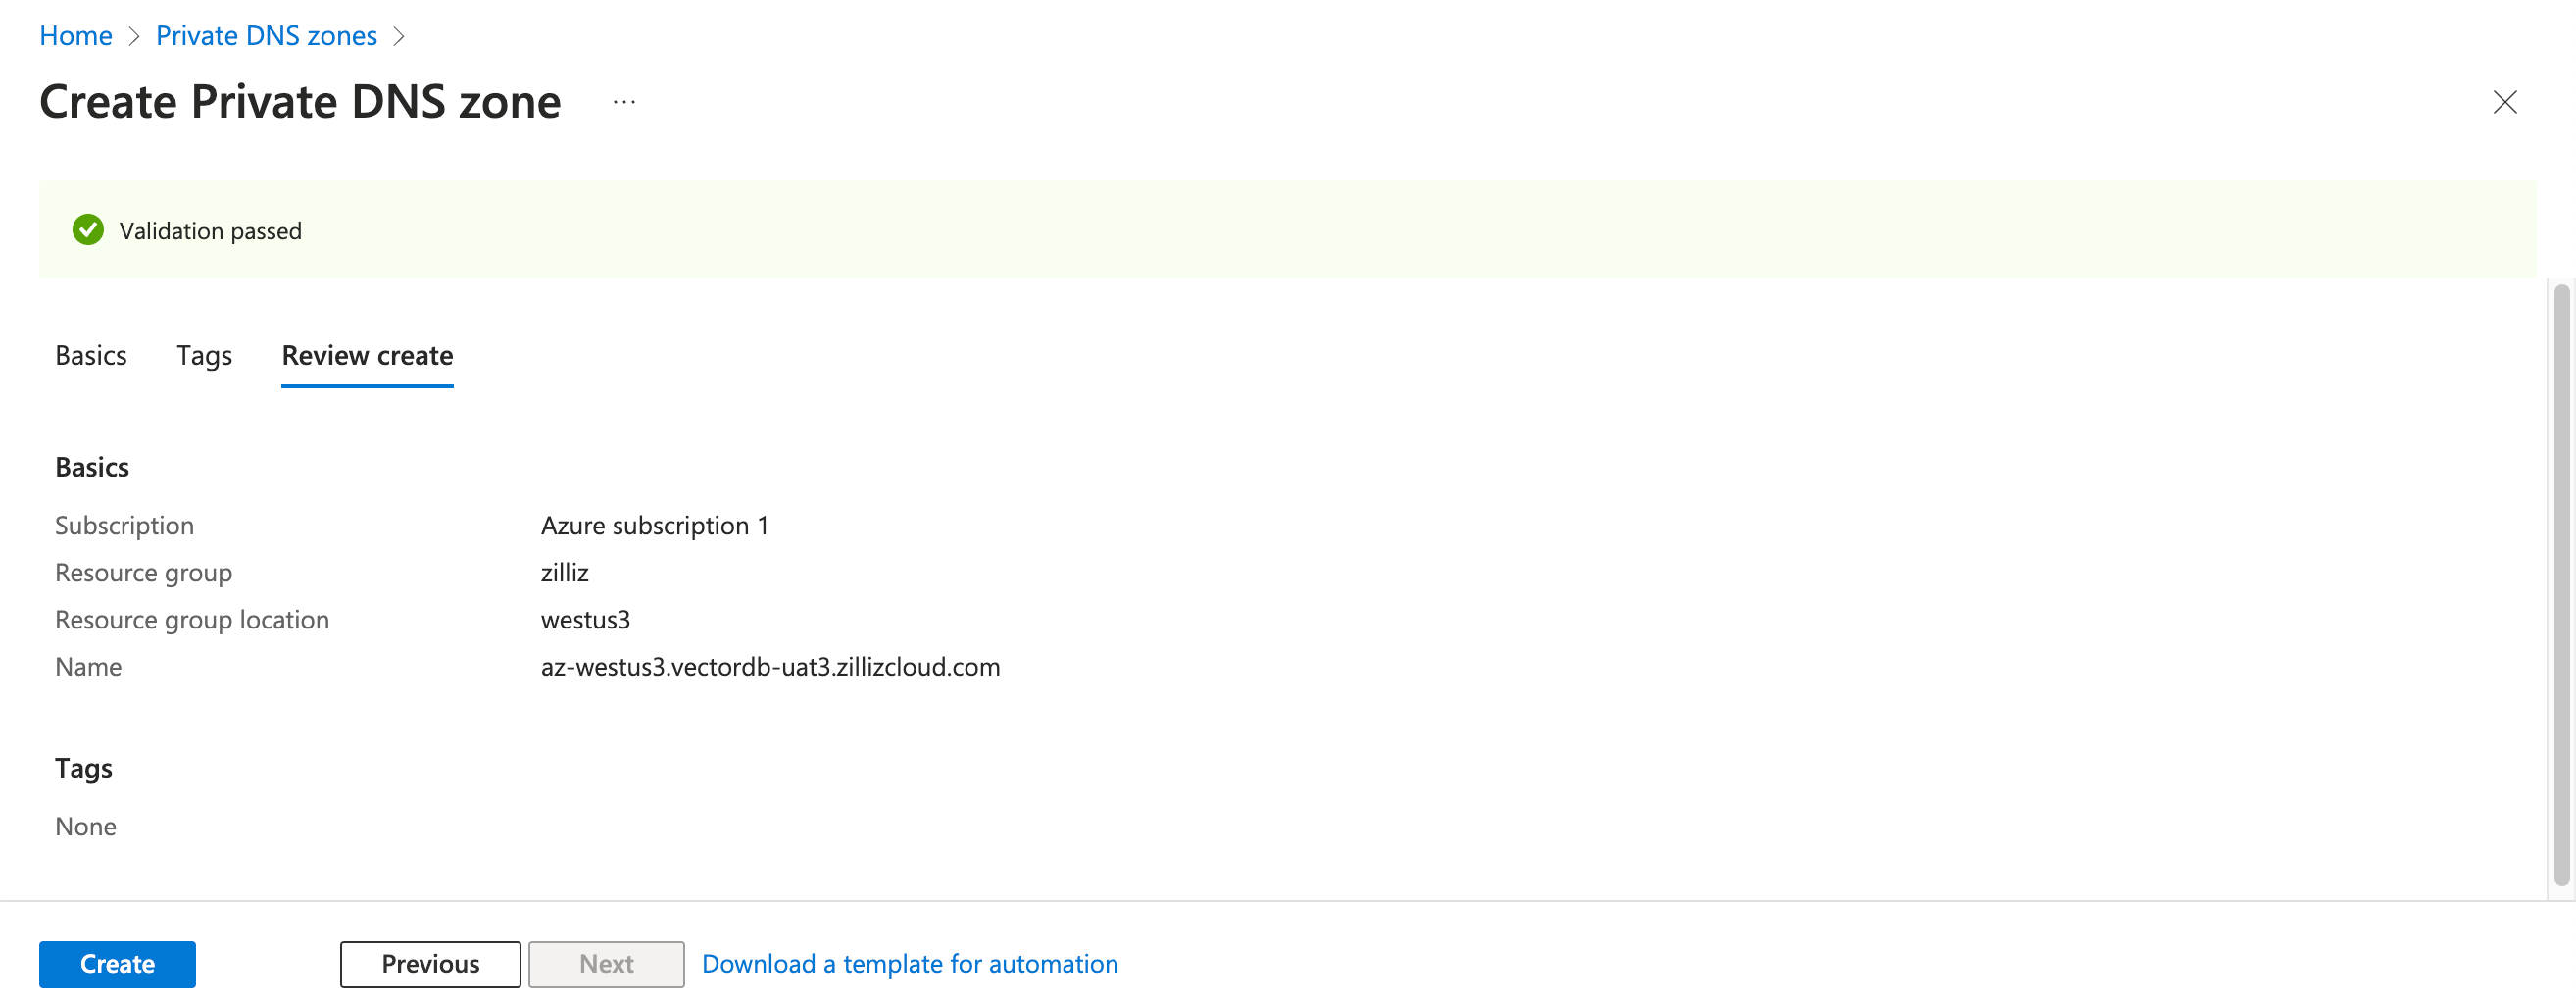
If the deployment succeeds, you will see the following.
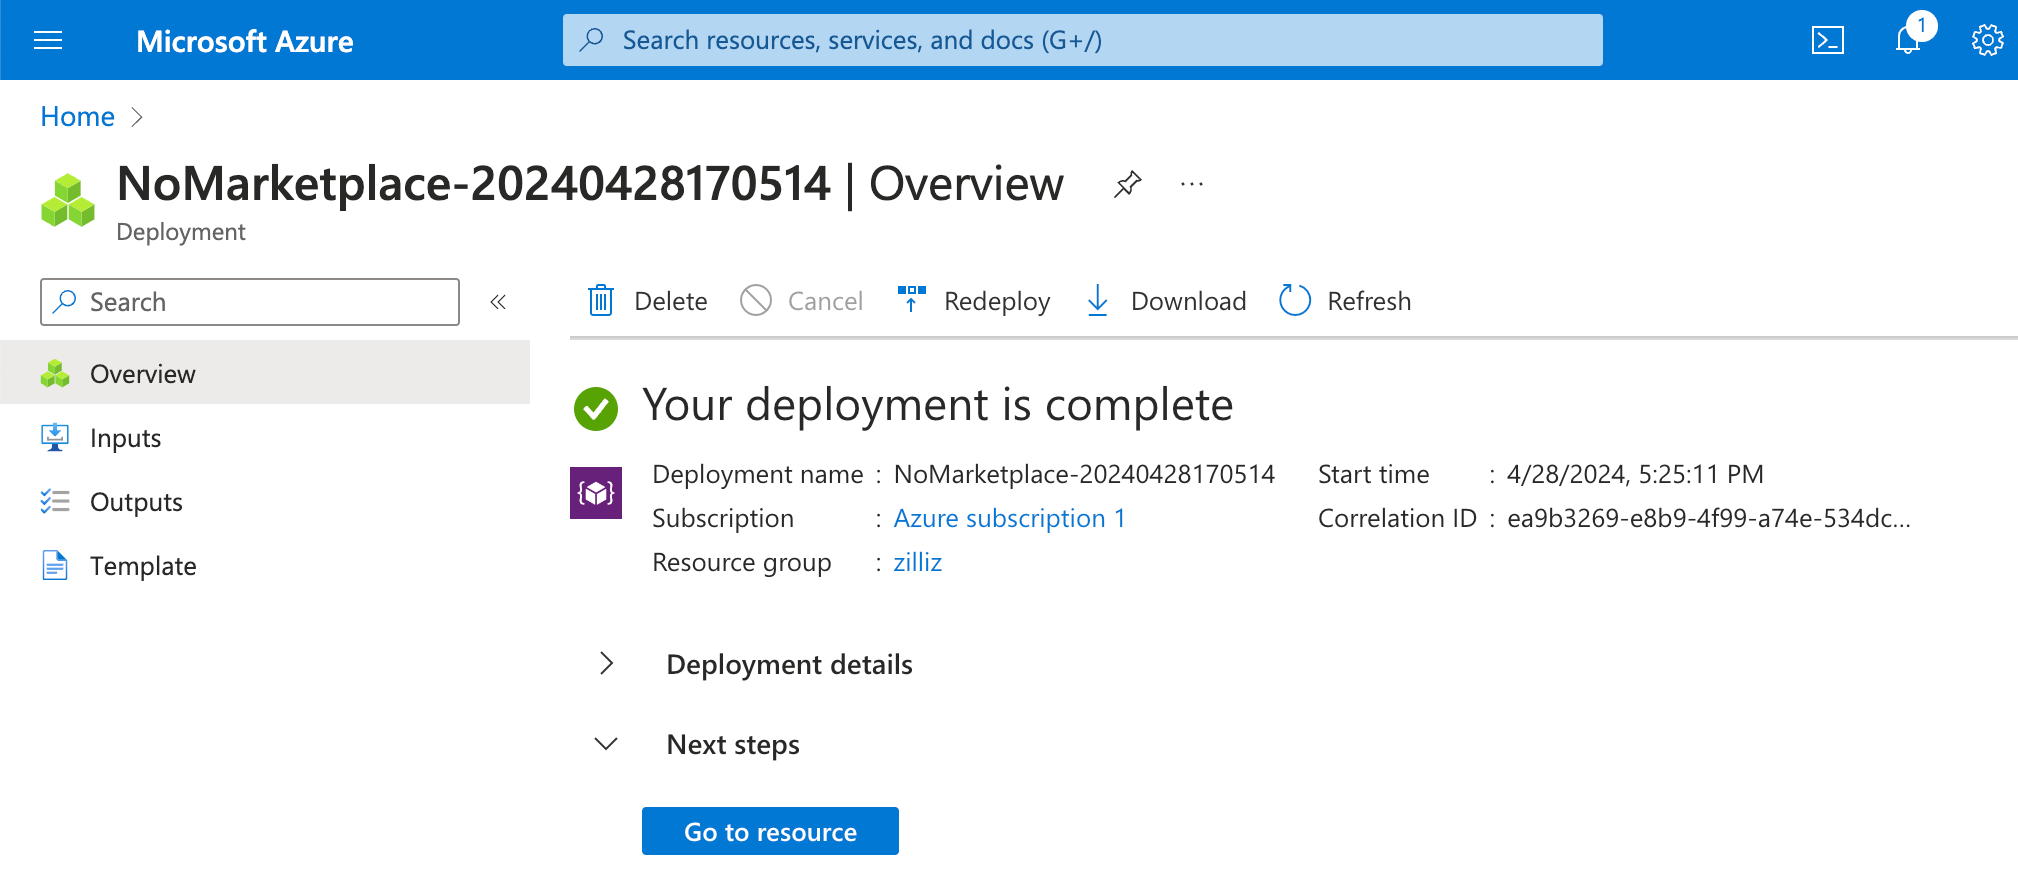
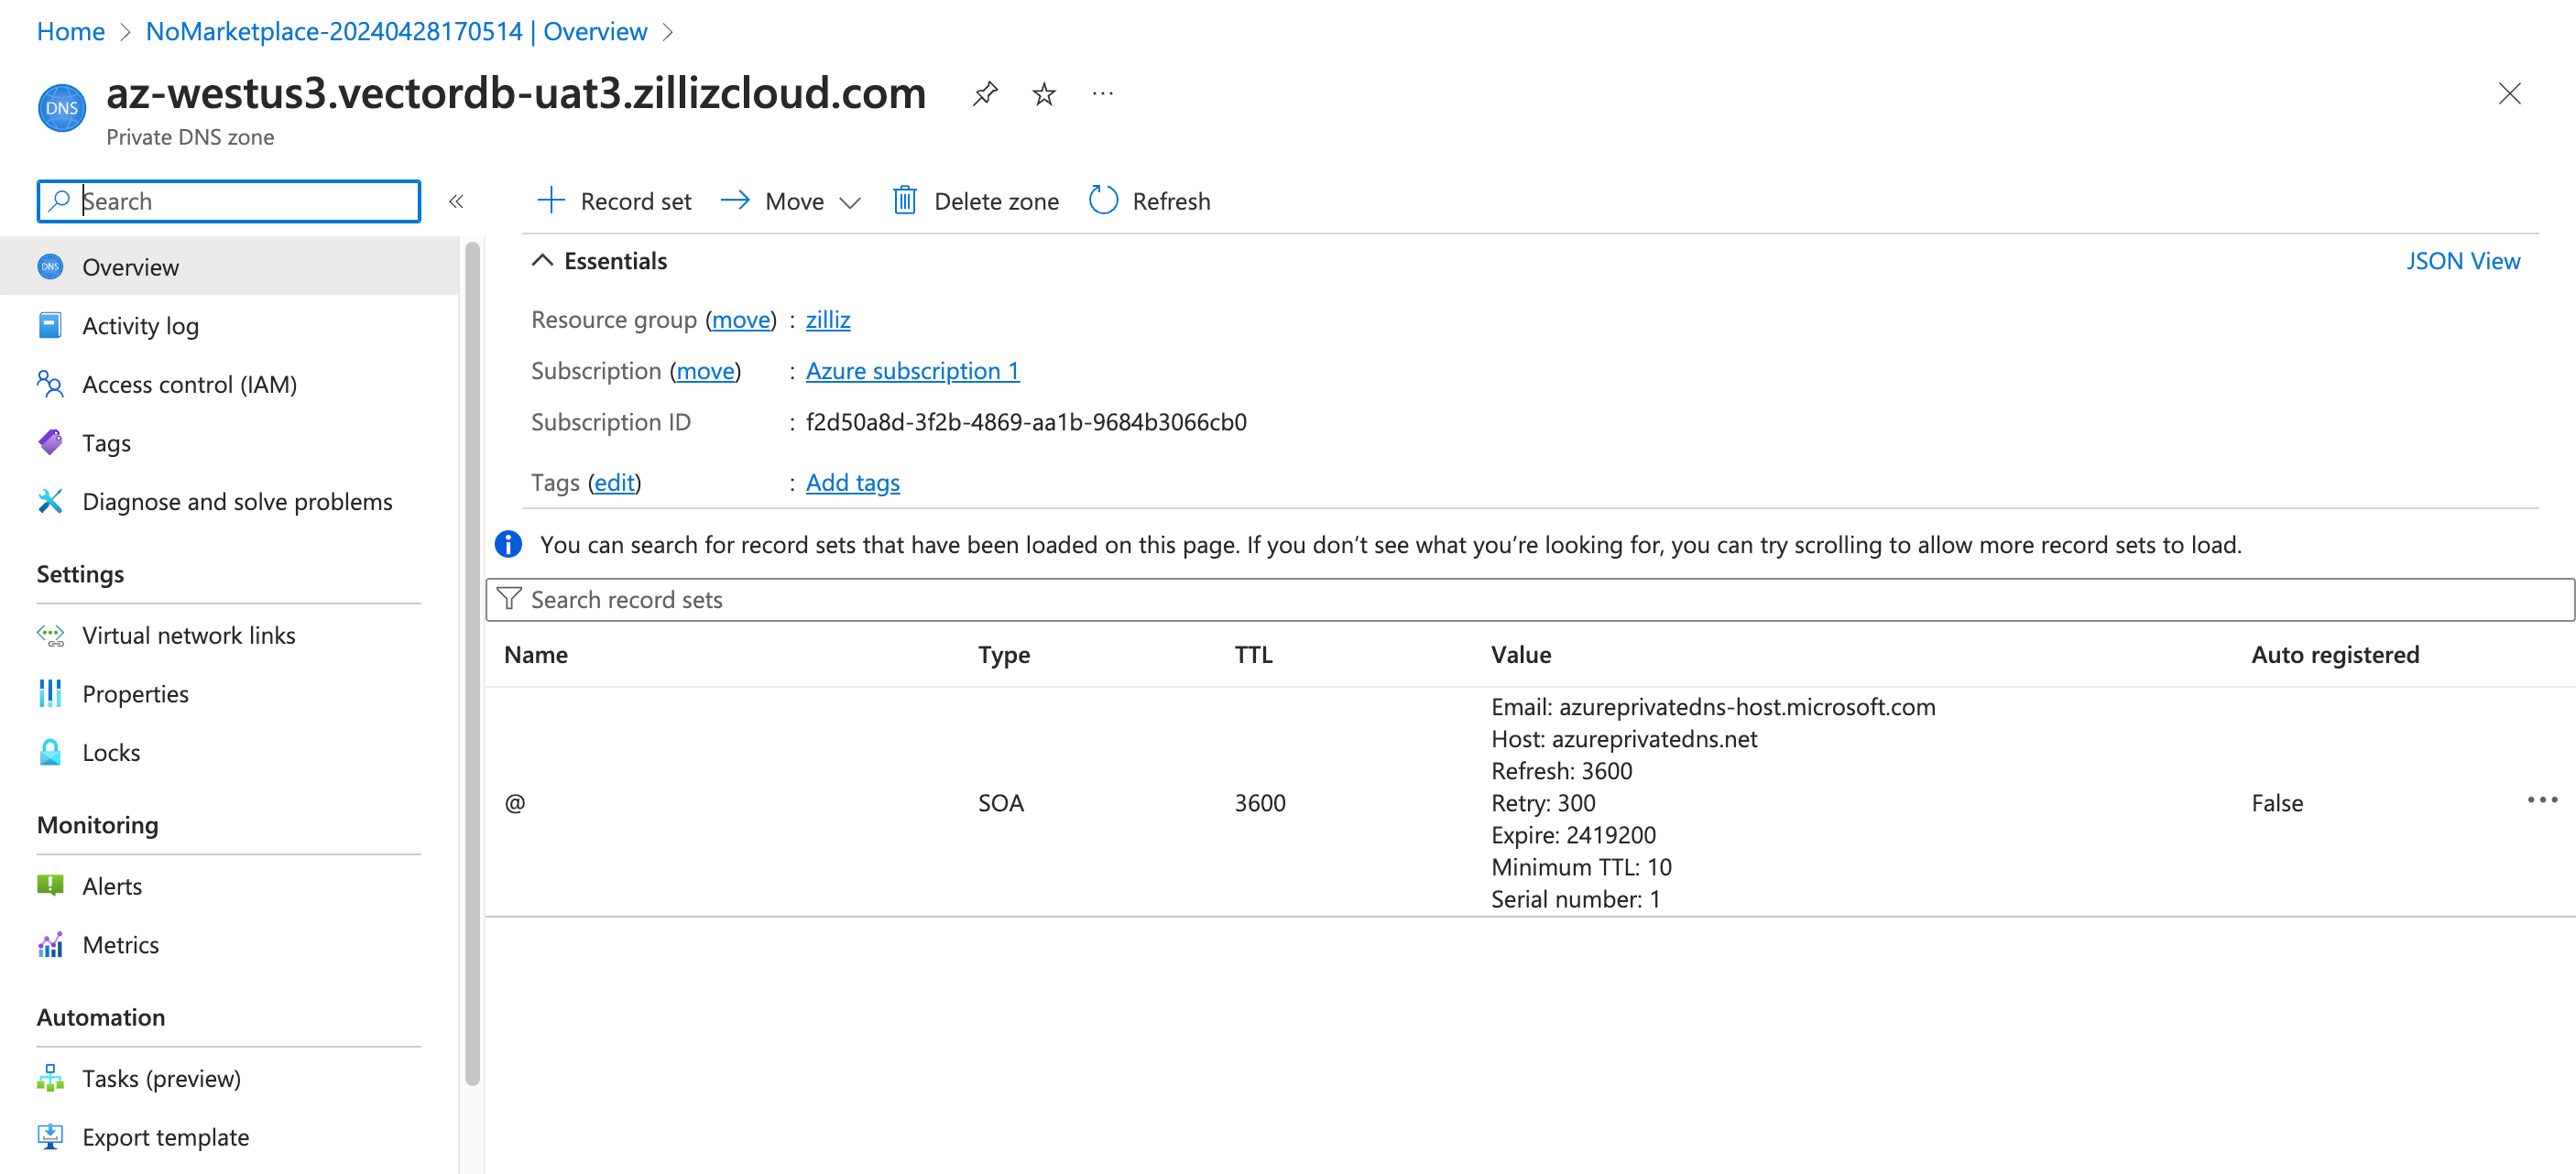
Click Go to resource to see the Overview page of the created Private DNS zone.
Step 2: Link the Private DNS Zone to your virtual network.
On the Overview page of the created Private DNS Zone, choose Settings > DNS Management in the left navigation pane.
Click + Add. In the Add virtual network link dialog box, enter a Link name, and select Subscription and Virtual network you have used above. In the Configuration section, select Enable auto registration also.
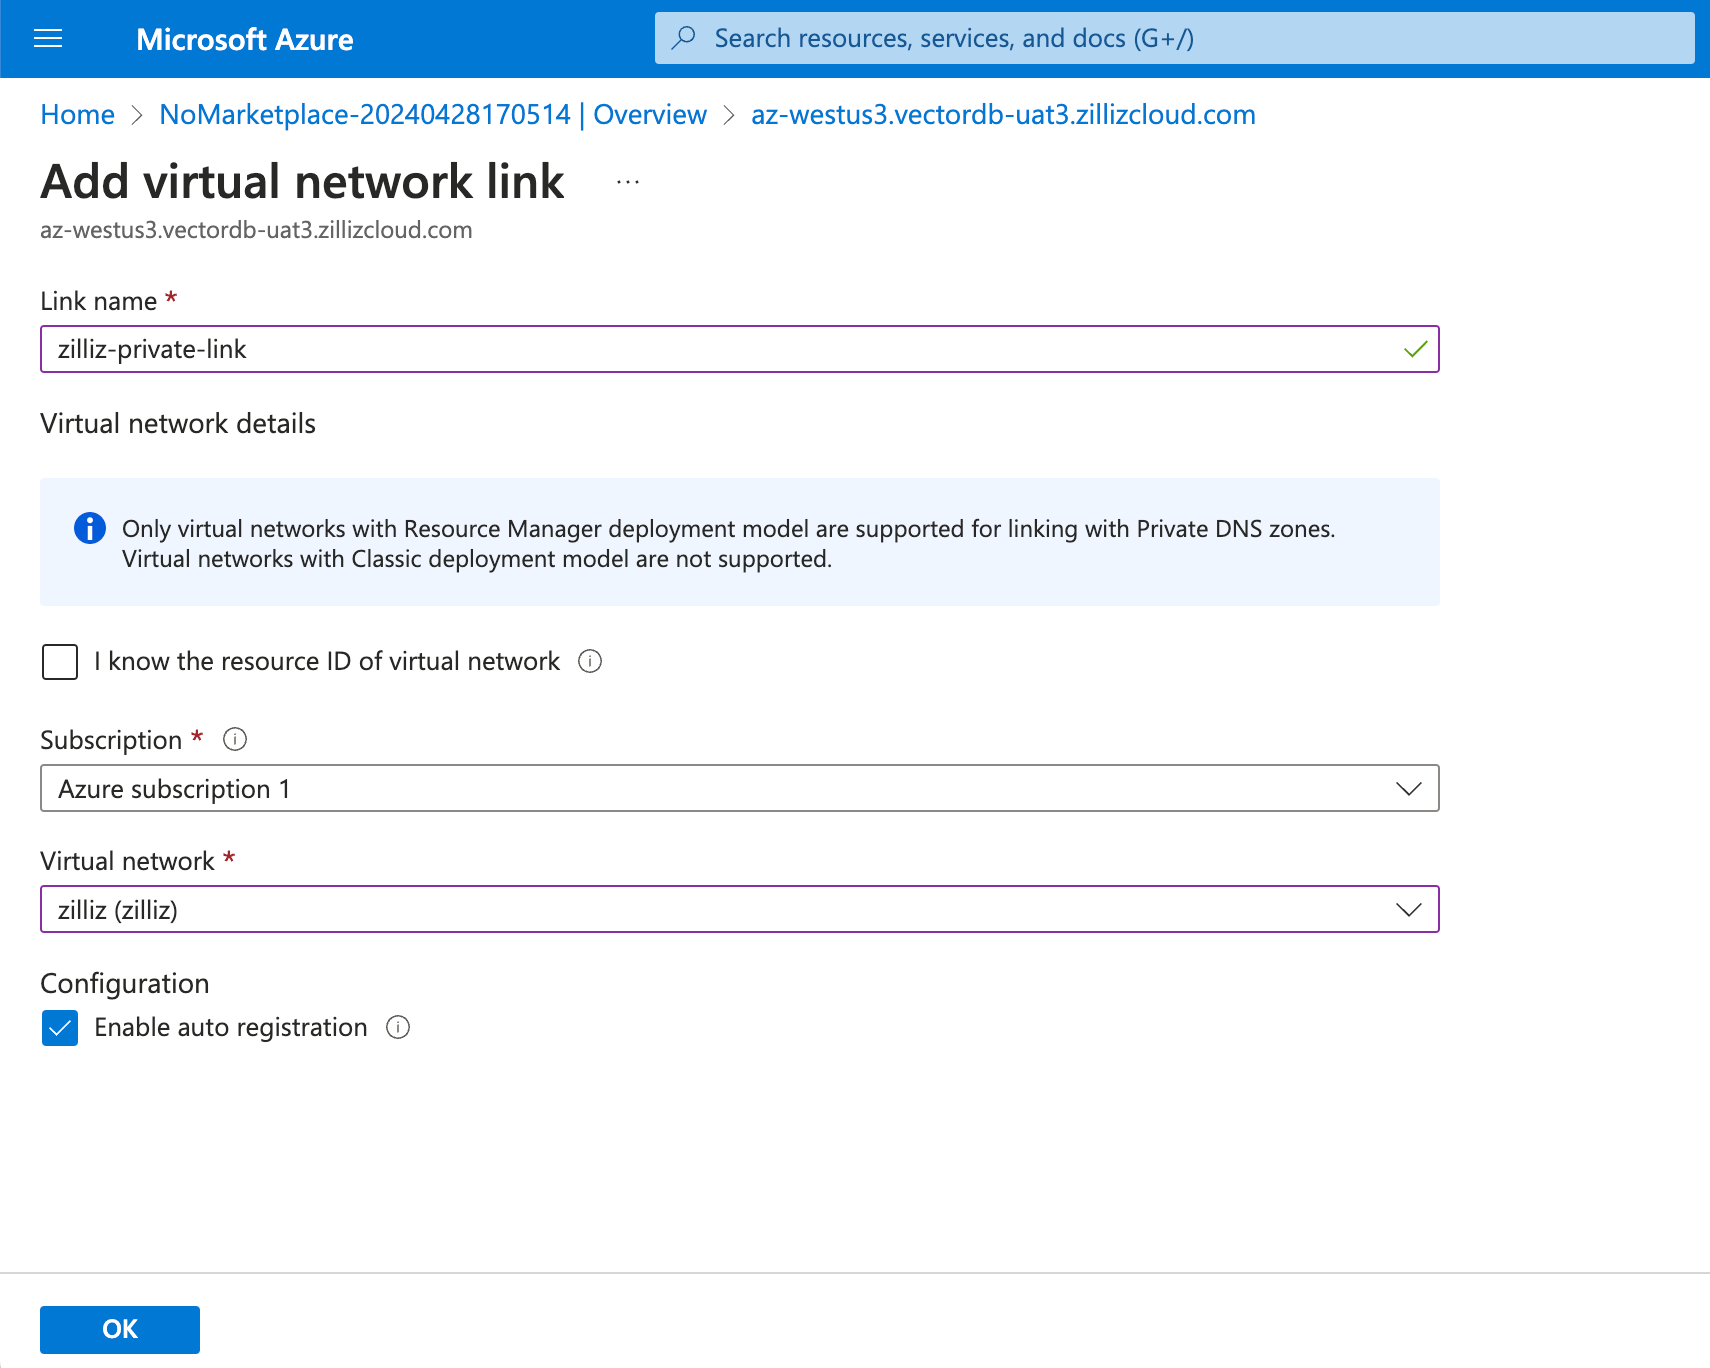
Once everything is set up as expected, click OK to continue. The link status of the created virtual network link will change to Completed after the deployment succeeds.

Click Overview in the left navigation pane to go back to the Overview page of the Private DNS zone.
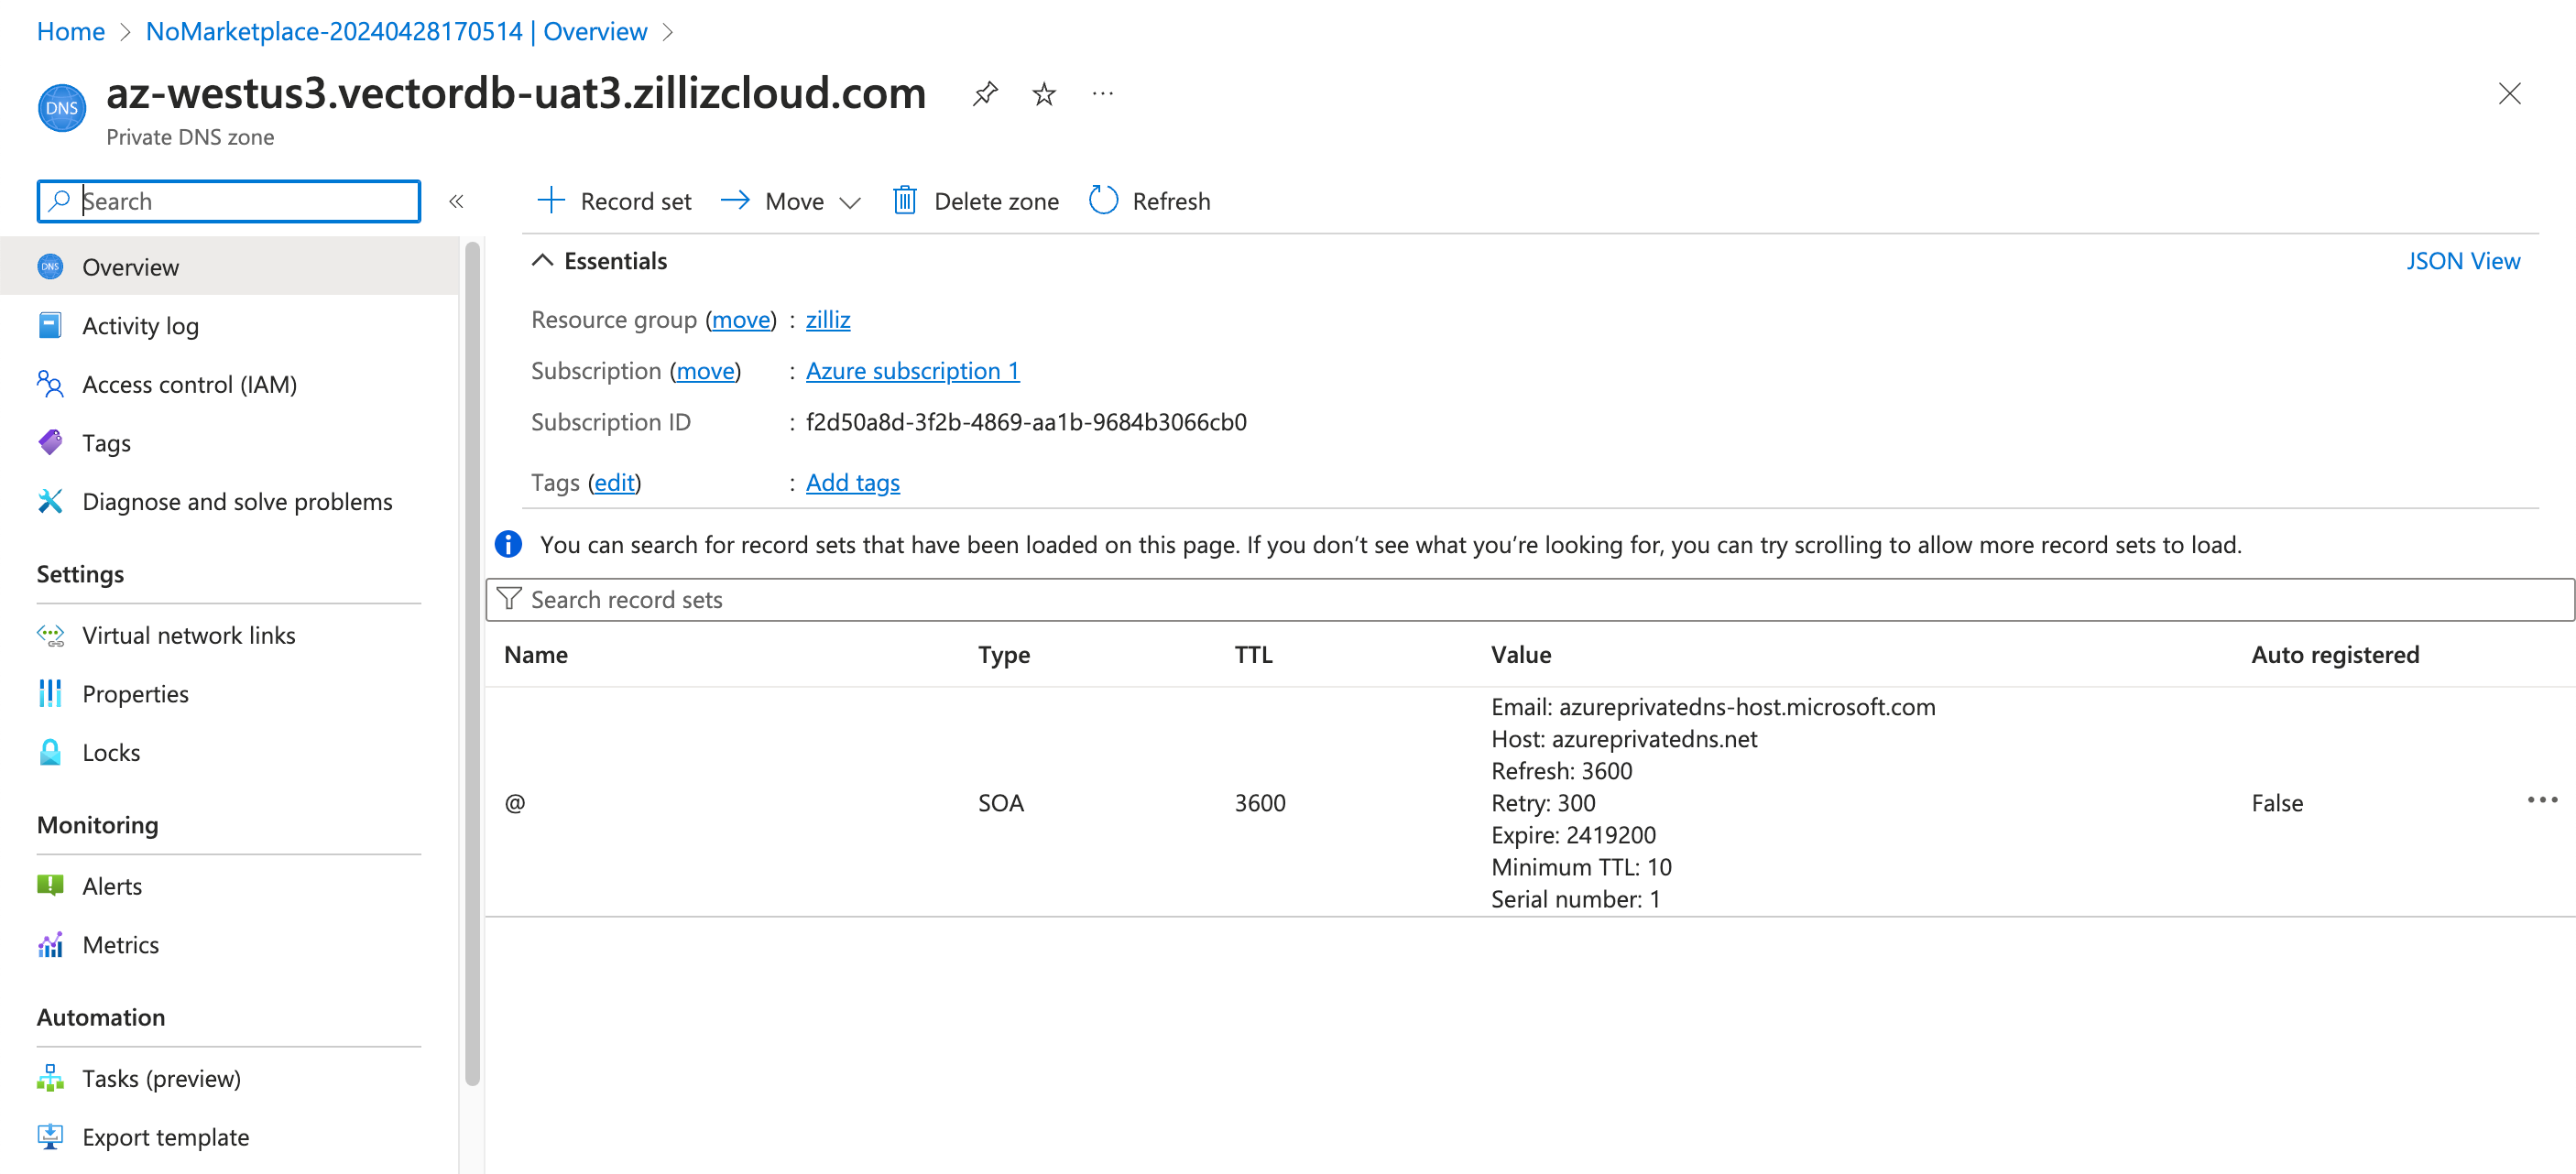
Click + Record set. In the Add record set dialog box, enter your cluster ID suffixed with -privatelink in Name, select A - Address record in Type, and set TTL to 10 Minutes. Check whether the listed IP address is the one you have noted down.
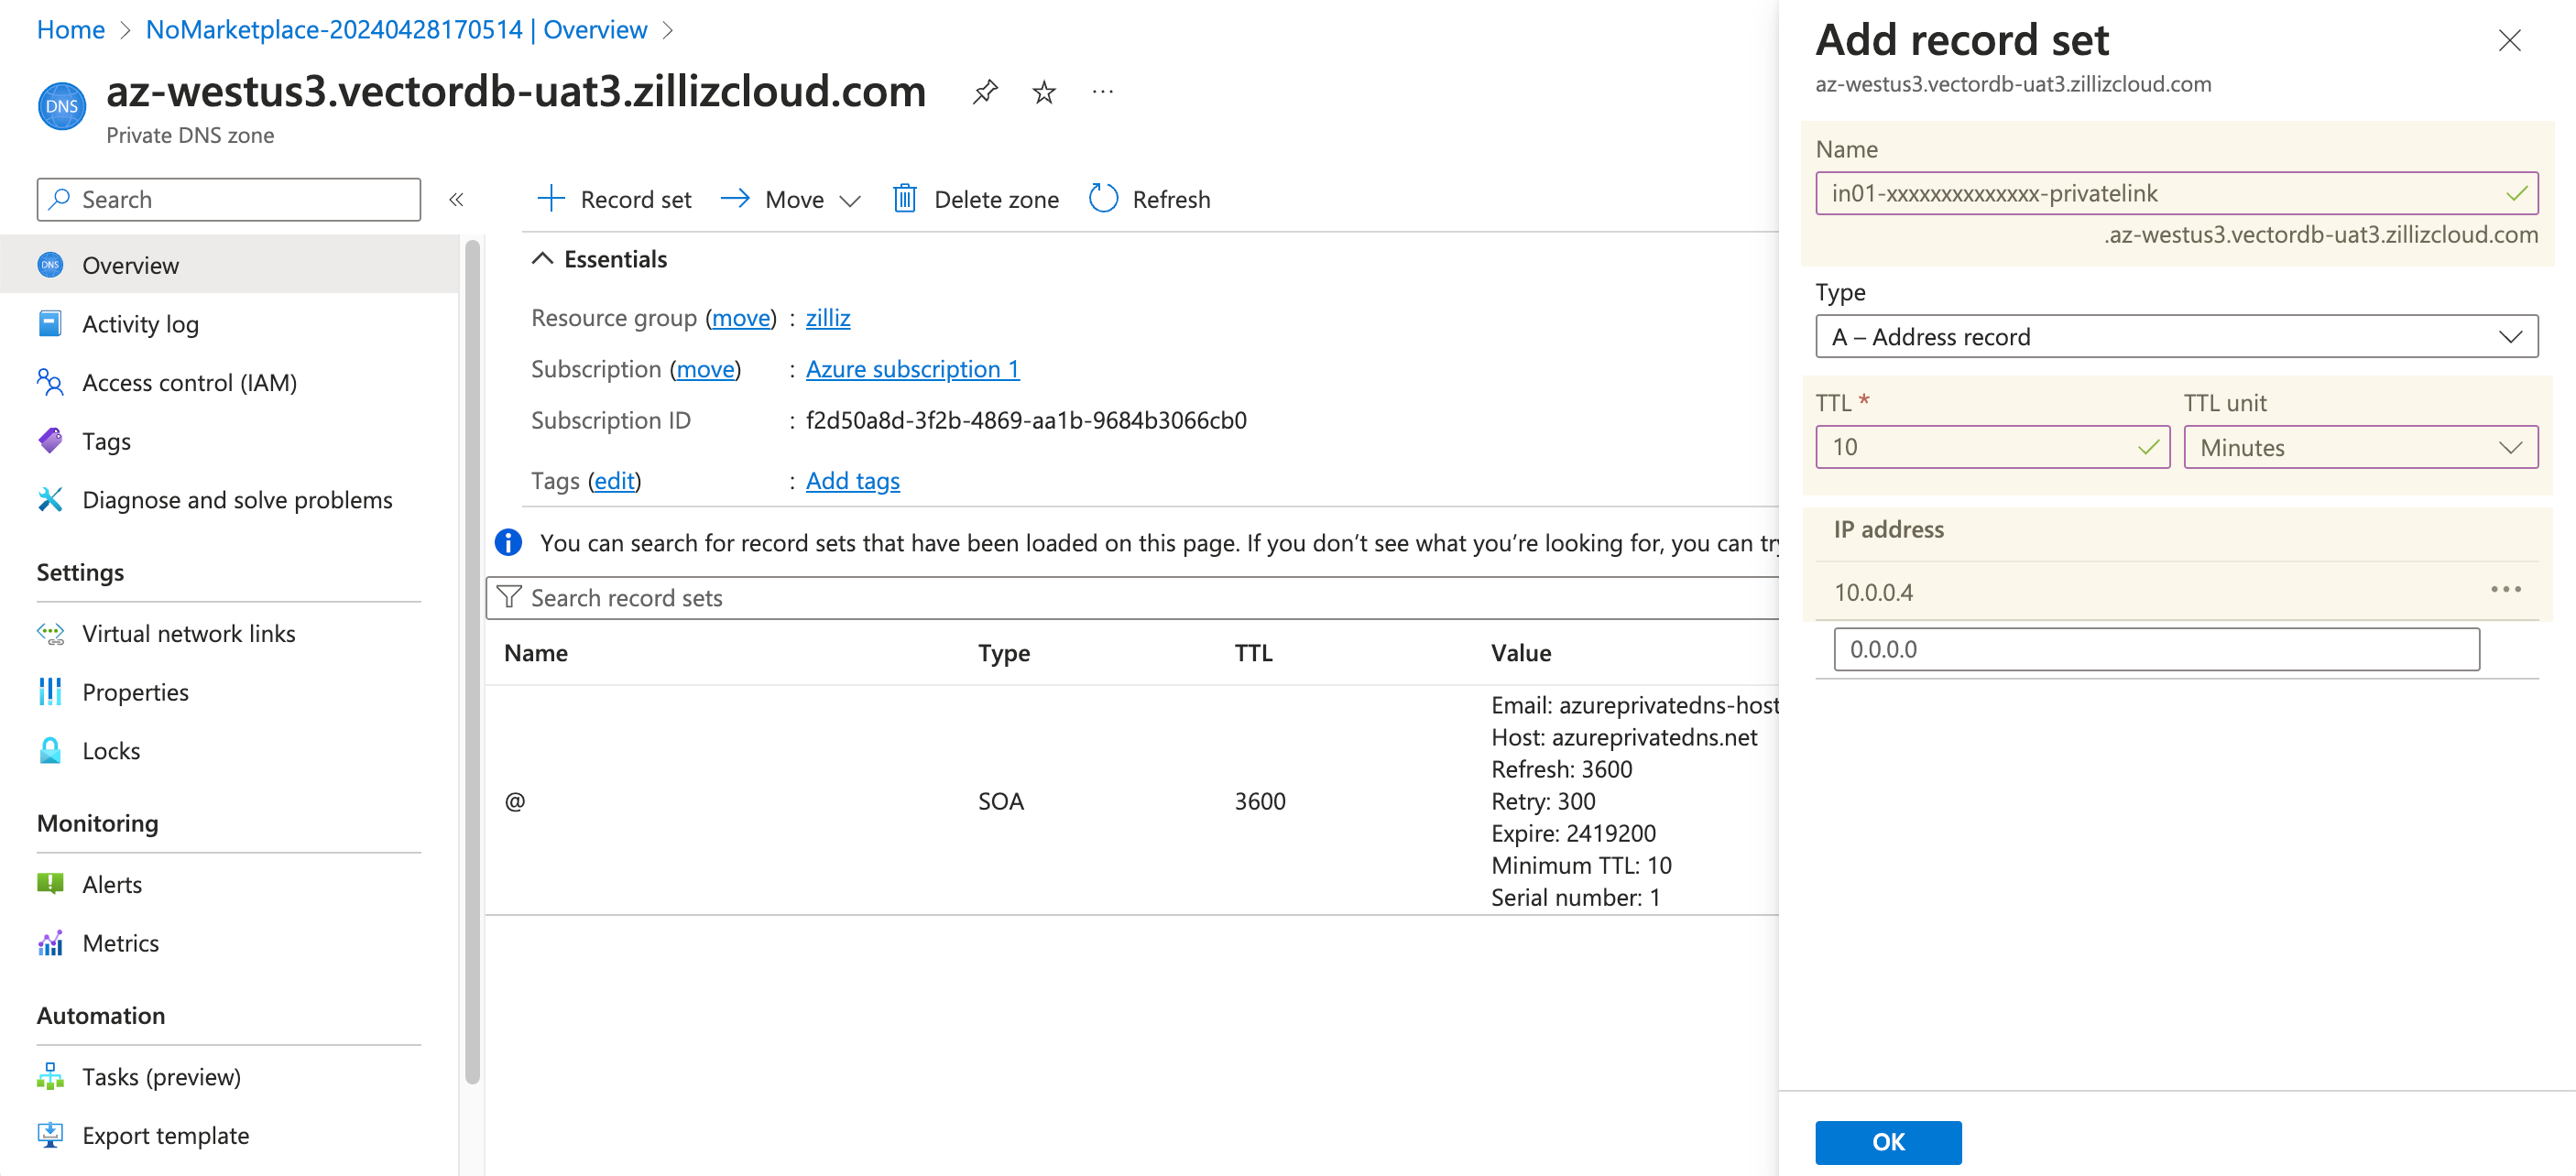
Click OK to save the record set.
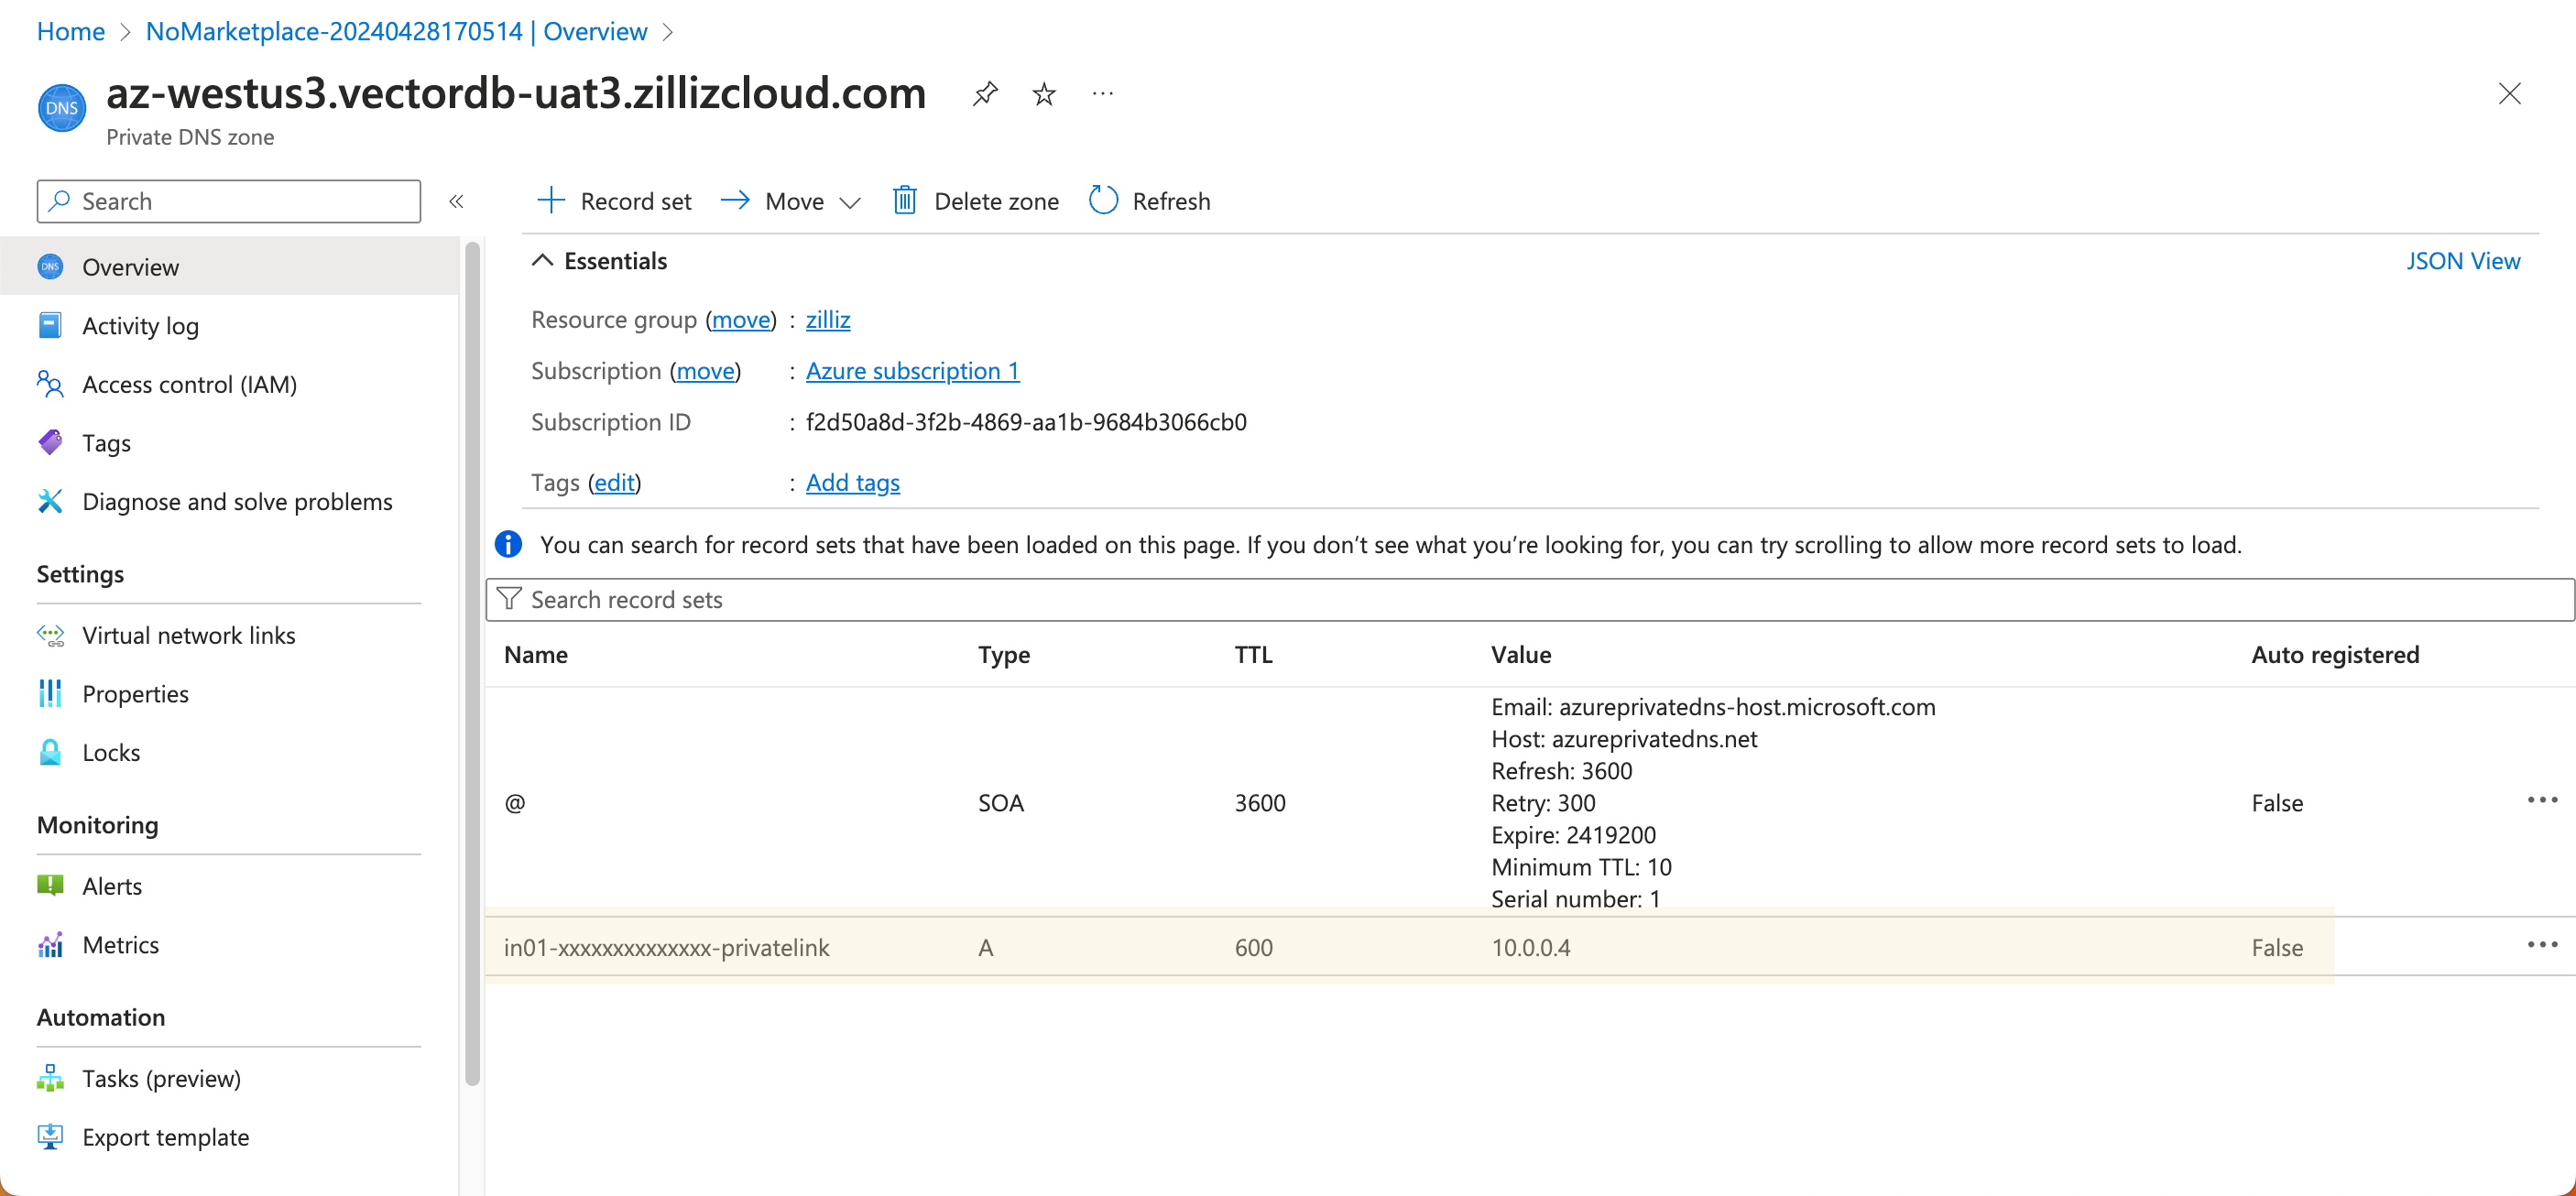
Go back to the Overview page of the created Private Endpoint on the Azure portal, and you will see that the Connection Status of the Private Endpoint turns from Pending to Approved.
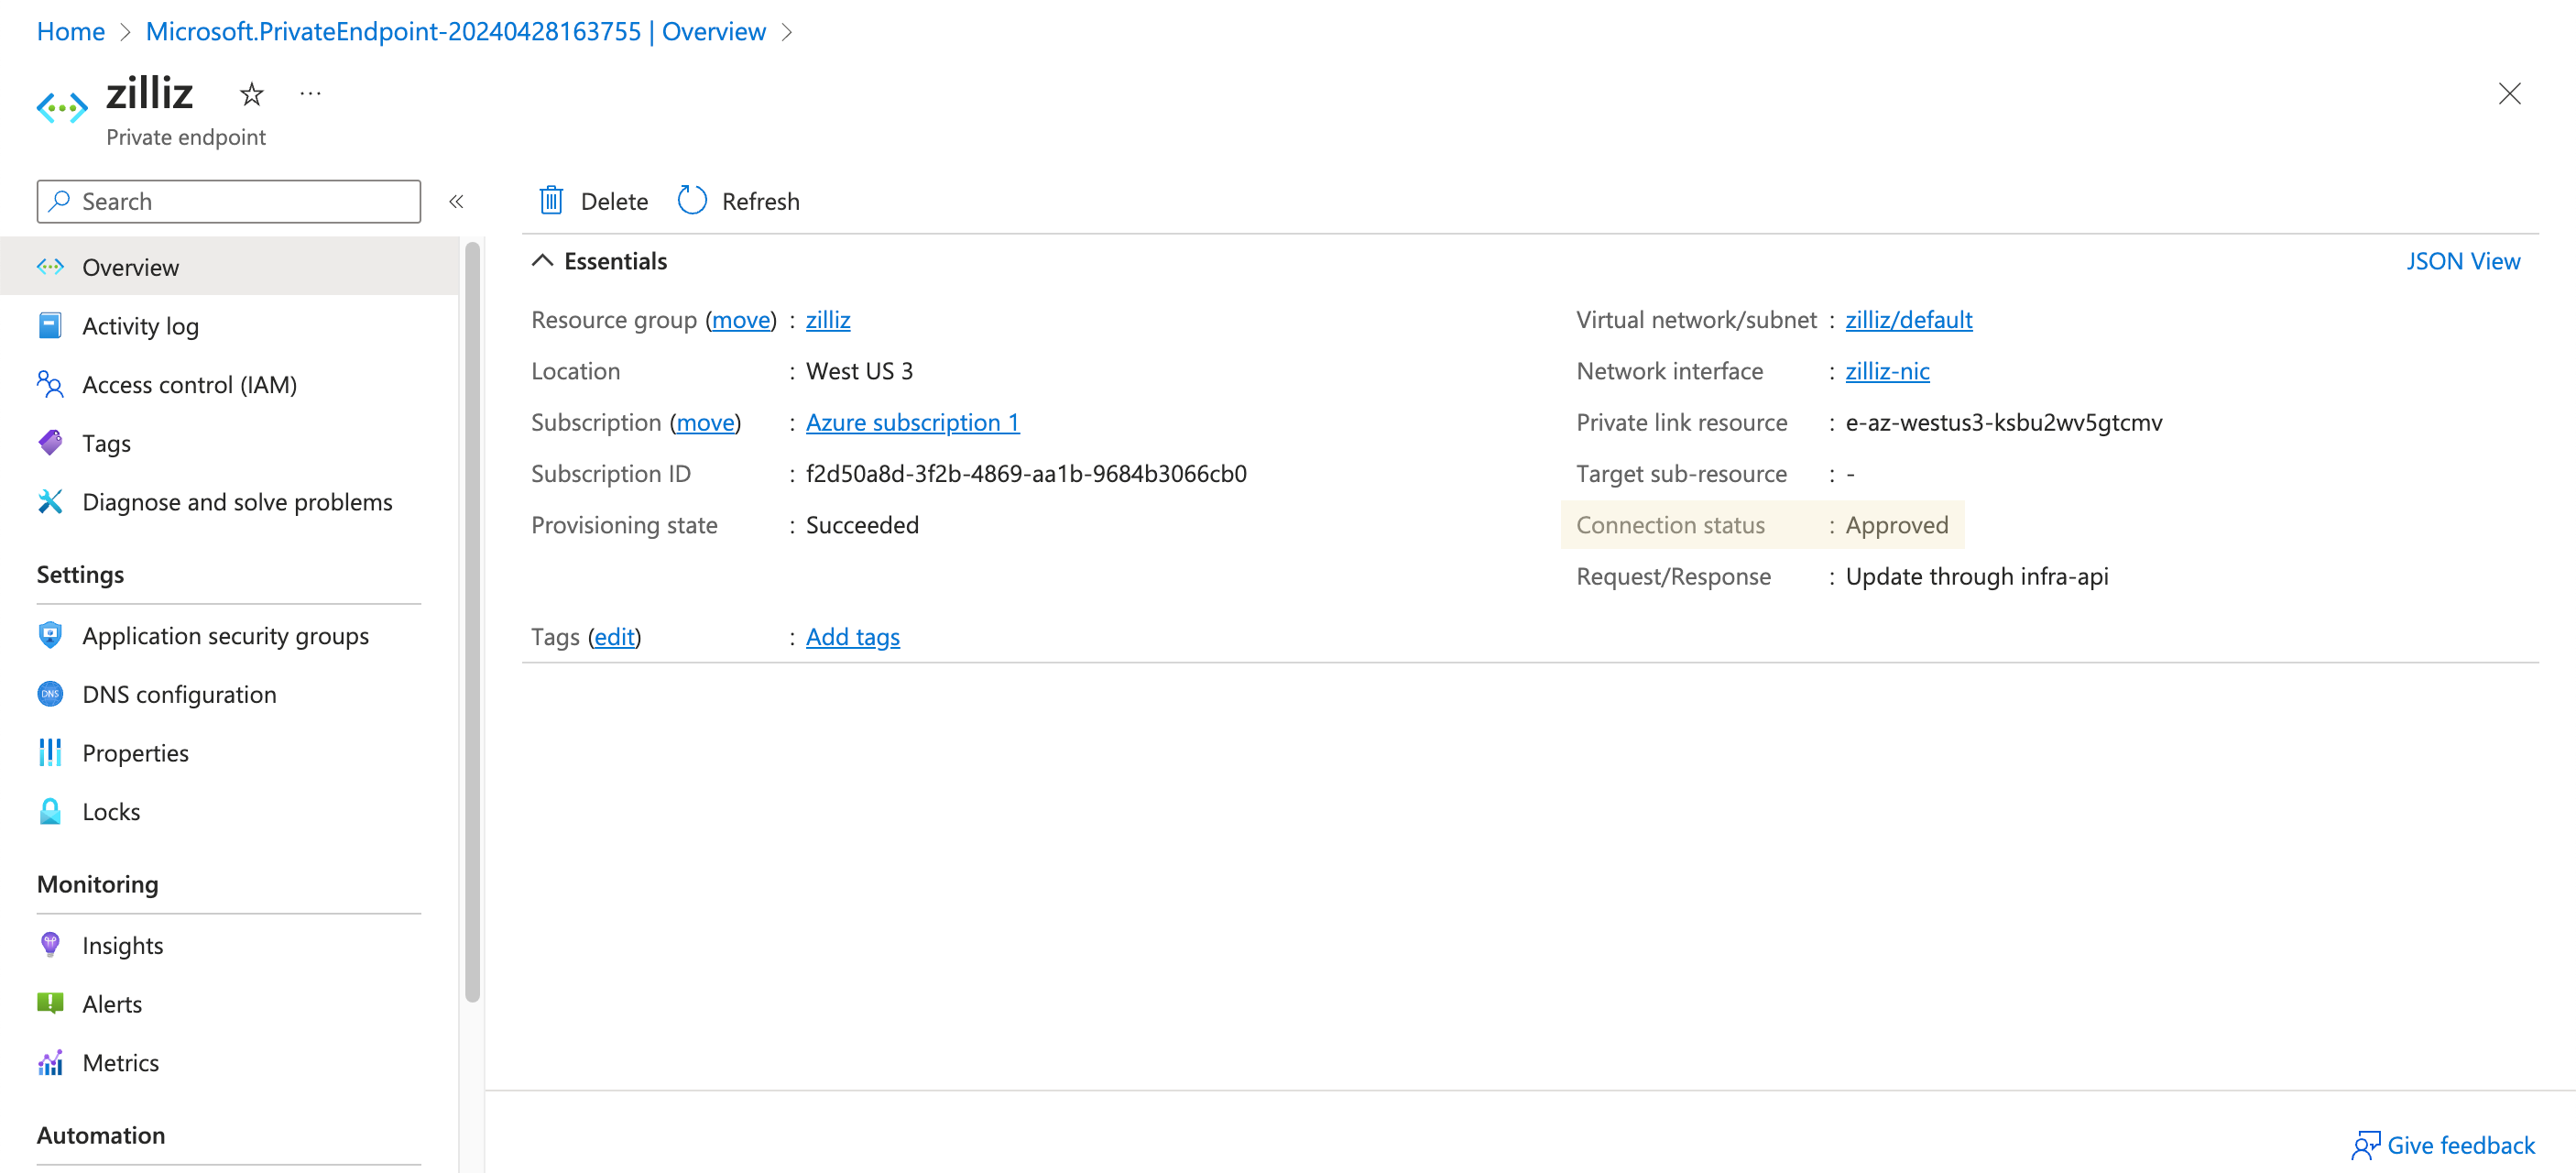
Now the resources in your Azure virtual network can access the Zilliz Cloud cluster privately.
Manage internet access to your clusters
After configuring your private endpoint, you can choose to disable the cluster public endpoints to restrict internet access to your project. Once you have disabled the public endpoint, users can only connect to the cluster using the private link.
To disable public endpoints:
Go to the Cluster Details page of your target cluster.
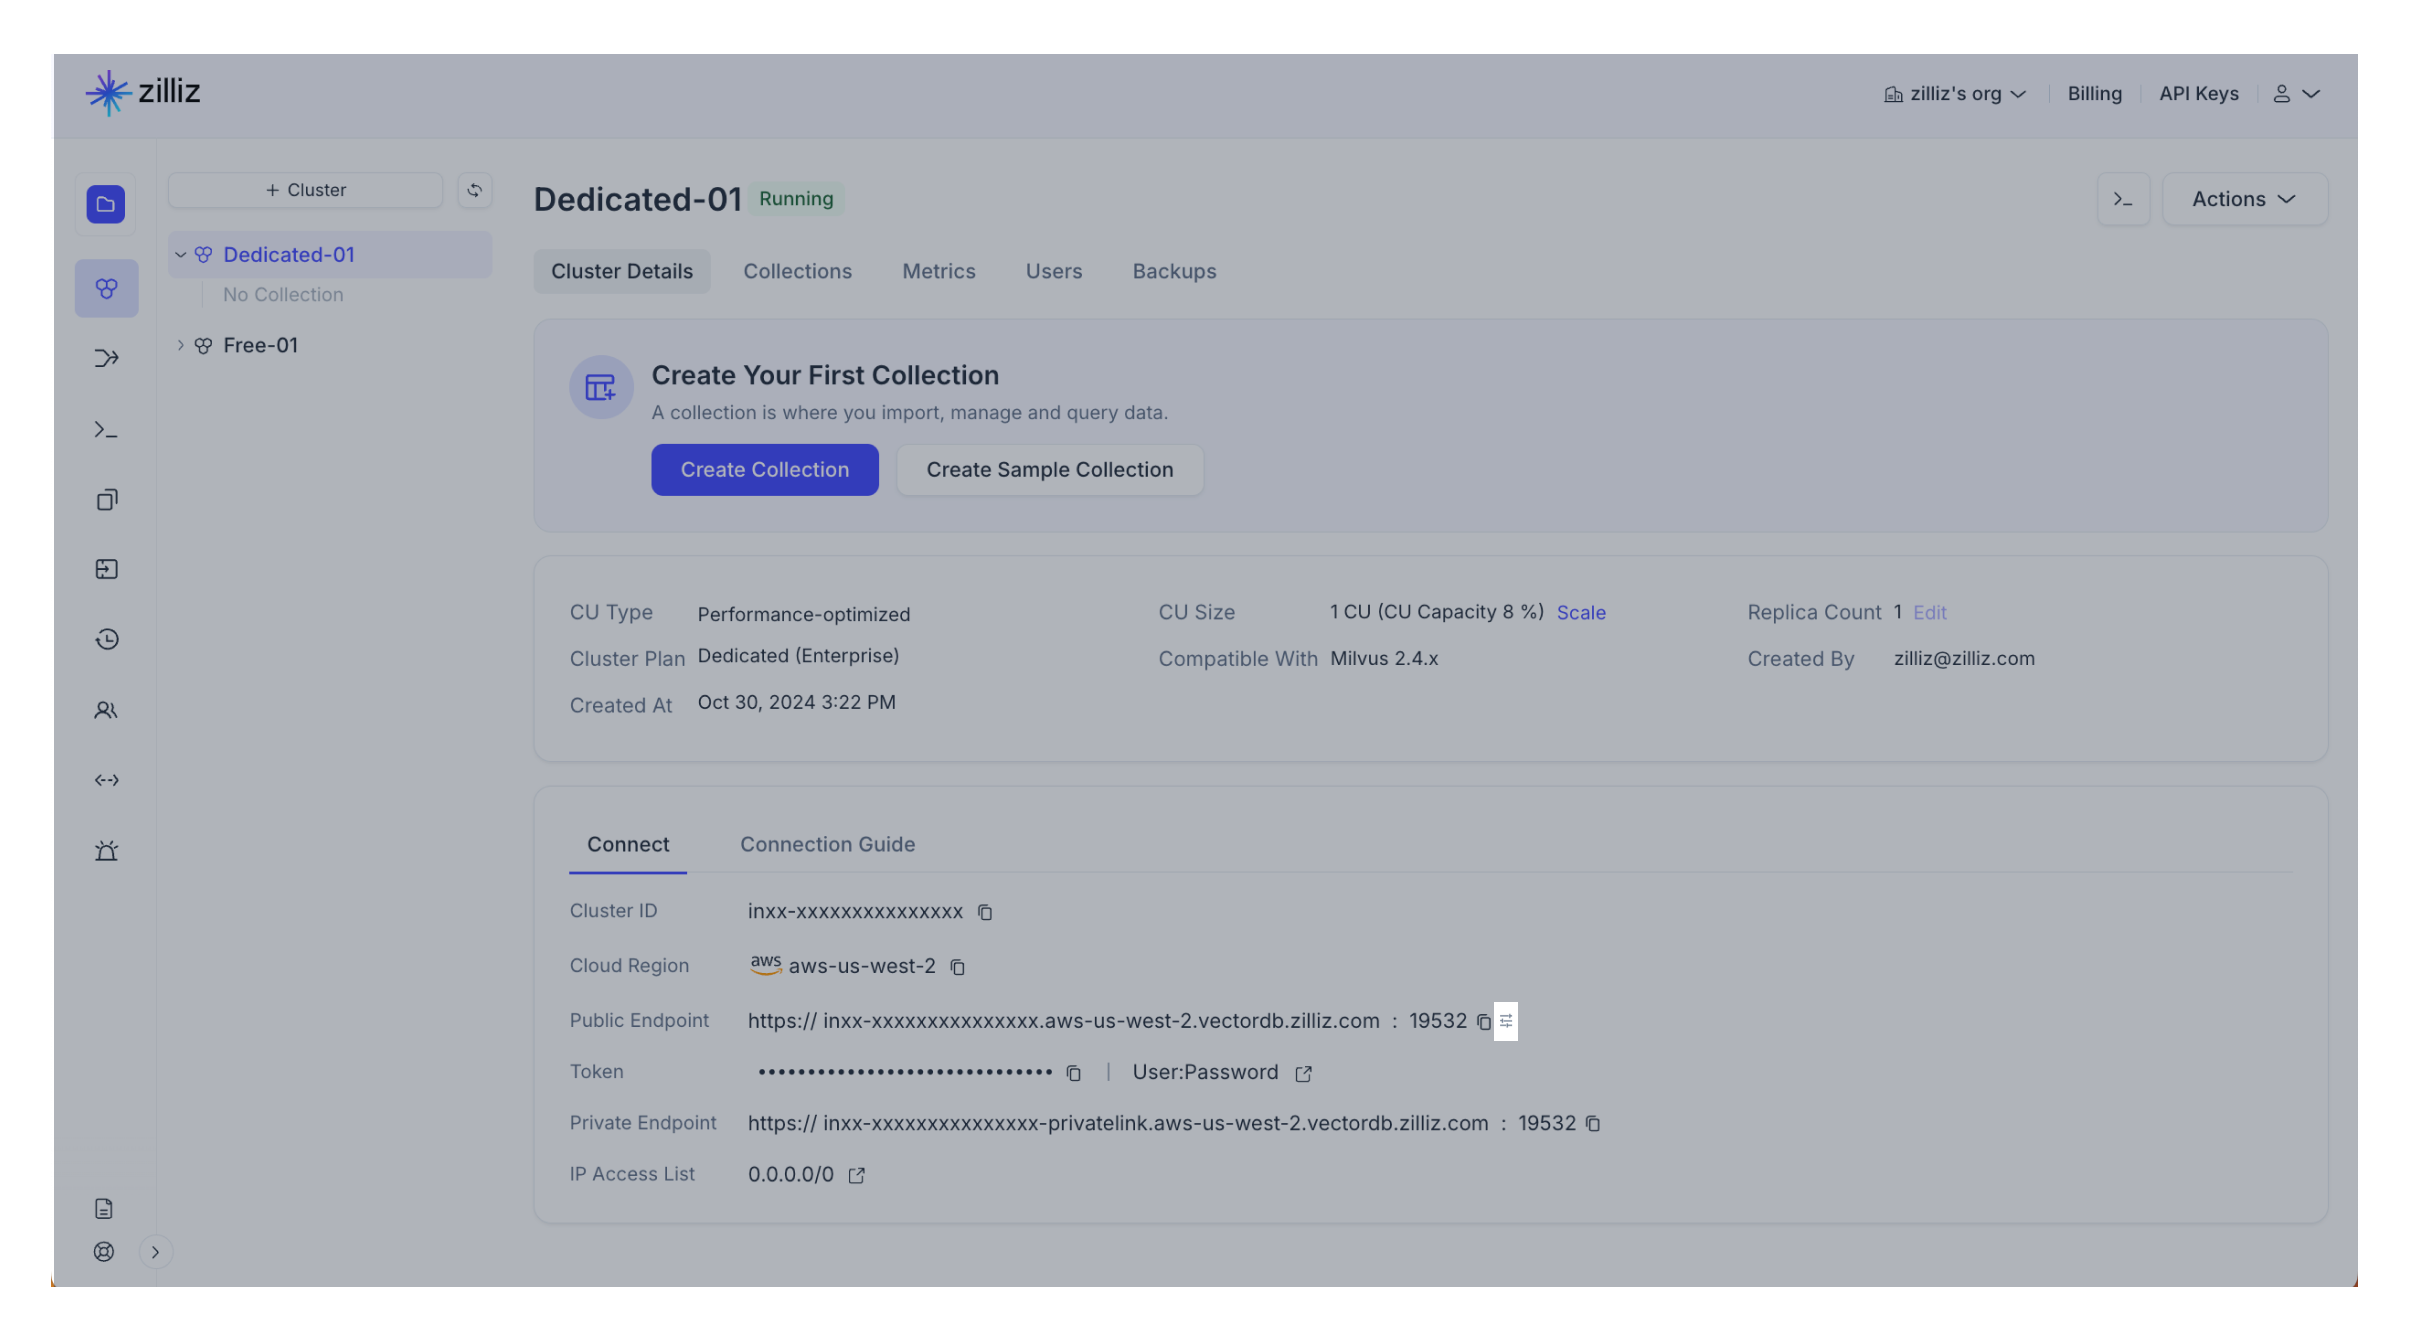
Navigate to the Connection section.
Click on the configurations icon next to the cluster public endpoint.
Read the information and click Disable in the Disable Public Endpoint dialog box.
Private endpoints only impact data plane access. Control plane can still be accessed over the public internet.
After you re-enable the public endpoint, you may need to wait until the local DNS cache to expire before you can access the public endpoint.
FAQ
Can I create a private endpoint for an existing cluster?
Yes. When you create a private endpoint, it will take effect on all existing and future Dedicated (Enterprise) clusters that reside in the same region and project. All you need to do is to add different DNS records for different clusters.