Set up a Private Service Connect (GCP)
This guide demonstrates the procedure for setting up a private link from a Zilliz Cloud cluster to your service hosted in different GCP VPCs.
This feature is available only to Dedicated clusters.
A private link is set up at the project level and is effective for all clusters deployed within the same cloud provider and region under this project.
Zilliz Cloud does not charge you for private links. However, your cloud provider may charge you for each endpoint that you create to access Zilliz Cloud.
Before you start
Make sure the following condition is met:
- Suppose your service and Zilliz Cloud cluster are in different regions and you want the service to access the cluster through a Private Service Connect endpoint. In that case, you must enable global access for the endpoint when creating it.
Create private endpoint
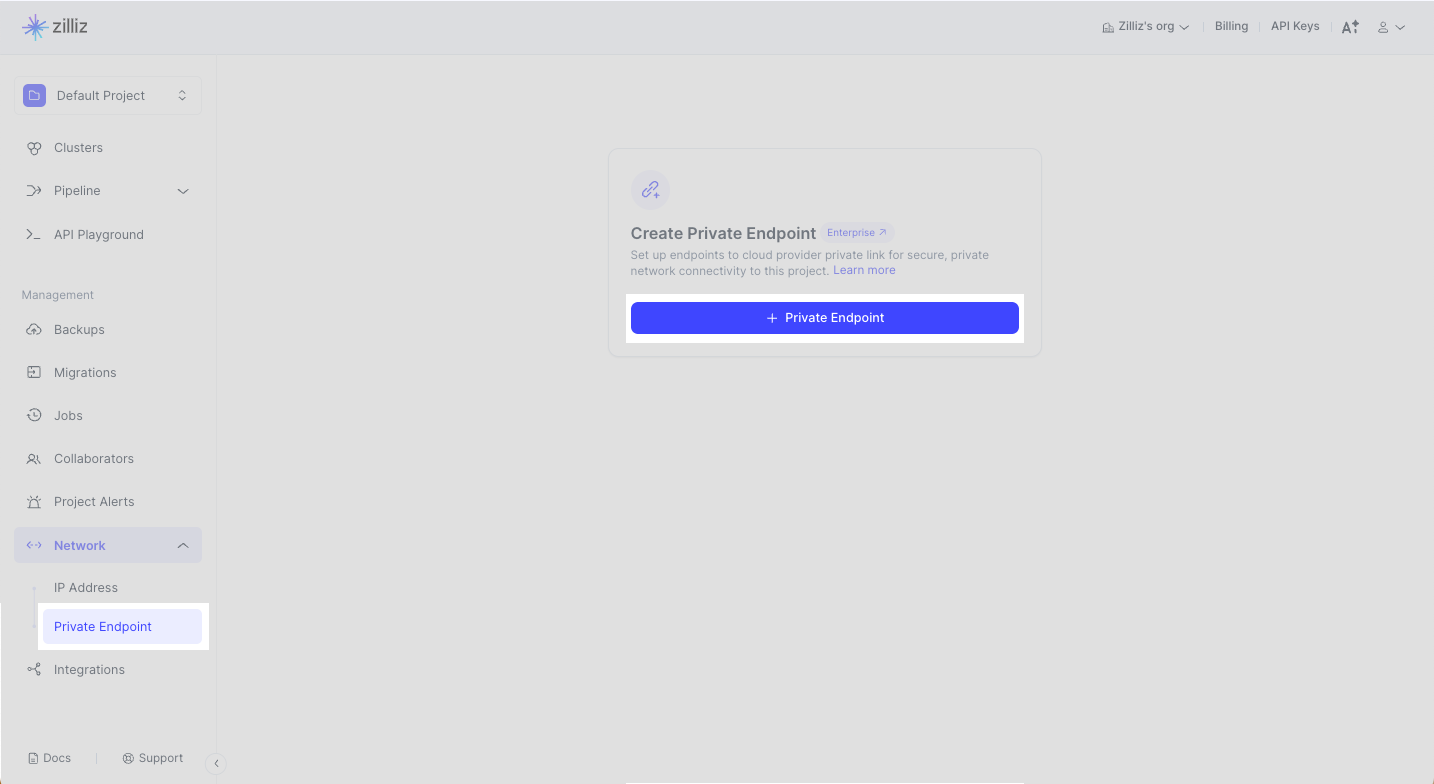
Zilliz Cloud offers you an intuitive web console to add a private endpoint. Navigate to your target project and click Network > Private Endpoint in the left navigation. Click + Private Endpoint.
Select a cloud provider and region
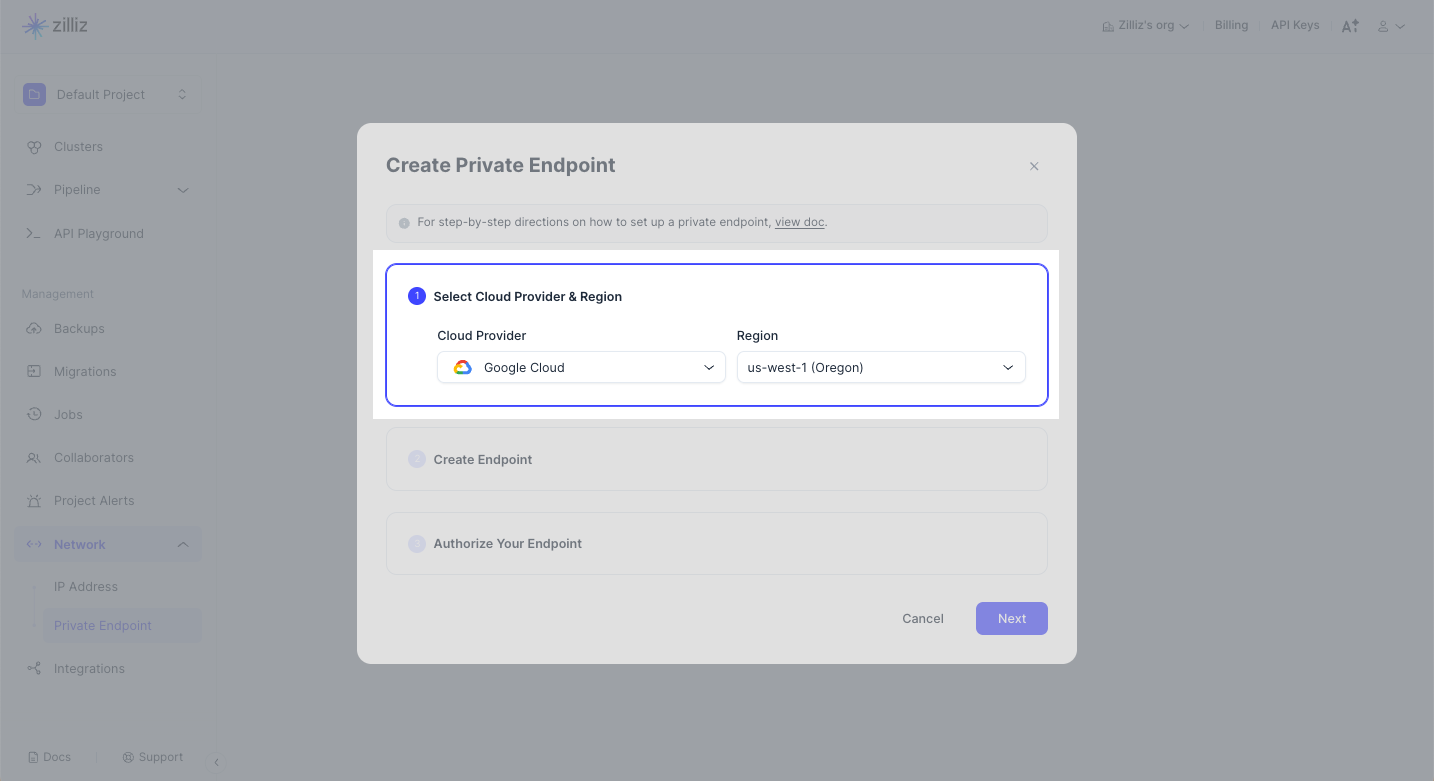
To create a private endpoint for a cluster deployed in a GCP region, select GCP from the Cloud Provider drop-down list. In Region, select the region that accommodates the cluster you want to access privately. Click Next.
For more information on available cloud providers and regions, see Cloud Providers & Regions.
Create an endpoint
You can create an endpoint either via the Google Cloud Dashboard (via UI Console) or via the gCloud CLI (via CLI). Ensure that you have already created a VPC and are running your service that needs to connect to Zilliz Cloud within that VPC before following the steps below.
Via UI console
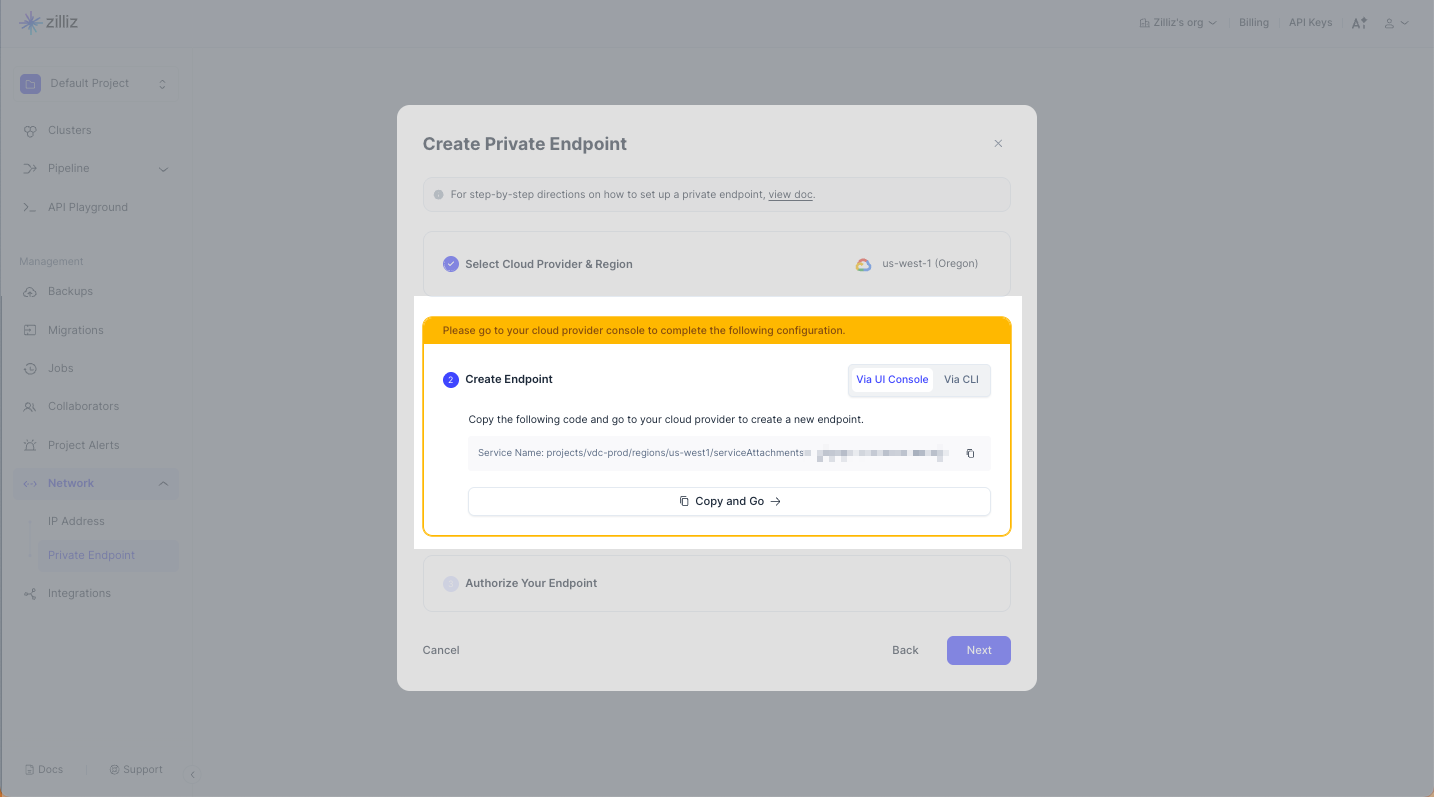
Click Copy and Go on the Zilliz Cloud console to open the Private Service Connect list on GCP and follow the steps below to create an endpoint:
On the Private Service Connect page that opens, click + Connect endpoint.
For Target, select Published service.
For Target Service, paste the one you copied from the Zilliz Cloud console.
For Endpoint name, enter a name to use for the endpoint.
Select a Network for the endpoint. Your service that needs to connect to Zilliz Cloud clusters must be running within the specified VPC.
Select a Subnetwork for the endpoint.
Select an IP address for the endpoint or create a new one.
If your service and the target Zilliz Cloud cluster are in different regions and you want the service to access the cluster through a Private Service Connect endpoint, select Enable global access for the endpoint.
Select a Namespace from the drop-down list or create a new namespace.
Click Add endpoint.
Copy the endpoint name and go back to the Zilliz Cloud console.
Via CLI
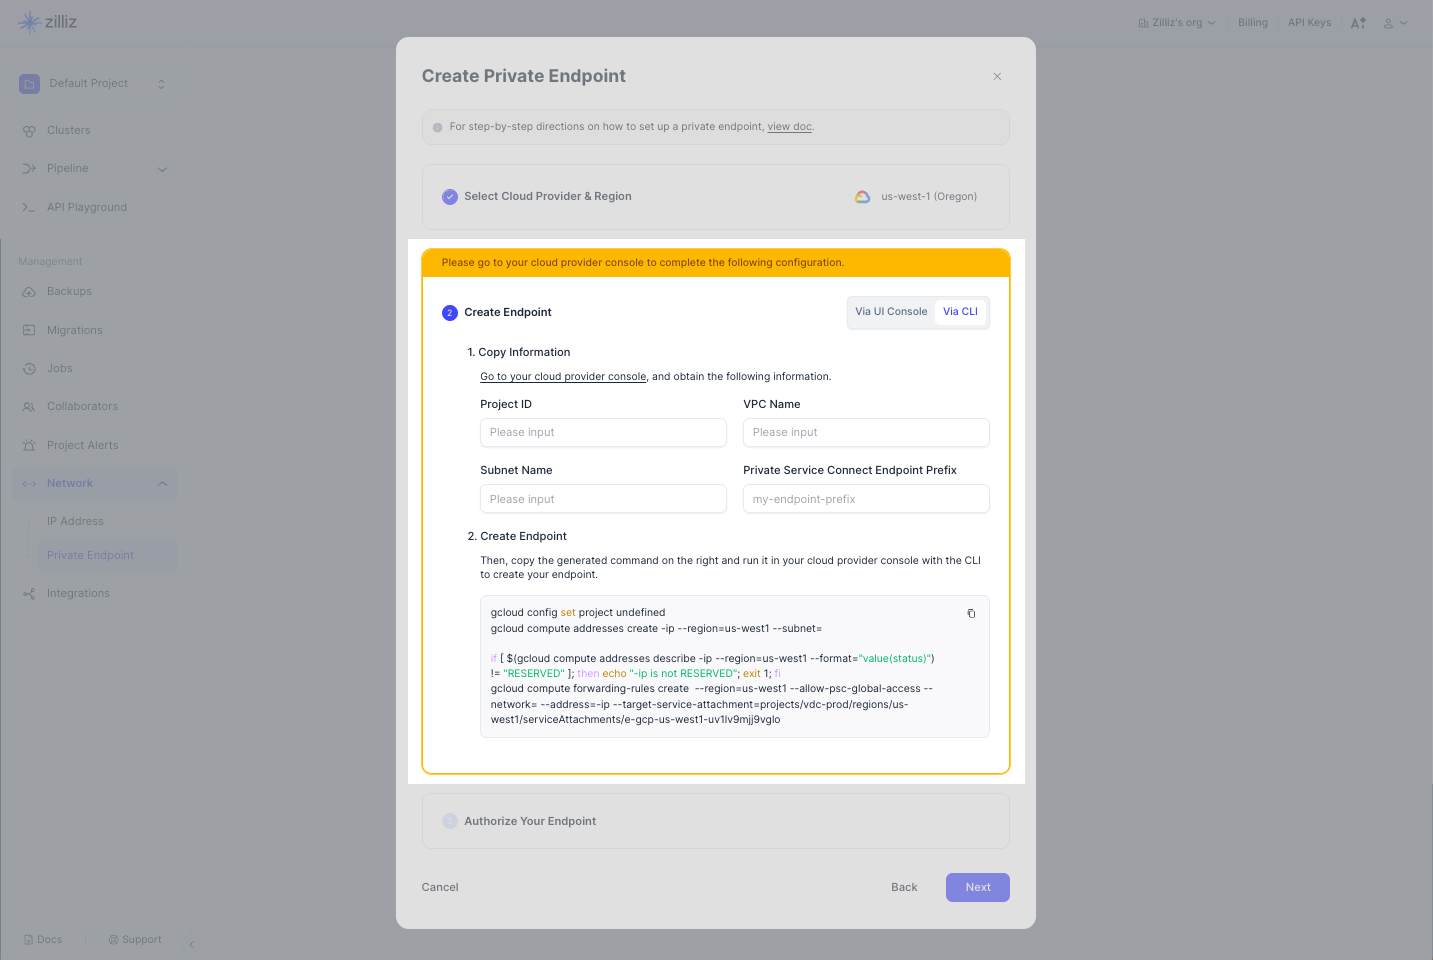
Switch to the Via CLI tab.
Enter the Project ID.
To obtain a Google Cloud project ID,
-
Open the Google Cloud Dashboard.
-
Find the Project ID of your desire and copy its ID.
-
Enter this ID in Google Cloud Project ID on Zilliz Cloud.
Enter the VPC Name.
Before creating a VPC endpoint, you need to have a VPC on your GCP console. To view your VPCs, do as follows:
-
Open the Google Cloud VPC Dashboard.
-
In the navigation pane, choose VPC networks.
-
Find the VPC of your desire and copy its Name.
-
Enter this name in VPC Name on Zilliz Cloud.
To create a VPC network, see Create and manage VPC networks.
Enter the Subnet Name.
Subnets are sub-divisions of your VPC. You need to have a subnet that resides in the same region as the private link to be created. To view your subnets, do as follows:
-
Open your VPC network list.
-
In the navigation pane, choose VPC networks.
-
Click the name of the VPC of your desire.
-
Find the subnet of your desire and copy its name.
-
Enter this name in Subnet Name on Zilliz Cloud.
Enter the Private Service Connect Endpoint Prefix.
For your convenience, you are required to set an endpoint prefix in Private Service Connect Endpoint prefix so that any forwarding rules you create will have this prefix.
Click the copy icon in the code block, and go to the Google Cloud Console.
In the top navigation, launch Google Cloud Cloud Shell. Run the CLI command you just copied from Zilliz Cloud in the Cloud Shell.

When the endpoint is created, navigate to the Google Cloud Private Service Connect page and copy the name of the endpoint you just created.
Authorize your endpoint
Paste the endpoint ID and project ID you obtained from the Google Cloud console into the Endpoint ID and Project ID box respectively on Zilliz Cloud. Click Create.
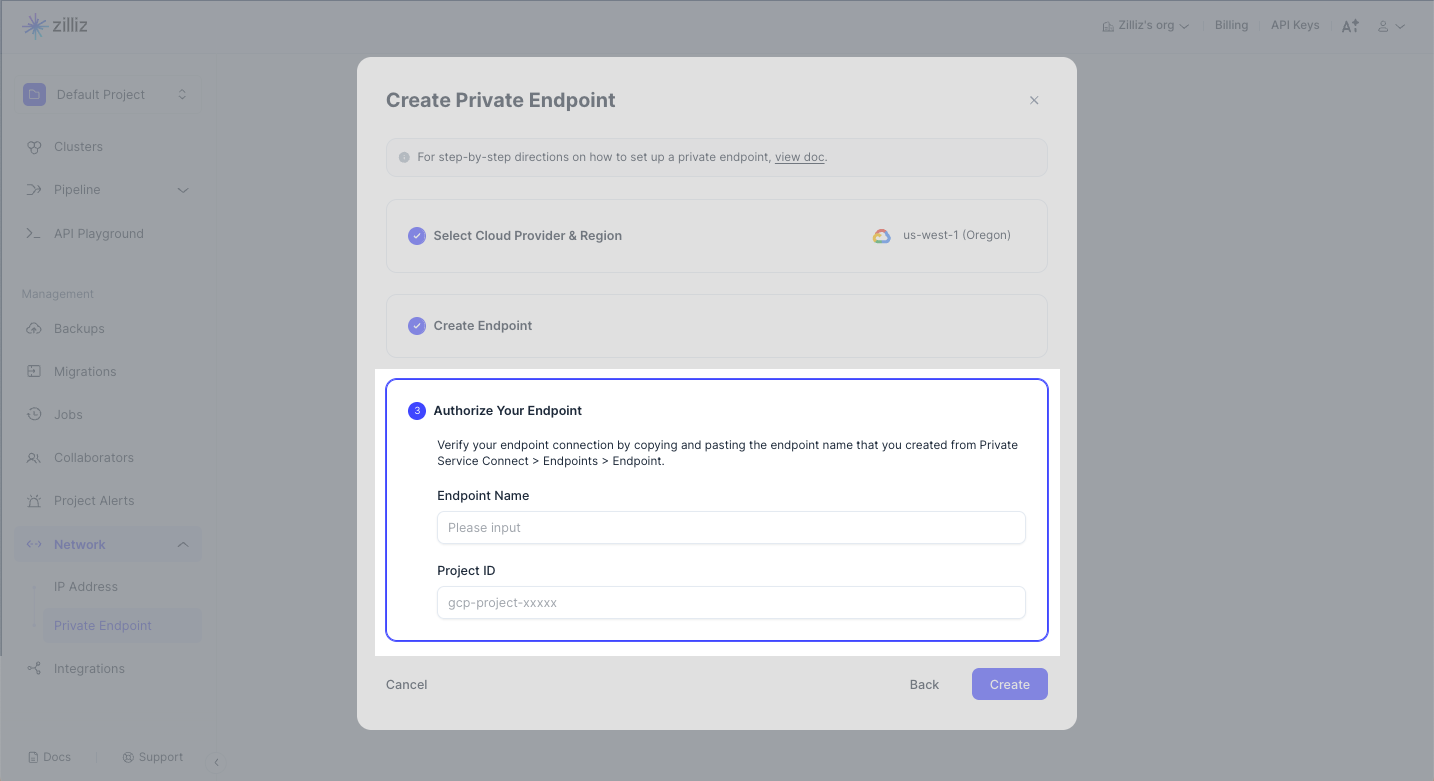
Obtain a private link
After verifying and accepting the preceding attributes you have submitted, Zilliz Cloud allocates a private link for this endpoint. This process takes about 5 minutes.
When the private link is ready, you can view it on the Private Link page on Zilliz Cloud.
Set up firewall rules and a DNS record
Before you can access your cluster via the private link allocated by Zilliz Cloud, it is necessary to create a CNAME record in your DNS zone to resolve the private link to the DNS name of your VPC endpoint.
Create firewall rules
To allow private access to your managed cluster, add appropriate firewall rules. The following snippet shows how to allow traffic through TCP port 22. Note that you need to set VPC_NAME to the name of your VPC.
VPC_NAME={{vpc-name}};

gcloud compute firewall-rules create psclab-iap-consumer --network $VPC_NAME --allow tcp:22 --source-ranges=35.235.240.0/20 --enable-logging
Create a hosted zone using Cloud DNS
Go to Cloud DNS in your GCP console and create a DNS zone.
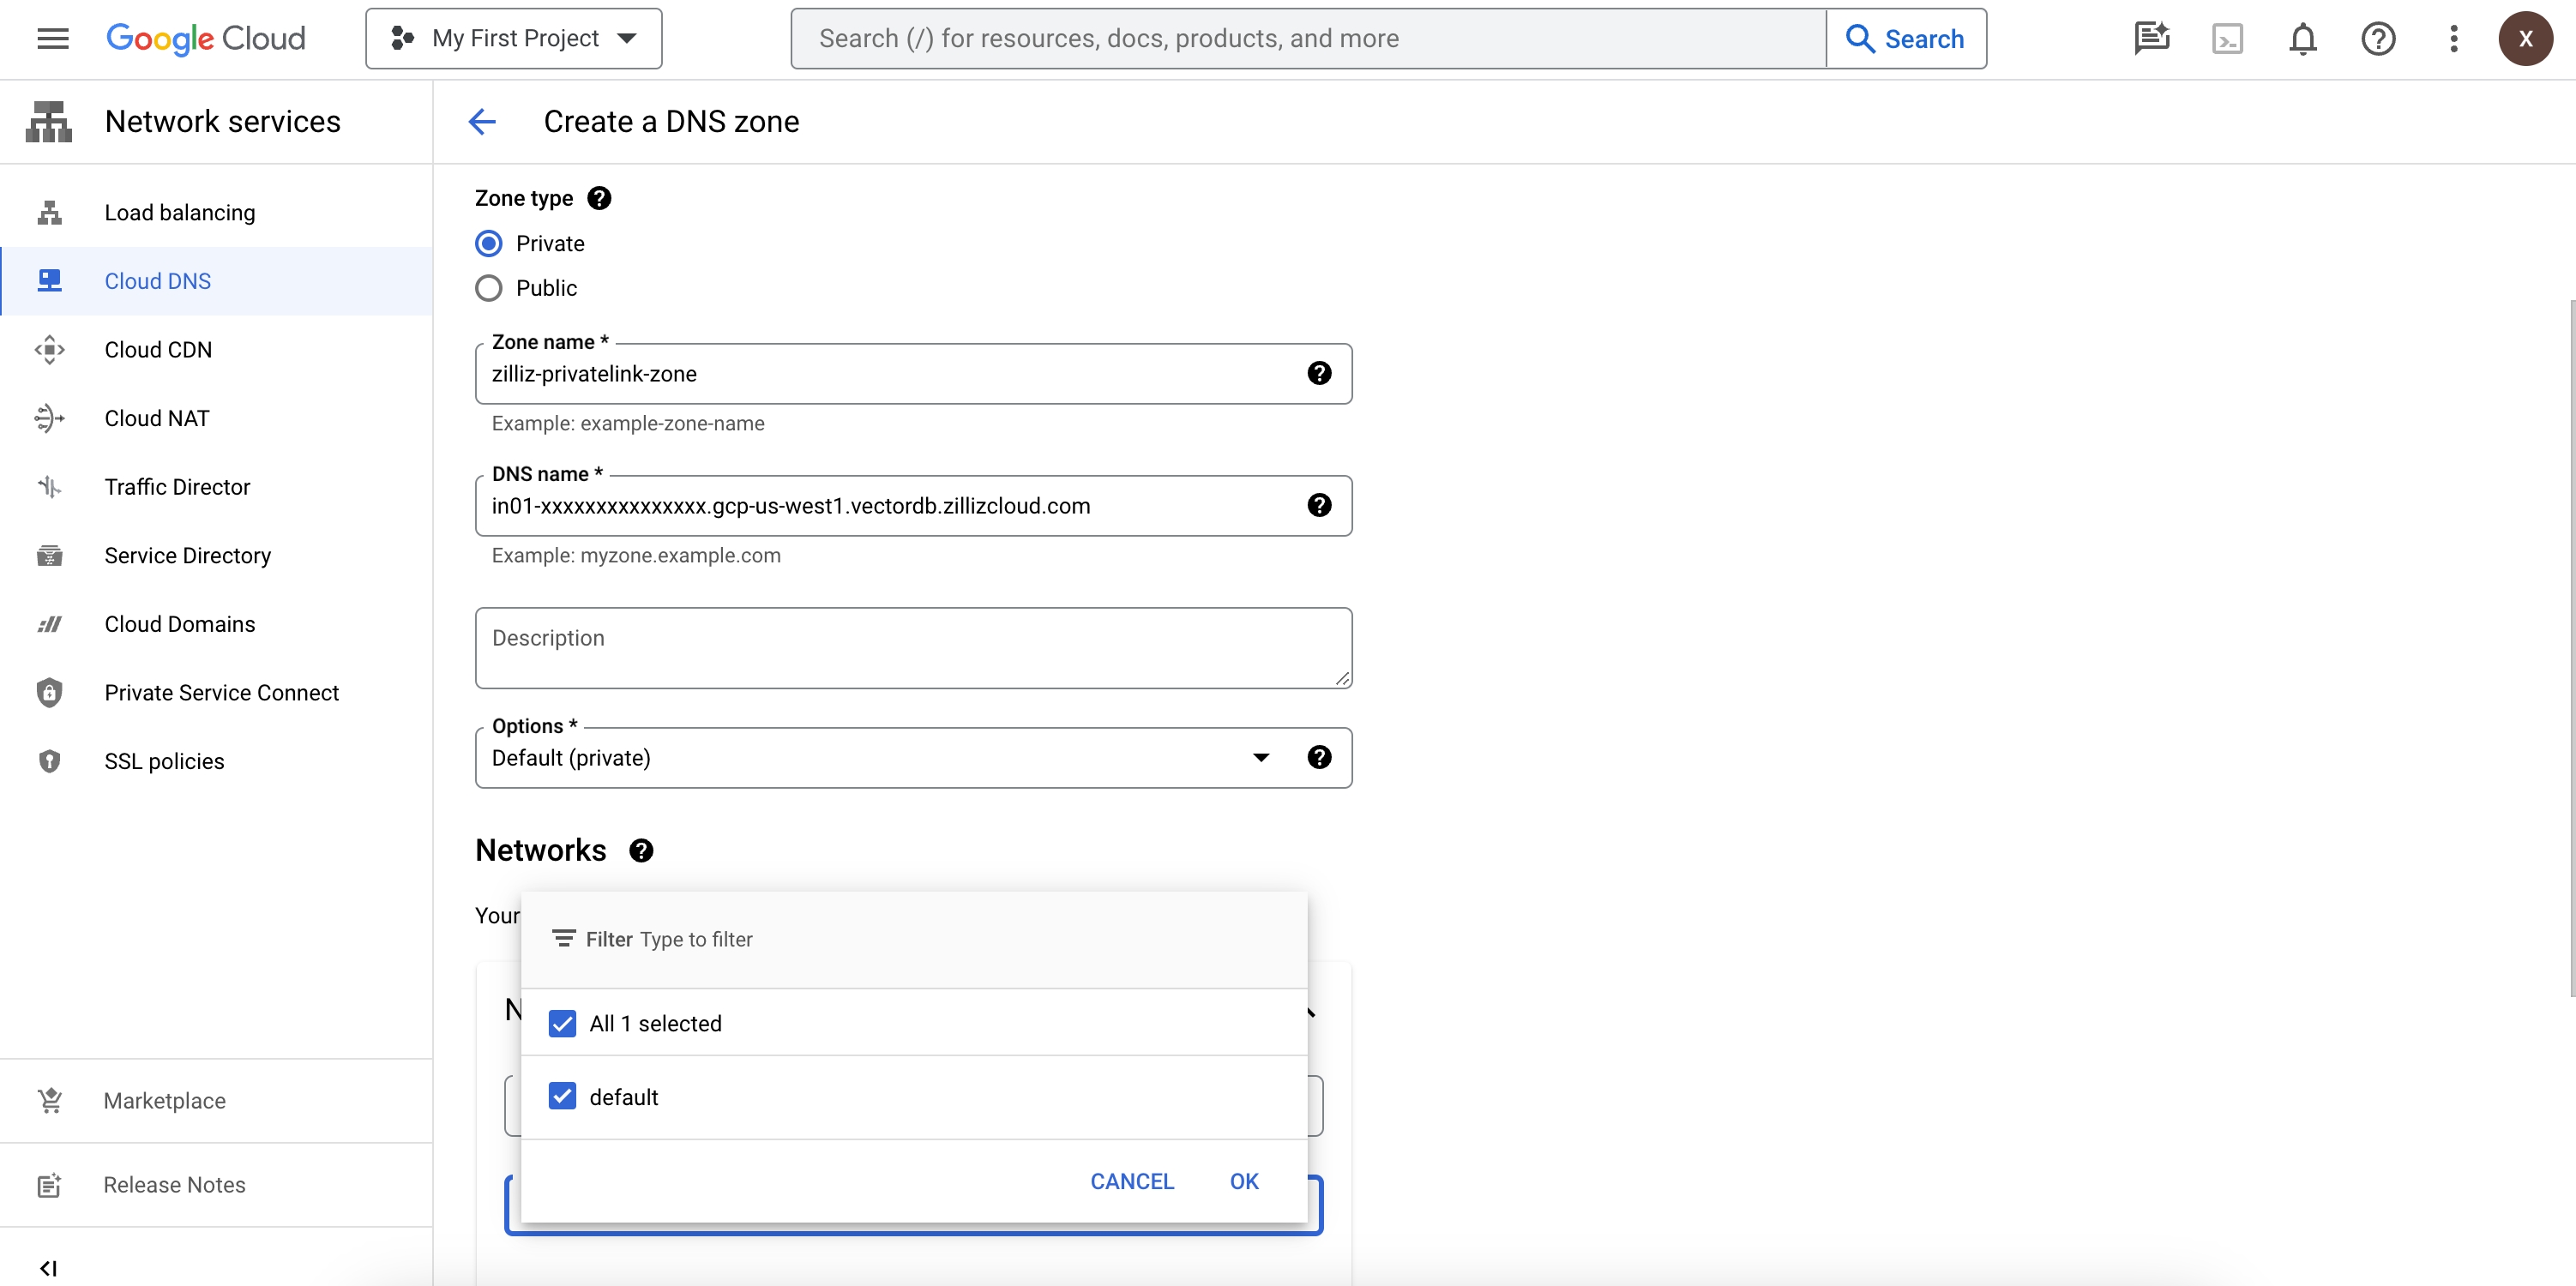
Select Private in Zone type.
Set Zone name to zilliz-privatelink-zone or other values that you see fit.
Set DNS name to the private link obtained in step 7.
A valid DNS name is similar to in01-xxxxxxxxxxxxxxx.gcp-us-west1.vectordb.zillizcloud.com.
Select the proper VPC network in Networks.
Click CREATE.
Create a record in the hosted zone
In the zone created above, click ADD STANDARD in the RECORD SETS tab.
On the Create record set page, create an A record with the default settings.
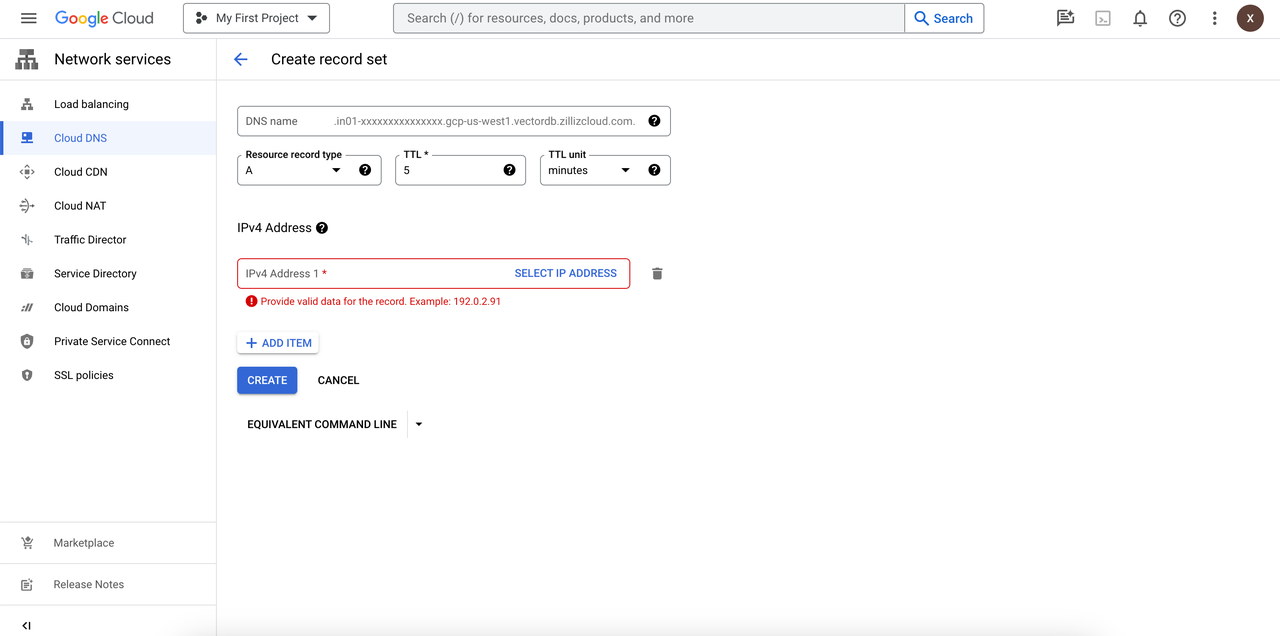
Click SELECT IP ADDRESS in IPv4 Address, and select the IP address of your endpoint.
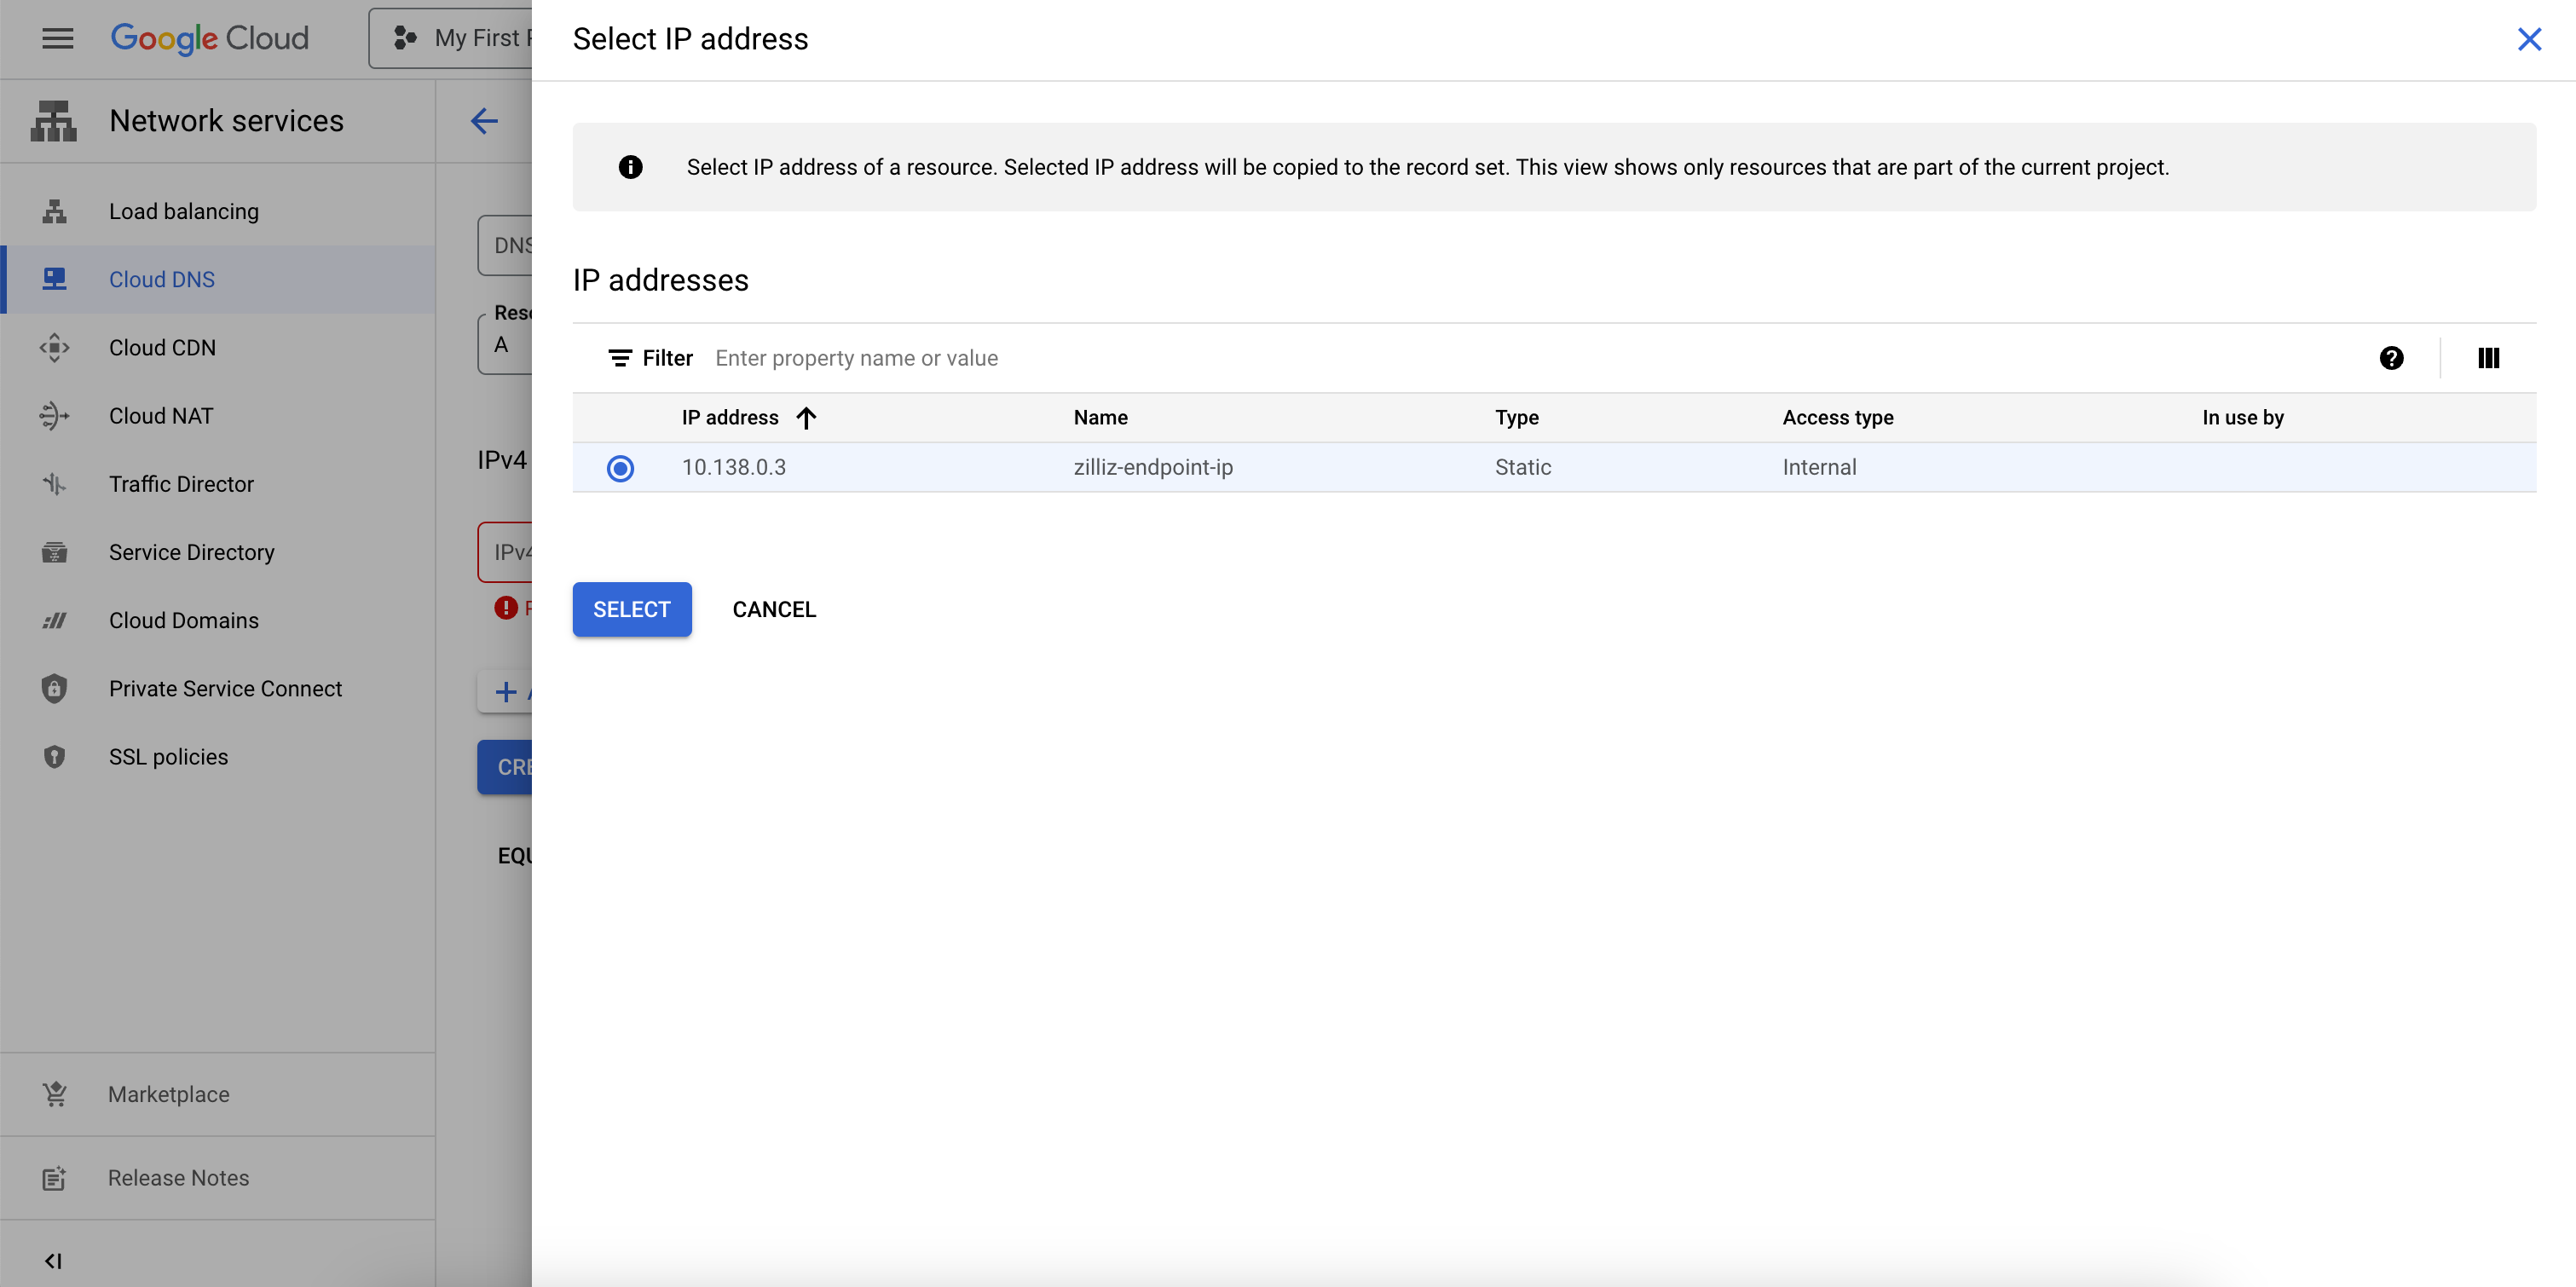
Click CREATE.
Manage internet access to your clusters
After configuring your private endpoint, you can choose to disable the cluster public endpoints to restrict internet access to your project. Once you have disabled the public endpoint, users can only connect to the cluster using the private link.
To disable public endpoints:
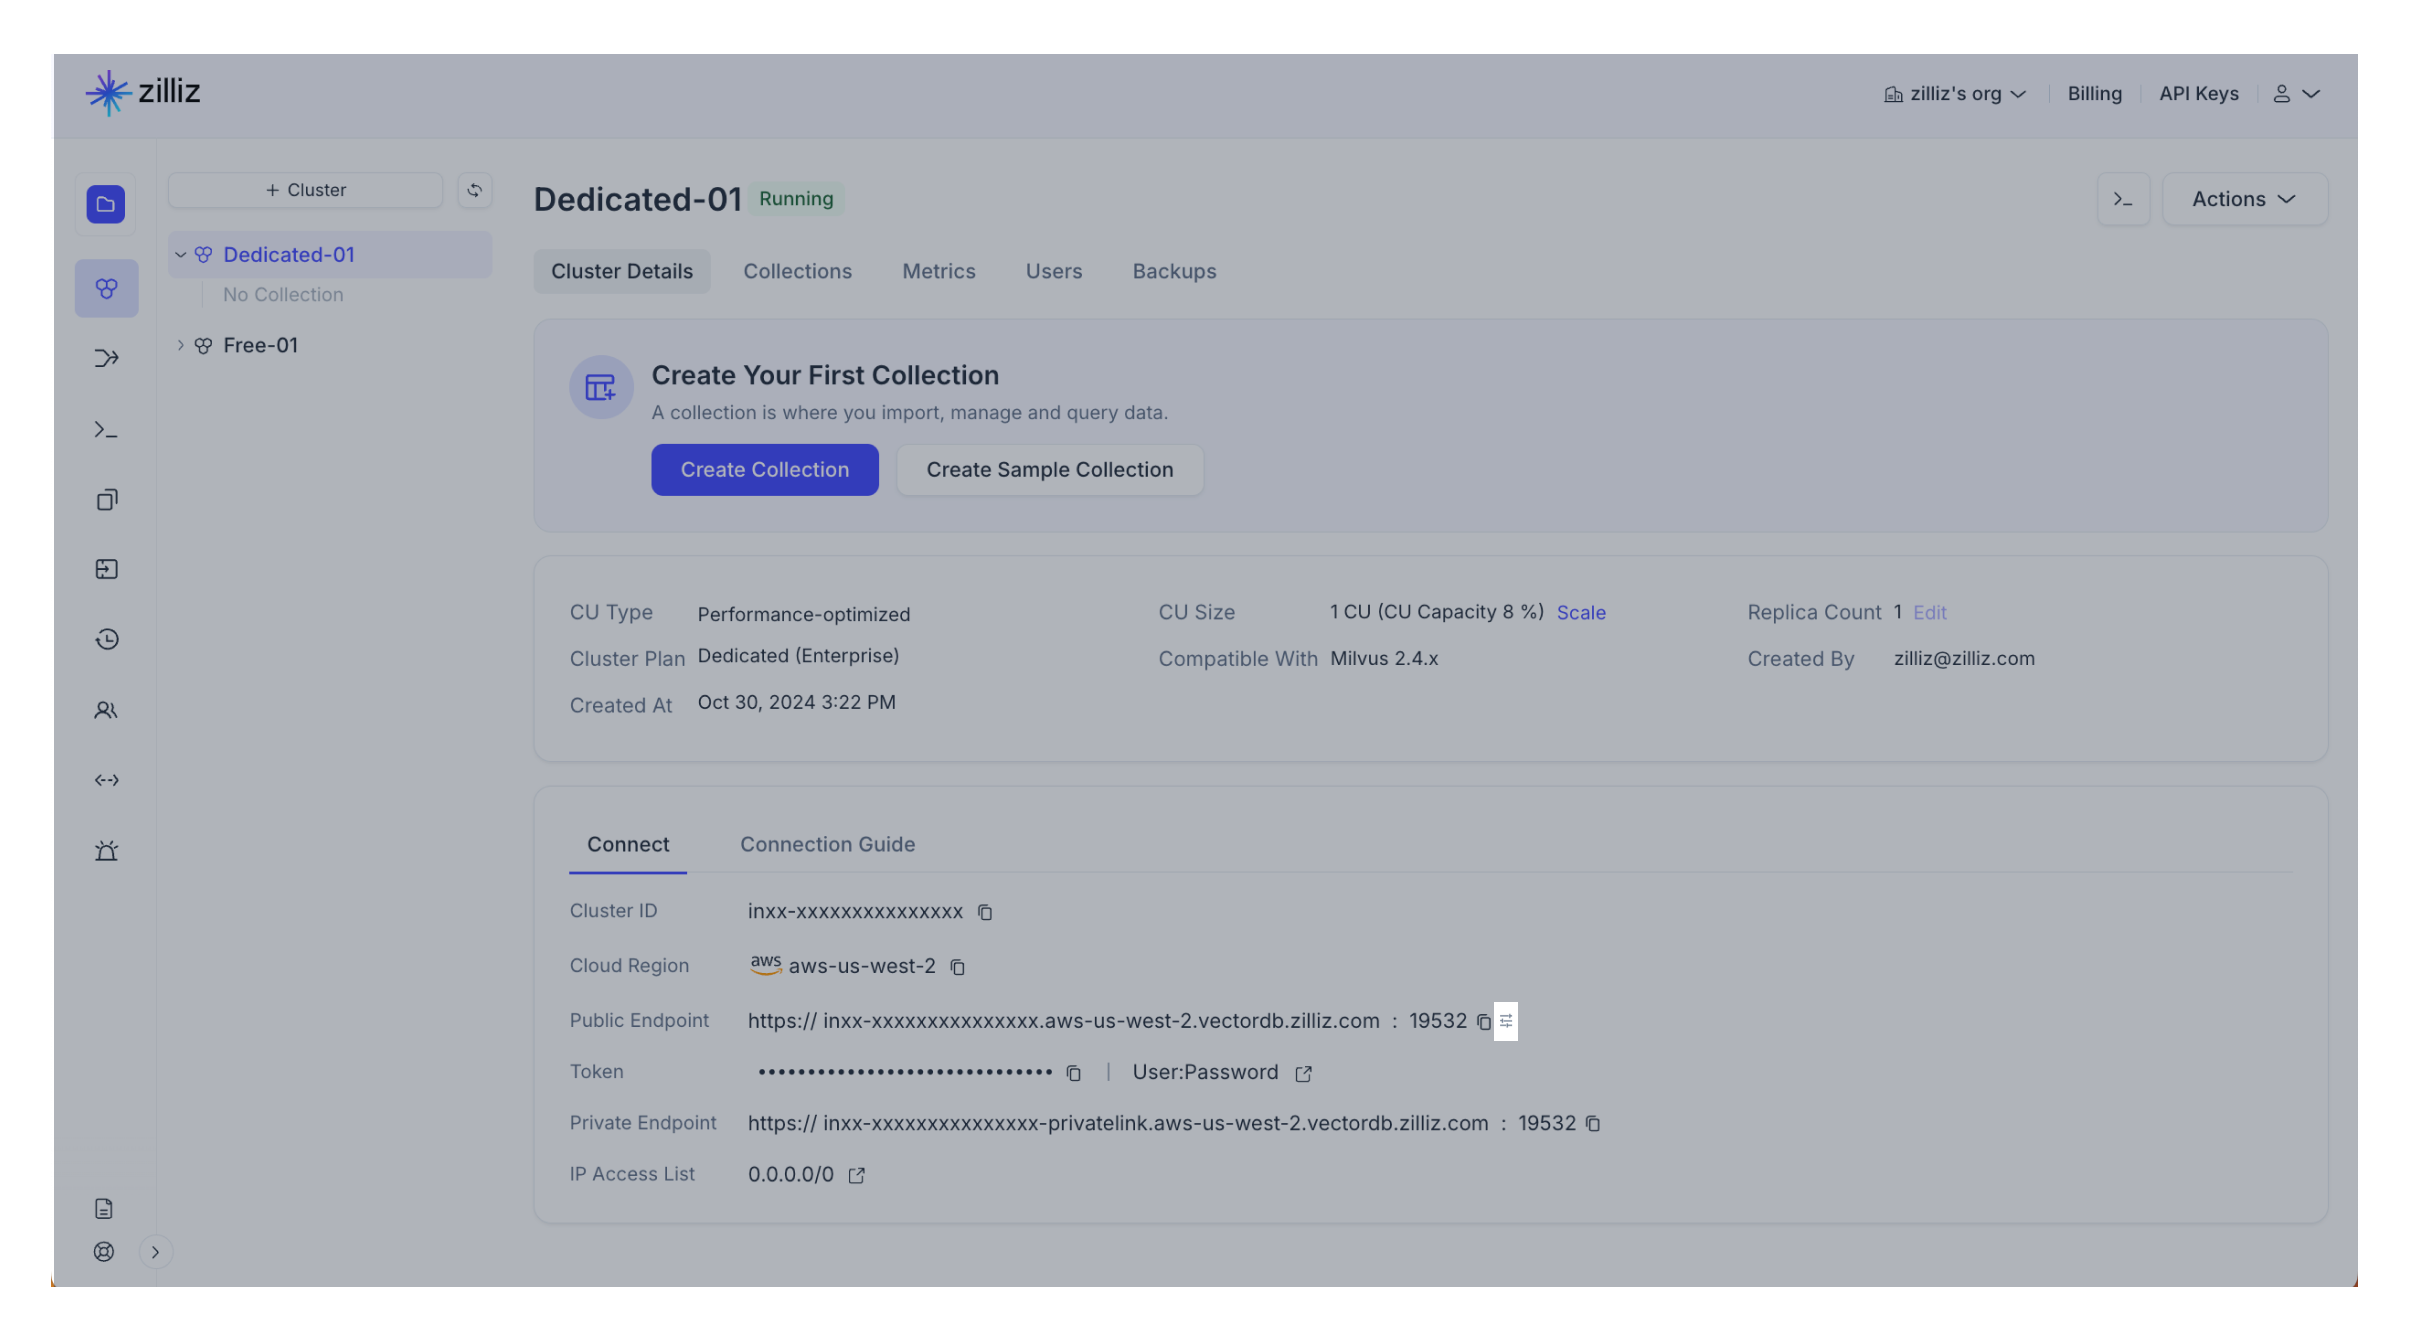
Go to the Cluster Details page of your target cluster.
Navigate to the Connection section.
Click on the configurations icon next to the cluster public endpoint.
Read the information and click Disable in the Disable Public Endpoint dialog box.
Private endpoints only impact data plane access. Control plane can still be accessed over the public internet.
After you re-enable the public endpoint, you may need to wait until the local DNS cache to expire before you can access the public endpoint.
FAQ
Why does it always report Name or service not known when I ping the private link on GCP?
Check your DNS settings by referring to Set up firewall rules and a DNS record.
-
If the configuration is correct, when you ping your private link, you should see

-
If the configuration is incorrect, when you ping your private link, you may see

Can I create a private endpoint for an existing cluster?
Yes. When you create a private endpoint, it will take effect on all existing and future Dedicated (Enterprise) clusters that reside in the same region and project. All you need to do is to add different DNS records for different clusters.