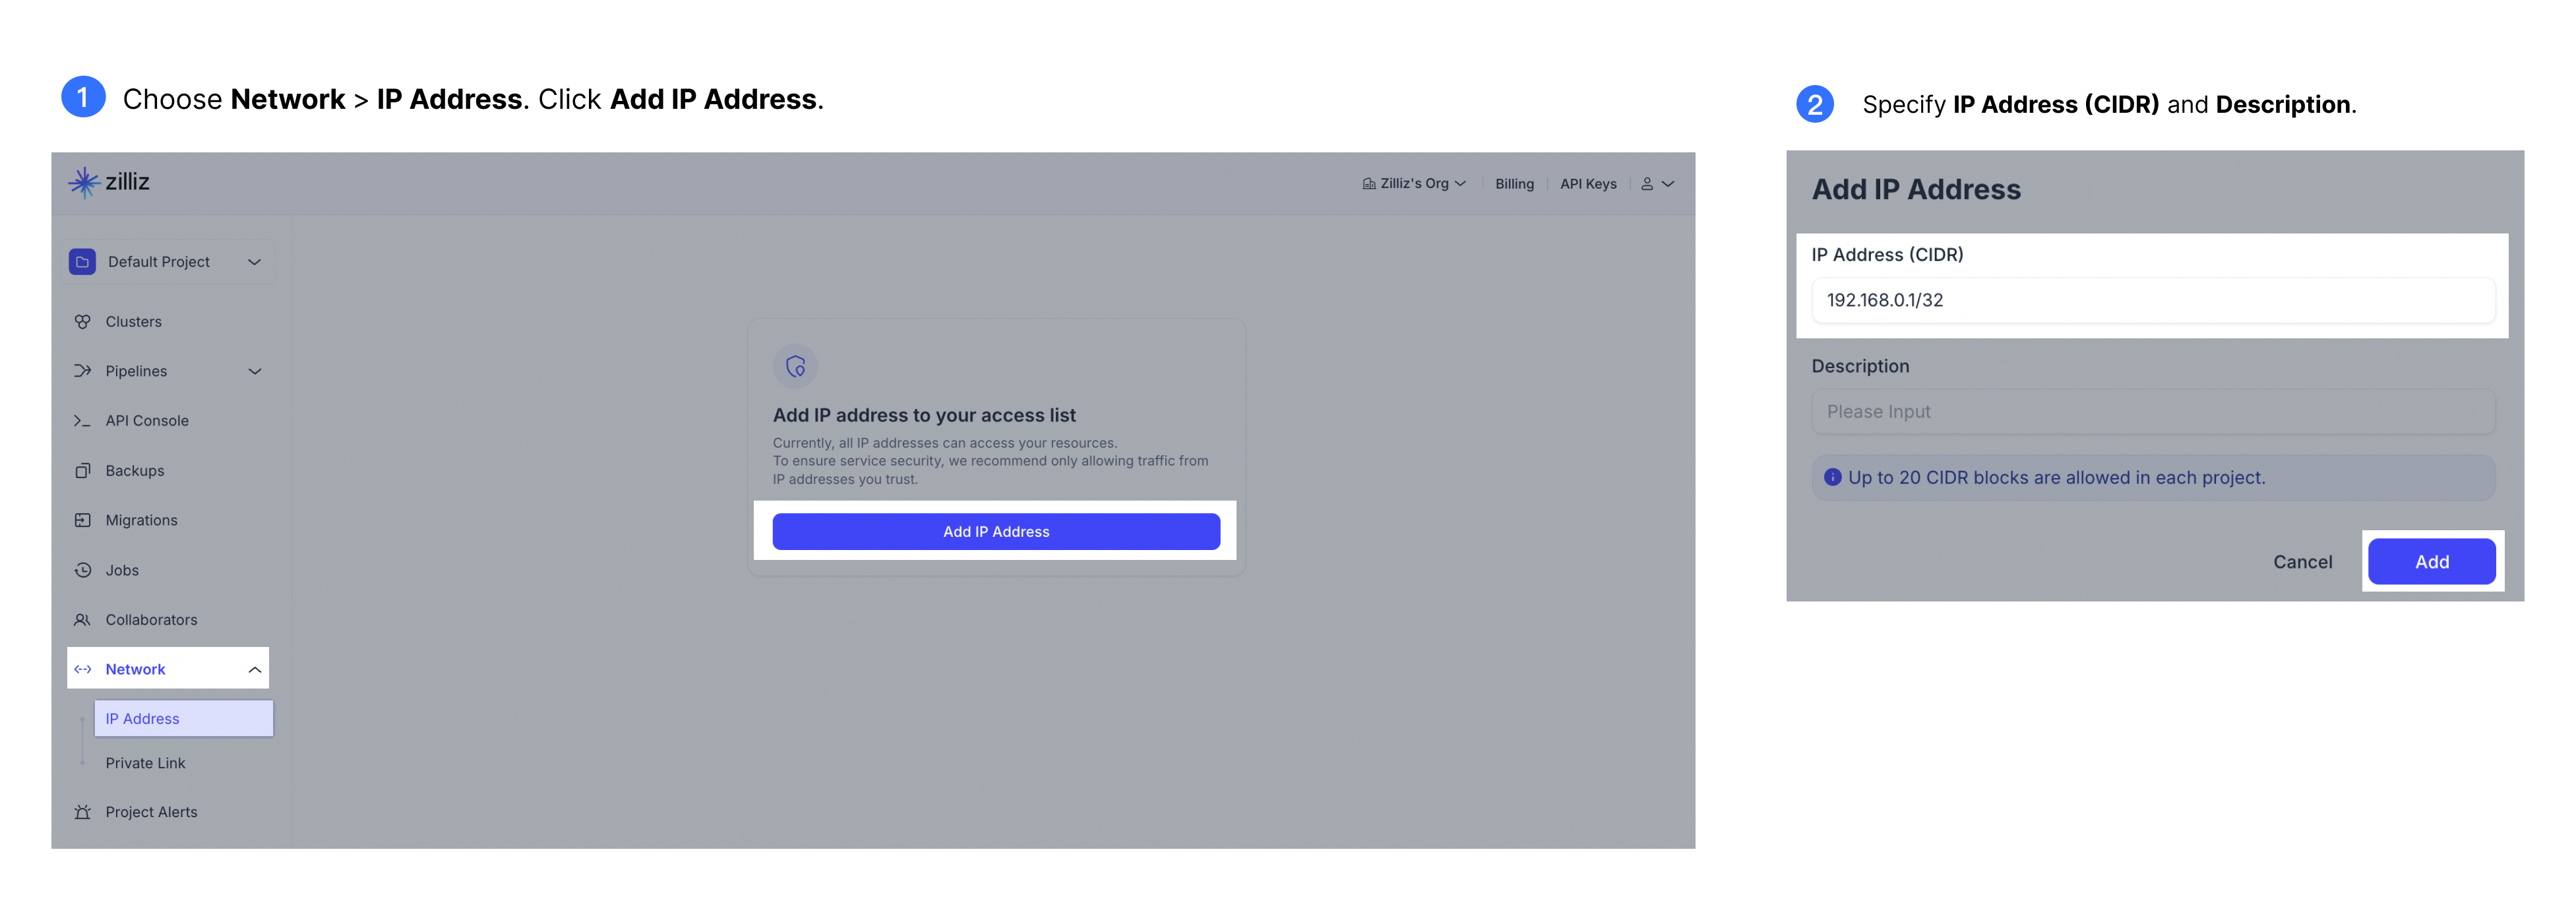
Set up Cluster IP Allowlist
Cluster IP allowlist on Zilliz Cloud serves as a robust security layer at the project level, extending its benefits to every cluster within a specified project. By implementing an IP allowlist, you effectively narrow down access to your project’s clusters to a select group of IP addresses, substantially mitigating the risk of malicious attacks.
Before you start
Ensure the following prerequisites are met before proceeding:
-
You have signed up for Zilliz Cloud. For information on how to register an account, see Register with Zilliz Cloud.
-
You are the owner of the organization or project in which you want to set up a cluster IP allowlist. For information on roles and permissions, see Manage Organization Users and Manage Project Users.
Procedure
Log in to the Zilliz Cloud console.
Navigate to the specific organization and project where the allowlist is to be configured.
In the left-side navigation pane, choose Security > Cluster IP Allowlist**.
Click Add IP Address.
In the dialog box that appears, specify IP Address (CIDR) and Description.
The following table describes the fields.
Field | Description |
|---|---|
IP Address (CIDR) | The IP addresses or CIDR block that you want to add to the allowlist. Up to 100 CIDR blocks are allowed. Example value: 192.168.1.1/20. |
Description | The description of the IP addresses or CIDR block to add to the allowlist. |
Click Add.
Without any entries in the allowlist, Zilliz Cloud allows access from any IP address.
Upon adding a CIDR block, cluster access is exclusively limited to the IP addresses within that block.
Adding 0.0.0.0/0 equates to having an empty allowlist.
