MCP Server
Zilliz Cloud provides an MCP server that enables AI agents to interact with Zilliz Cloud seamlessly through the standardized Model Context Protocol (MCP). This page guides you through setting up the Zilliz MCP Server locally and using it with your preferred AI agents.
Before you start
Ensure that you have
-
Obtained a Zilliz Cloud API key.
You can create a one by following the guides on this page.
-
Installed Python 3.10 or a later version.
To check the installed Python version, run the following command in your terminal:
python3 -VFor available Python releases, refer to the download page.
-
Installed uv and added it to your PATH.
To check the installed uv version, run the following command in your terminal:
uv -VYou can install it by following the guides on this page.
Procedure
To run Zilliz MCP Server, you need to prepare the configuration and add it to your preferred AI agents.
Step 1: Prepare Zilliz MCP Server configuration
You can configure Zilliz MCP Server in either of the following modes:
Local mode (Standard Input/Output)
In this mode, Zilliz MCP Server is running locally along with your preferred AI agent on the same machine, and the AI agent manages Zilliz MCP Server's lifecycle directly.
Once you have installed Python and uv on the machine where your AI agent runs, you can use the following server configuration after you replace YOUR-API-KEY with a valid Zilliz Cloud API key that has sufficient permissions.
{
  "mcpServers": {
    "zilliz-mcp-server": {
      "command": "uvx",
      "args": ["zilliz-mcp-server"],
      "env": {
          "ZILLIZ_CLOUD_TOKEN": "YOUR-API-KEY"
      }
    }
  }
}
Server mode (Streamable HTTP)
If you prefer to share Zilliz MCP Server among multiple AI agents running on different machines, run Zilliz MCP Server in server mode. This requires you to clone the Zilliz MCP Server repository and start the server on a separate machines before preparing the configurations.
Clone the Zilliz MCP Server repository.
git clone https://github.com/zilliztech/zilliz-mcp-server.git
cd zilliz-mcp-server
Create the environment variable file (.env).
cp example.env .env
Add your Zilliz Cloud API key to the .env file.
The .env file is similar to the following. Append a valid Zilliz Cloud API key with sufficient permissions to the end of ZILLIZ_CLOUD_TOKEN=.
# Zilliz MCP Server Configuration
# Copy this file to .env and fill in your actual values

# Zilliz Cloud Configuration

ZILLIZ_CLOUD_TOKEN=
ZILLIZ_CLOUD_URI=https://api.cloud.zilliz.com
ZILLIZ_CLOUD_FREE_CLUSTER_REGION=gcp-us-west1

# MCP Server Configuration

# Port for MCP server when using HTTP/SSE transports (default: 8000)
MCP_SERVER_PORT=8000
# Host for MCP server when using HTTP/SSE transports (default: localhost)
MCP_SERVER_HOST=localhost
Zilliz MCP Server starts at localhost*:*8000 by default. You can change this by setting MCP_SERVER_HOST and MCP_SERVER_PORT to proper values.
Start Zilliz MCP Server.
uv run src/zilliz_mcp_server/server.py --transport streamable-http
Prepare the server configuration.
Zilliz MCP Server starts at localhost*:*8000 by default. If you have modified the server settings in the .env file above, update the URL in the following configuration with the correct one.
{
  "mcpServers": {
    "zilliz-mcp-server": {
      "url": "http://localhost:8000/mcp",
      "transport": "streamable-http",
      "description": "Zilliz Cloud and Milvus MCP Server"
    }
  }
}
Step 2: Add the configuration to your preferred AI agent
MCP is an open protocol that standardizes how applications provide context to LLMs. Lots of AI-driven applications support it. In this step, you will learn how to add the configuration to Cursor, an AI code editor.
Start Cursor and choose Cursor > Settings > Cursor Settings in the top menu bar.
Choose Tools & Integrations from the left navigation pane.
Click Add Custom MCP. This opens mcp.json.
Copy the configuration prepared in Step 1 and paste it into the open file.
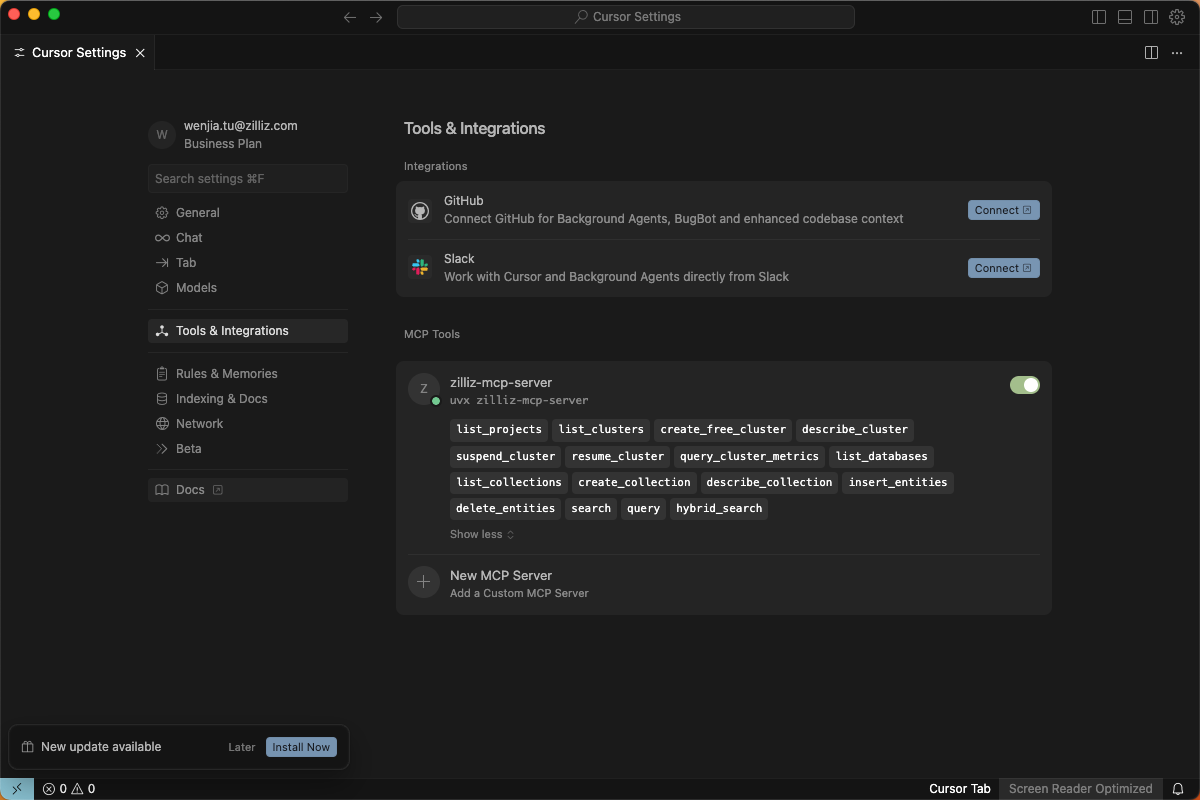
Save the file and go back to Tools & Integrations. You will find Zilliz MCP Server is listed in MCP Tools with available tools for AI agents to call.

The procedures for adding Zilliz MCP Server to your preferred AI applications are very similar. You can follow the instructions specific to your AI applications to add the configuration.
Available Tools
Zilliz MCP Server provides the following tools for you to interact with Zilliz Cloud.
Control plane tools
These tools are used to manage resources, such as projects and clusters, on the control plane.
Tool | Description |
|---|---|
| List all projects in your Zilliz Cloud account. |
| List all clusters within your projects. |
| Create a new, free-tier Milvus cluster. |
| Get detailed information about a specific cluster. |
| Suspend a running cluster to save costs. |
| Resume a suspended cluster. |
| Query various performance metrics for a cluster. |
Data plane tools
These tools are used to manage resources, such as databases and collections, and conduct vector searches on the data plane.
Tool Name | Description |
|---|---|
| List all databases within a specific cluster. |
| List all collections within a database. |
| Create a new collection with a specified schema. |
| Get detailed information about a collection, including its schema. |
| Insert entities (data records with vectors) into a collection. |
| Delete entities from a collection based on IDs or a filter expression. |
| Perform a vector similarity search on a collection. |
| Query entities based on a scalar filter expression. |
| Perform a hybrid search combining vector similarity and scalar filters. |
Troubleshooting
-
Why does my AI agent report that Zilliz MCP Server has zero tools?
This is usually caused by missing certain dependencies, such as Python and uv. Ensure that you have installed them properly. For details, refer to Before you start.