GCP 上に BYOC をデプロイ
このページでは、Zilliz Cloud コンソールとカスタム GCP 構成を使用して、Google Cloud Platform(GCP)Virtual プライベート Cloud(VPC)内に完全に管理された Bring-Your-Own-Cloud(BYOC)データプレーンを手動で作成する方法について説明します。
Zilliz BYOC は現在 一般提供されています。アクセスと実装の詳細については、Zilliz Cloud 営業までお問い合わせください。
このガイドでは、GCP コンソール上で必要なリソースを段階的に作成する方法を説明します。インフラストラクチャのプロビジョニングに Terraform スクリプトを使用する場合は、Terraform Provider を参照してください。
前提条件
-
BYOC 組織オーナーである必要があります。
-
必要な GCP API サービスを有効化している必要があります。
手順
GCP 上に BYOC をデプロイするために、Zilliz Cloud は、お客様が管理する VPC 内の Cloud Storage バケットと GKE クラスターにアクセスするための特定のロールを引き受ける必要があります。その結果、Zilliz Cloud は、これらのインフラストラクチャリソースにアクセスするために必要なロールとともに、Cloud Storage バケット、GKE クラスター、および VPC に関する情報を収集する必要があります。
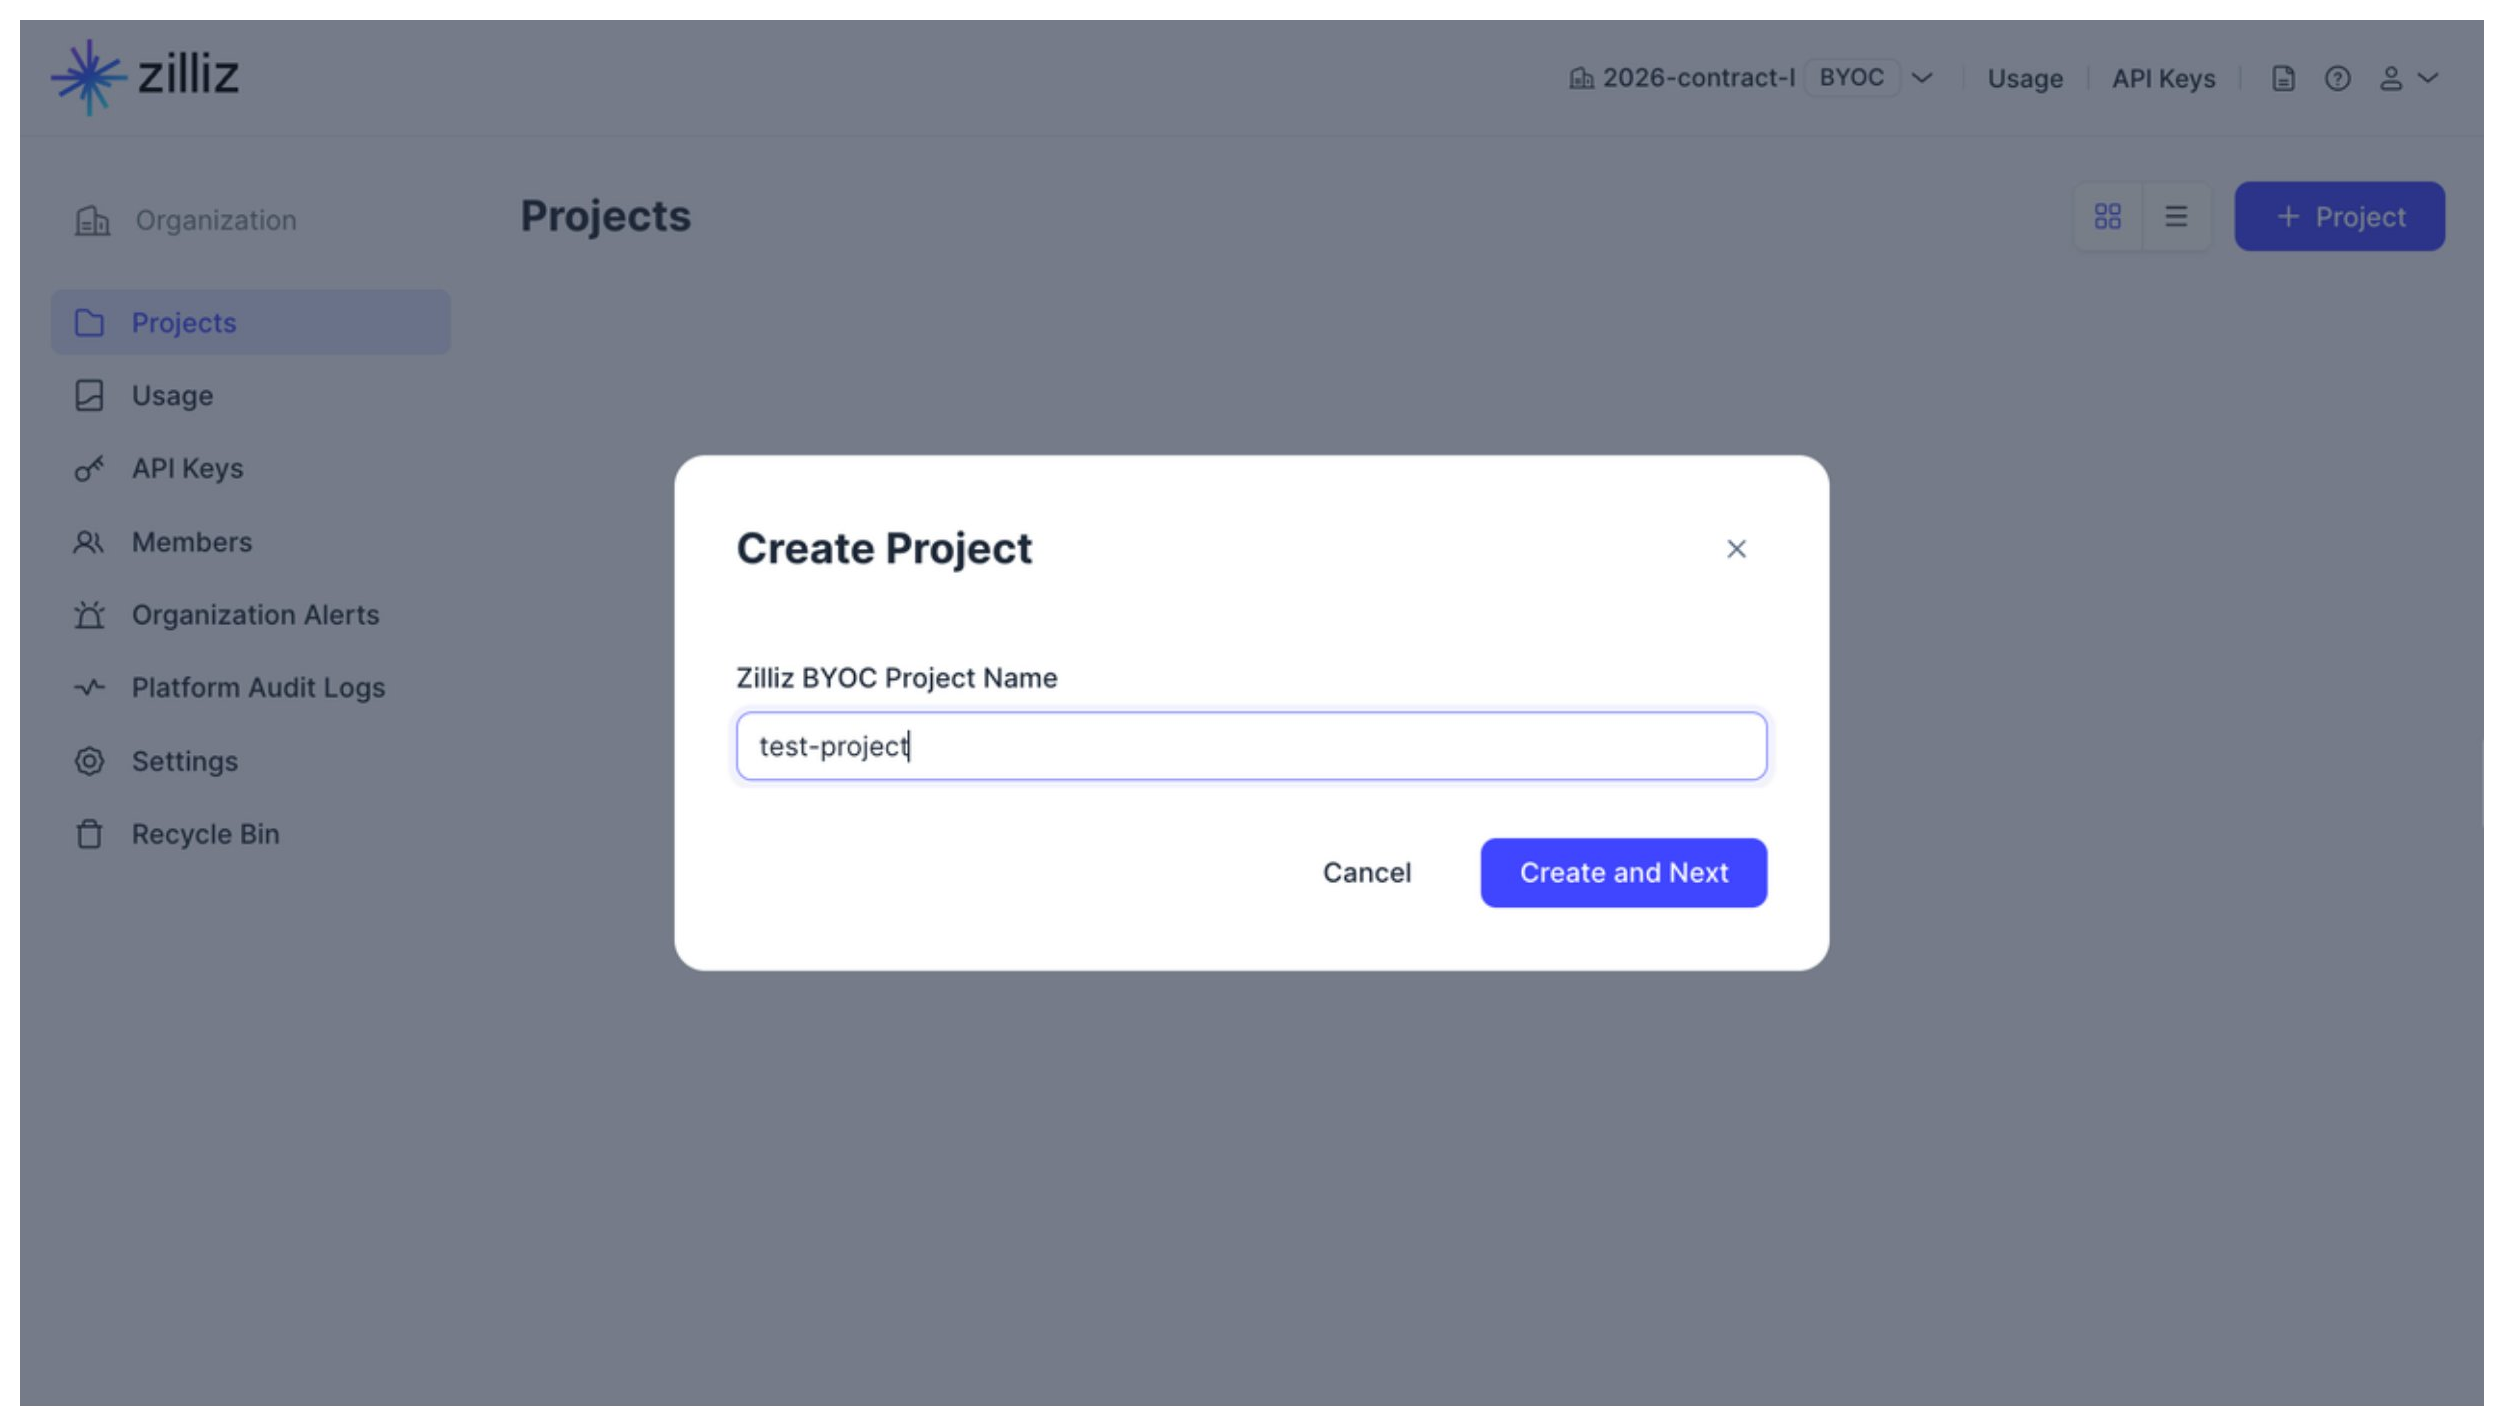
BYOC 組織内で、Create Project ボタンをクリックして、デプロイを開始します。
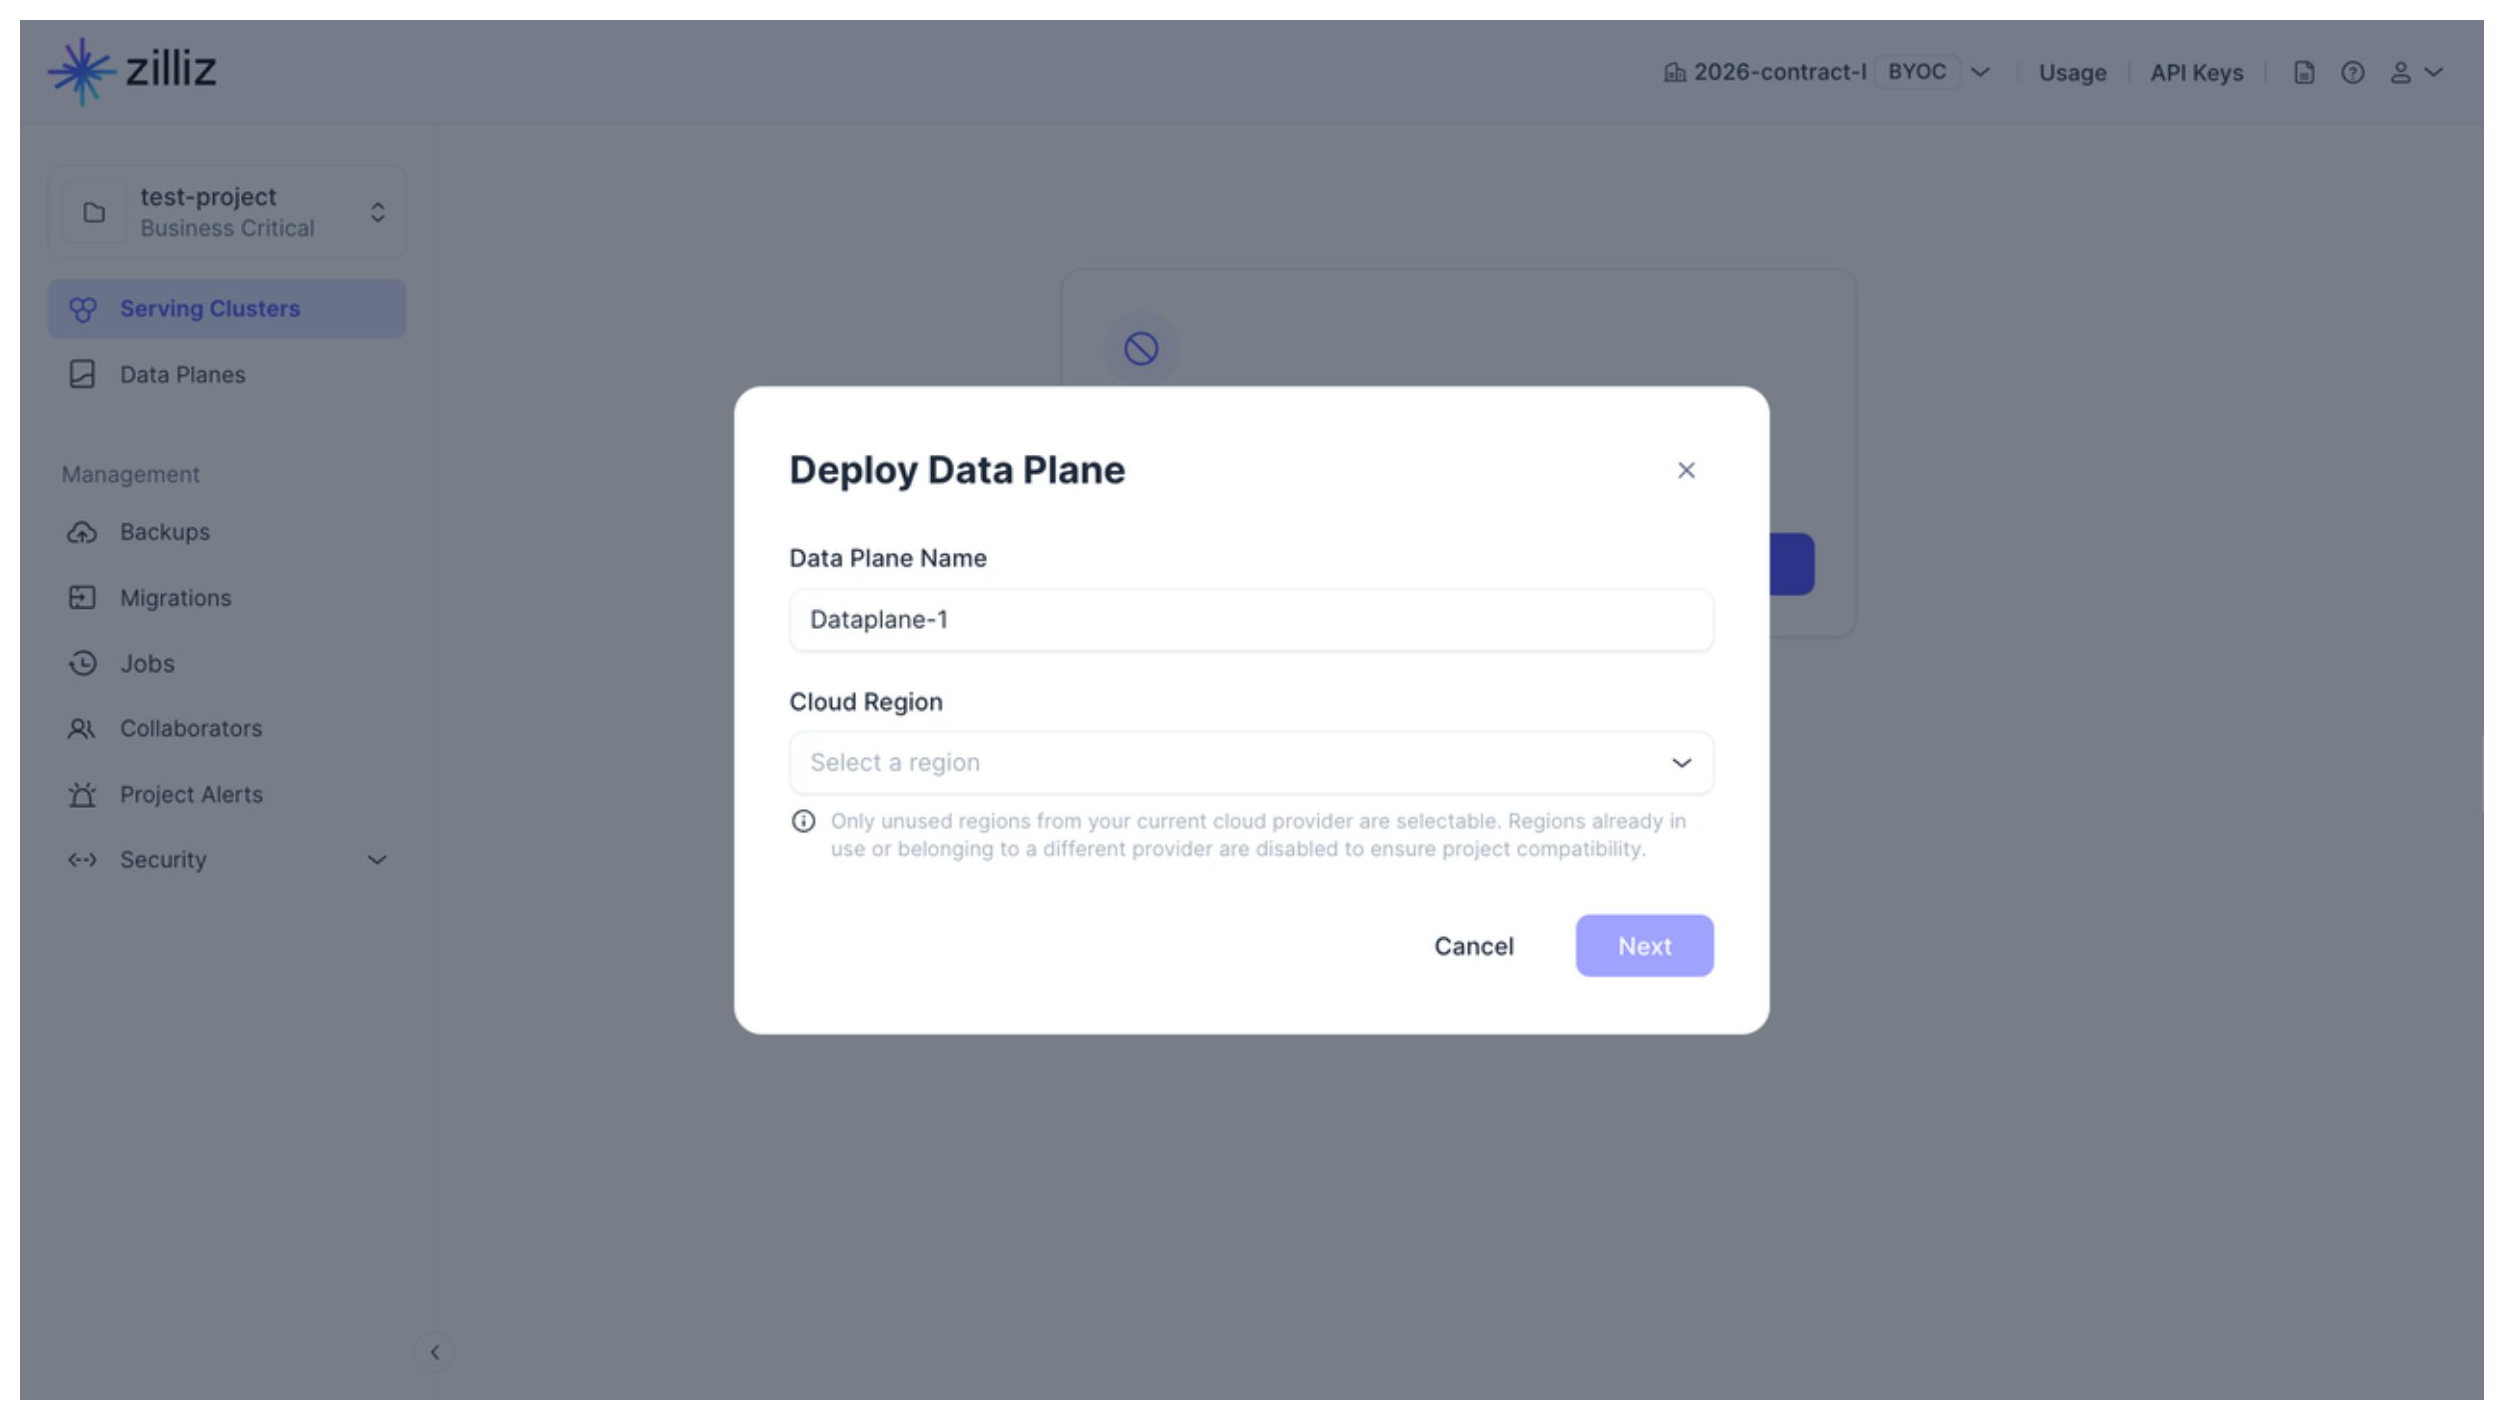
ステップ 1: データプレーンをデプロイする
このステップでは、Zilliz BYOC プロジェクト名、クラウドプロバイダー、クラウドリージョン、初期プロジェクトサイズを決定する必要があります。
Data Plane Name と Cloud Region を設定し、Next をクリックします。
Cancel をクリックするとデータプレーンのデプロイは中止されますが、上記で作成したプロジェクトは保持されます。プロジェクトでは後からいつでもデータプレーンをデプロイでき、1つのプロジェクトに複数のデータプレーンを追加できます。
GCP プライベート Service Connectを有効にするかどうかを決定します。
このオプションにより、現在のプロジェクト内のクラスターへのプライベート接続が可能になります。このオプションを有効にする場合は、プライベート接続のために プライベート Service Connect エンドポイントを作成する必要があります。詳細については、クラスター接続の準備を参照してください。
アーキテクチャで、アプリケーションに一致するアーキテクチャタイプを選択します。
これにより、使用する Zilliz BYOC イメージのアーキテクチャタイプが決定されます。利用可能なオプションは X86 と ARM です。
リソース設定では、以下を行う必要があります。
-
オートスケーリングを有効または無効にして、Zilliz Cloud がプロジェクトのワークロードに基づいて定義された範囲内で GCE インスタンスの数を自動的に調整できるようにし、効率的なリソース使用を確保します。
-
初期プロジェクトサイズを構成します。
BYOC プロジェクトでは、クエリノード、インデックスサービス、Milvus コンポーネント、および依存関係が異なる Google Compute Engine(GCE)インスタンスを使用します。これらのサービスとコンポーネントのインスタンスタイプを設定できます。
オートスケーリングが無効の場合は、各プロジェクトコンポーネントに必要な GCE インスタンスの数を対応するカウントフィールドで指定するだけです。

オートスケーリングが有効になると、対応する最小および最大フィールドを設定することで、実際のプロジェクトワークロードに基づいて Zilliz Cloud が GCE インスタンスの数を自動的にスケーリングする範囲を指定する必要があります。

リソース設定を容易にするために、4 つの定義済みプロジェクトサイズオプションがあります。次の表は、これらのプロジェクトサイズオプションとプロジェクト内に作成できるクラスターの数、およびこれらのクラスターが含めることができるエンティティの数の対応関係を示しています。
サイズ
最大クラスター数
最大エンティティ数(百万)
パフォーマンス最適化済み CU
容量最適化済み CU
階層型ストレージ CU
小
8 ~ 16 CU のクラスター 3 つ
2000 万 ~ 4000 万
6400 万 ~ 1.28 億
3.2 億 ~ 6.4 億
中
16 ~ 64 CU のクラスター 7 つ
4000 万 ~ 1.6 億
1.28 億 ~ 5.12 億
6.4 億 ~ 26 億
大
64 ~ 192 CU のクラスター 12 つ
1.6 億 ~ 4.8 億
5.12 億 ~ 15 億
26 億 ~ 77 億
特大
192 ~ 576 CU のクラスター 17 つ
4.8 億 ~ 14.4 億
15 億 ~ 46 億
77 億 ~ 230 億
初期プロジェクトサイズでカスタムを選択し、すべてのデータプレーンコンポーネントの GCE インスタンスタイプと数を調整することで、設定をカスタマイズすることもできます。希望する GCE インスタンスタイプがリストにない場合は、さらなるサポートのために Zilliz サポートにお問い合わせください。
-
Tiered Query Node を有効にするかどうかを決定します。
このオプションにより、階層型ストレージクラスターを作成できるかどうかが決まります。このオプションを選択すると、階層型クエリノードのインスタンスタイプと数を設定できます。
 📘Notes
Project Size での選択は、Tiered Storage Node の設定には影響しません。
Auto-scaling が無効の場合、Default Query Node の数と Tiered Query Node の数の合計は正の整数である必要があります。
Auto-scaling が有効の場合、Default Query Node と Tiered Query Node の両方の Min 値の合計は正の整数である必要があります。
次へをクリックして認証情報を設定します。
ステップ 2: 認証情報を設定する
認証情報設定では、ストレージと、ストレージアクセス、GKE クラスター管理、およびデータプレーンデプロイメント用のいくつかのサービスアカウントを設定する必要があります。

Google Cloud Platform プロジェクト IDに、GCP プロジェクトの ID を入力します。
ストレージ設定で、GCP から取得したバケット名とサービスアカウントメールを設定します。
Zilliz Cloud は、指定されたバケットをデータプレーンストレージとして使用し、指定されたサービスアカウントを使用してお客様に代わってアクセスします。
バケットの設定とサービスアカウントの作成の詳細については、Cloud Storage バケットとサービスアカウントの作成を参照してください。
GKE 設定で、GKE 管理用のGKE クラスター名とサービスアカウントメールを設定します。
Zilliz Cloud は、指定されたサービスアカウントを使用して、指定された名前の GKE クラスターをお客様に代わってデプロイし、GKE クラスター内にデータプレーンをデプロイします。
サービスアカウントの作成の詳細については、GKE サービスアカウントの作成を参照してください。
クロスアカウント設定で、データプレーンデプロイメント用のサービスアカウント名を設定します。
サービスアカウントの準備ができたら、下の読み取り専用テキストボックスに表示された Zilliz BYOC プリンシパルをコピーし、GCP コンソールに貼り付けて、Zilliz BYOC に Zilliz Cloud BYOC プロジェクトのデータプレーンをデプロイするために必要な権限を付与します。
クロスアカウントサービスアカウントの作成の詳細については、クロスアカウントサービスアカウントの作成を参照してください。
次へをクリックしてネットワーク設定を構成します。
ステップ 3: ネットワーク設定を構成する
ネットワーク設定では、VPC と、サブネット名やオプションの プライベート Service Connect エンドポイントなど、いくつかのタイプのリソースを作成します。

ネットワーク設定で、VPC 名、サブネット名、およびオプションのプライベート Service Connect エンドポイントを設定します。
指定された VPC で、Zilliz Cloud は以下を必要とします。
-
2 つのセカンダリサブネットを持つプライマリサブネット、
-
ロードバランサーサブネット、および
-
オプションの プライベート Service Connect エンドポイント。
プライベート Service Connect エンドポイントは、上記の一般設定でGCP プライベート Service Connectをオンにした場合にのみ利用可能であることに注意してください。
次へをクリックして概要を表示します。
デプロイ概要で、構成設定を確認します。
すべてが期待どおりであれば、作成をクリックします。
デプロイ詳細を表示する
プロジェクトを作成した後、プロジェクトページでそのステータスを確認できます。

プロジェクトのデータプレーンをデプロイし、クラスターを作成した後、これらのクラスターには、直接 VPC アクセスまたは GCP プライベート Service Connect を介して接続できます。詳細については、BYOC クラスターへの接続を参照してください。
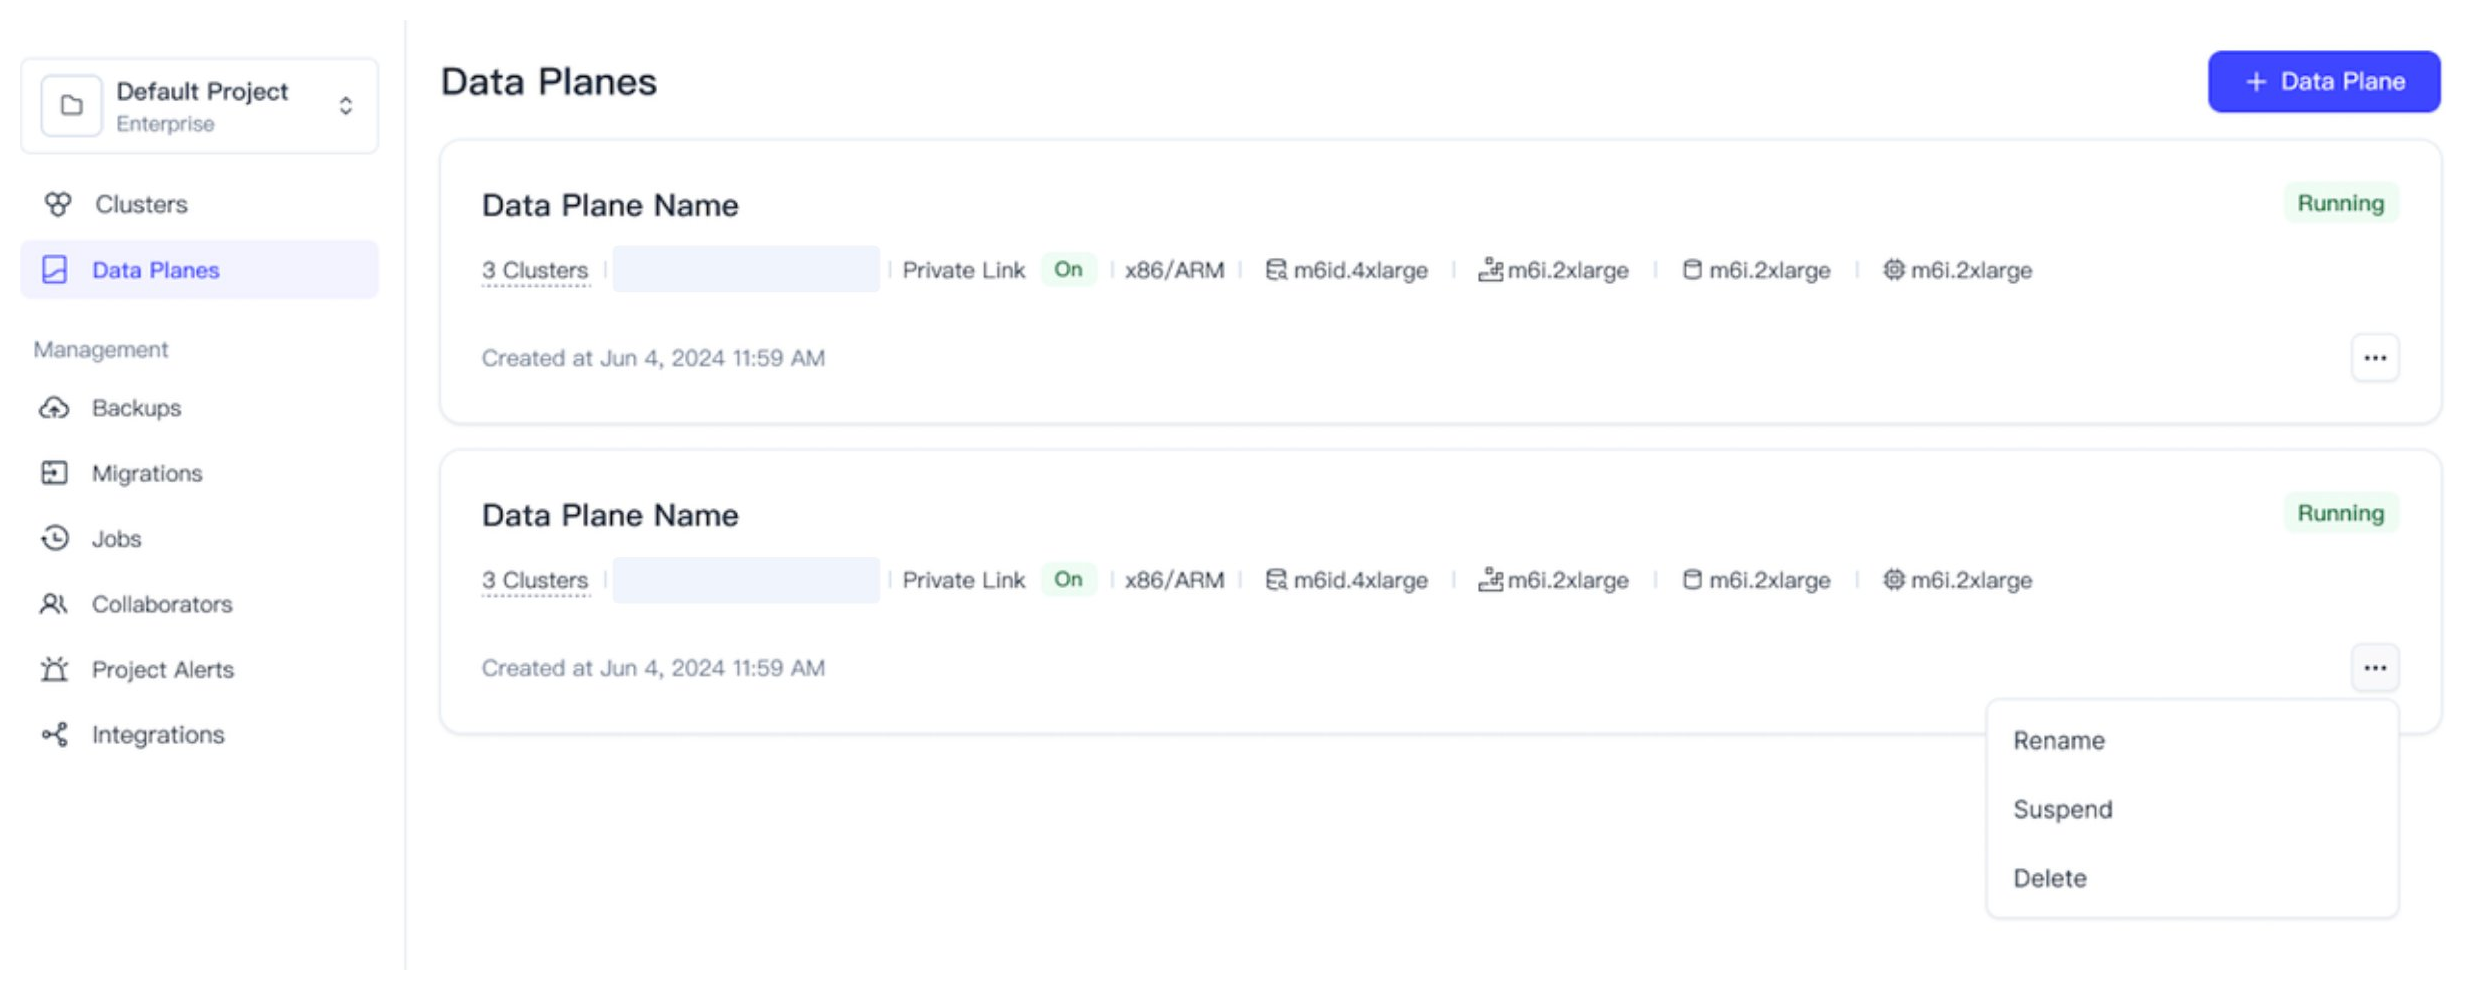
一時停止と再開
プロジェクトを一時停止すると、データプレーンが停止し、プロジェクトをサポートする GKE クラスターに関連付けられたすべての GCE インスタンスが終了します。この操作は、プロジェクト内の一時停止された Zilliz Cloud クラスターには影響せず、データプレーンが復元されると再開できます。
プロジェクト内にクラスターがないか、すべてのクラスターがすでに一時停止されている場合にのみ、実行中のプロジェクトを一時停止できます。

プロジェクトカードのステータスタグが一時停止と表示されると、プロジェクト内のクラスターを操作できなくなります。この場合、再開をクリックしてプロジェクトを再開できます。ステータスタグが再度実行中に変わると、プロジェクト内のクラスターの操作を続行できます。
テクニカルサポートアクセス
トラブルシューティングとメンテナンス操作を支援するために、Zilliz Cloud はデフォルトでテクニカルサポートがプロジェクトのデータプレーンにアクセスできるようにしています。
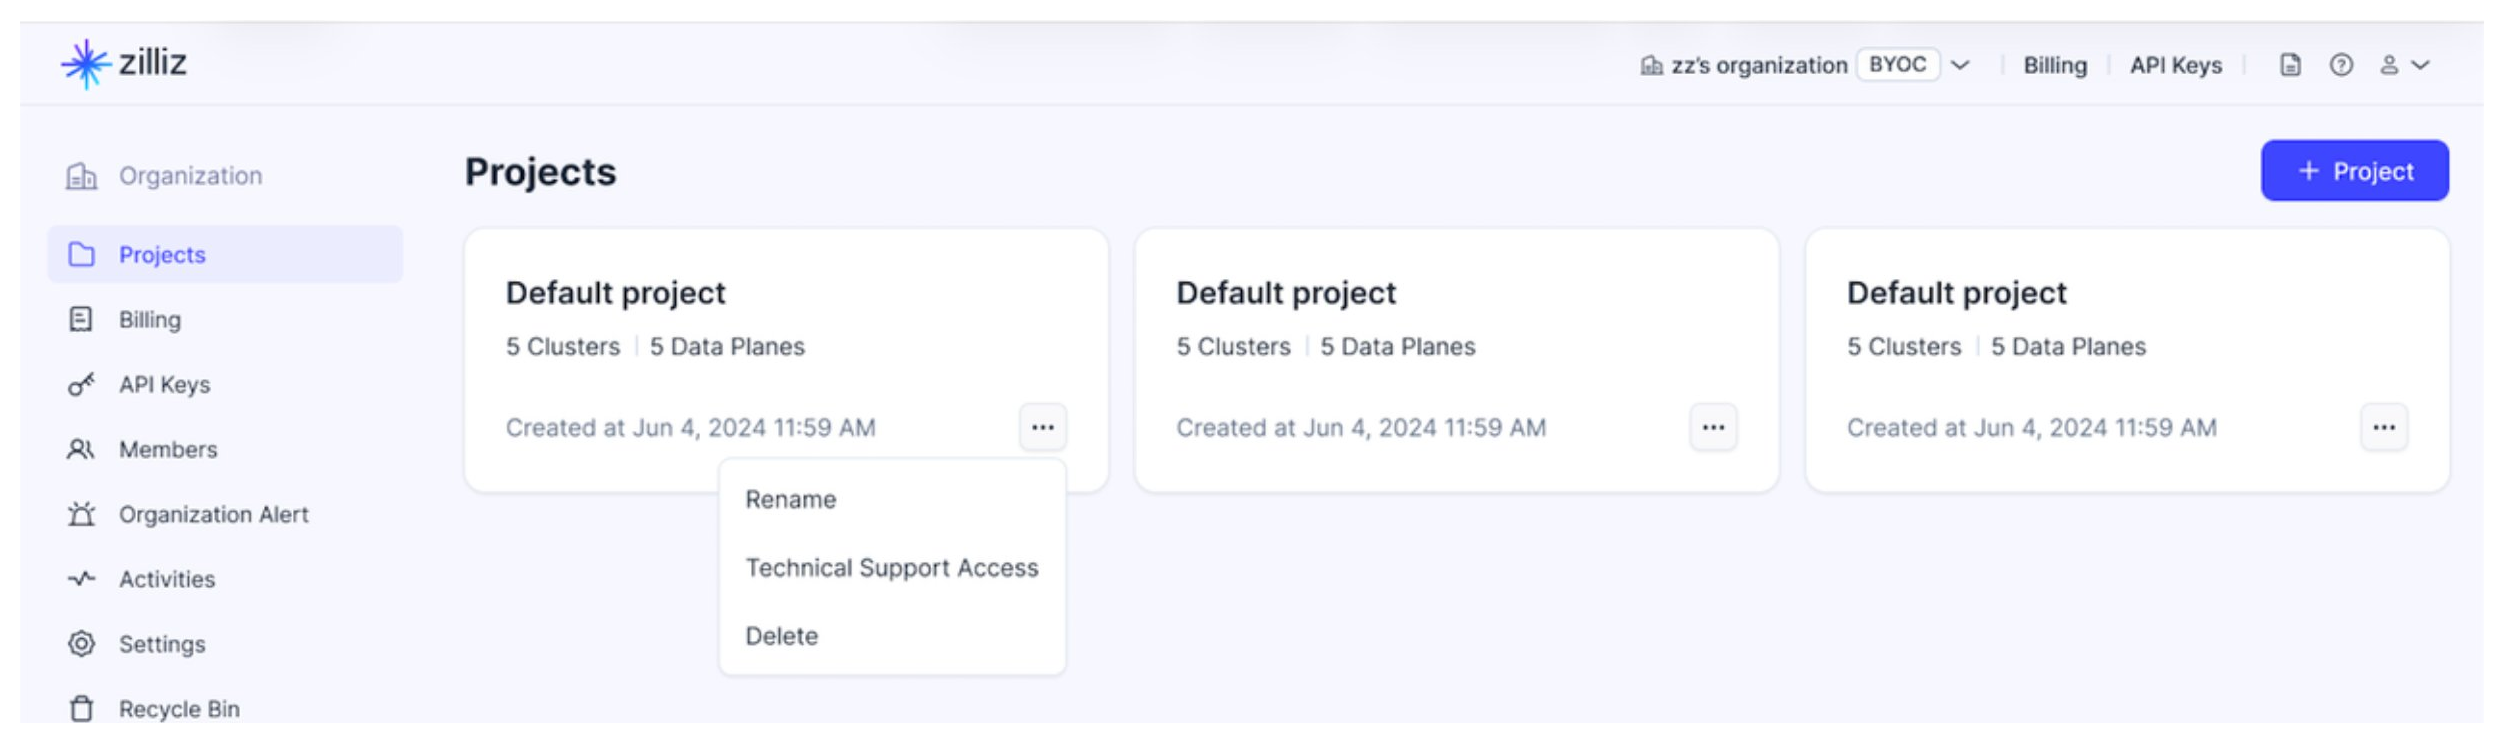
対象プロジェクトのドロップダウンメニューからテクニカルサポートアクセスをクリックして、現在の設定を表示します。
データガバナンスとセキュリティ要件を満たすために、これを無効にすることができます。
手順
Cloud Storage Bucket と Service Account を作成 [READ MORE]
このページでは、Bring-Your-Own-Cloud (BYOC) プロジェクトのルートストレージを適切な権限で作成・設定する手順について説明します。
GKE サービスアカウントを作成 [READ MORE]
このページでは、Zilliz Cloud プロジェクト用に Google Kubernetes Engine(GKE)クラスターをデプロイするためのサービスアカウントを作成・設定する方法について説明します。
クロスアカウント サービスアカウントを作成 [READ MORE]
このページでは、Zilliz Cloud がプロジェクトのデータプレーンをブートストラップするためのクロスアカウント サービスアカウントを作成・設定する方法を説明します。このサービスアカウントにより、Zilliz Cloud はお客様に代わって VPC リソースを管理するために必要な権限を取得します。
GCP でカスタマー管理 VPC を構成する [READ MORE]
Zilliz Cloud の Bring-Your-Own-Cloud(BYOC)ソリューションを使用すると、お客様自身の Virtual Private Cloud(VPC)内にプロジェクトをセットアップできます。カスタマー管理 VPC で動作する Zilliz Cloud プロジェクトにより、ネットワーク構成をより細かく制御でき、組織が求める特定のクラウドセキュリティおよびガバナンス基準を満たすことができます。
必要な権限 [READ MORE]
このページでは、お客様の VPCネットワーク 上に Zilliz BYOC データプレーンをデプロイする際に必要な IAM ポリシーを一覧で紹介します。
必要な GCP API サービス [READ MORE]
このページでは、Zilliz Cloud Terraform Provider を使用して GCP リソースを作成するために必要な Google Cloud Platform(GCP)API サービスを一覧表示し、それらを有効化するいくつかの方法を提供します。