Microsoft Azure 上での BYOC-I のデプロイ
このページでは、Microsoft Azure Virtual ネットワーク 内に BYOC エージェントを持つ Bring-Your-Own-Cloud (BYOC) データプレーンをデプロイする方法について説明します。
Zilliz BYOC は現在 一般提供 されています。アクセスおよび実装の詳細については、Zilliz Cloud サポートまでお問い合わせください。
このガイドでは、Microsoft Azure コンソール上で必要なリソースを段階的に作成する方法を説明します。Terraform スクリプトを使用してインフラストラクチャをプロビジョニングする場合は、Terraform Provider を参照してください。
前提条件
以下を確認してください。
-
BYOC-I 組織のオーナーであること。
-
必要な権限 に記載された権限が付与されていること。
手順
ステップ 1: デプロイ環境の準備
デプロイ環境とは、Terraform 構成ファイルを実行し、BYOC-I プロジェクトのデータプレーンをデプロイするために構成されたローカルマシン、仮想マシン (VM)、または CI/CD パイプラインです。このステップでは、以下が必要です。
-
Microsoft Azure 認証情報の構成
Microsoft Azure 認証情報には、サブスクリプション ID とリソースグループ名が含まれます。
Azure Portal (UI)
-
サブスクリプション ID:
 1
1上部の検索バーまたはホームページから サブスクリプション に移動します。
2サブスクリプションを選択します。
3概要ページの Essentials セクションで
Subscription IDを確認します。 -
リソースグループ名:
リソースグループは、Azure ソリューションの関連リソースを保持するコンテナです。
 1
1左側のメニューから リソースグループ に移動します。
2Name 列に名前が表示されます。
表示されていない場合は、新規作成して Zilliz Cloud に提供する必要があります。後で Terraform スクリプトを実行すると、仮想マシン (VM)、仮想ネットワーク (VNet)、Azure Kubernetes Service (AKS) クラスターを含むすべての必要なリソースがリソースグループに追加されます。
-
-
アクセス制御 (IAM) 権限の追加
Terraform スクリプトを実行するロールに Contributor および User Access Administrator の権限を割り当てます。
 1
1左側のメニューから アクセス制御 (IAM) に移動します。
2+ 追加 をクリックし、ドロップダウンリストから ロールの割り当ての追加 を選択します。
3ロール タブで Privileged administrator roles をクリックし、Contributor でフィルタリングして Next をクリックします。
4メンバー タブで、アクセスの割り当て先 で User, group, or service principal または Managed entity を選択し、+ メンバーの選択 をクリックします。
ユーザー、グループ、またはサービスプリンシパルが Terraform スクリプトの実行に使用される場合は User, group, or service principal を選択します。それ以外の場合は Managed entity を選択します。
5Next をクリックし、設定を確認して Review + assign をクリックして保存します。
6上記の手順を User Access Administrator ロールについても繰り返します。
-
最新の Terraform バイナリのインストール
Terraform のインストールの詳細については、このドキュメント を参照してください。
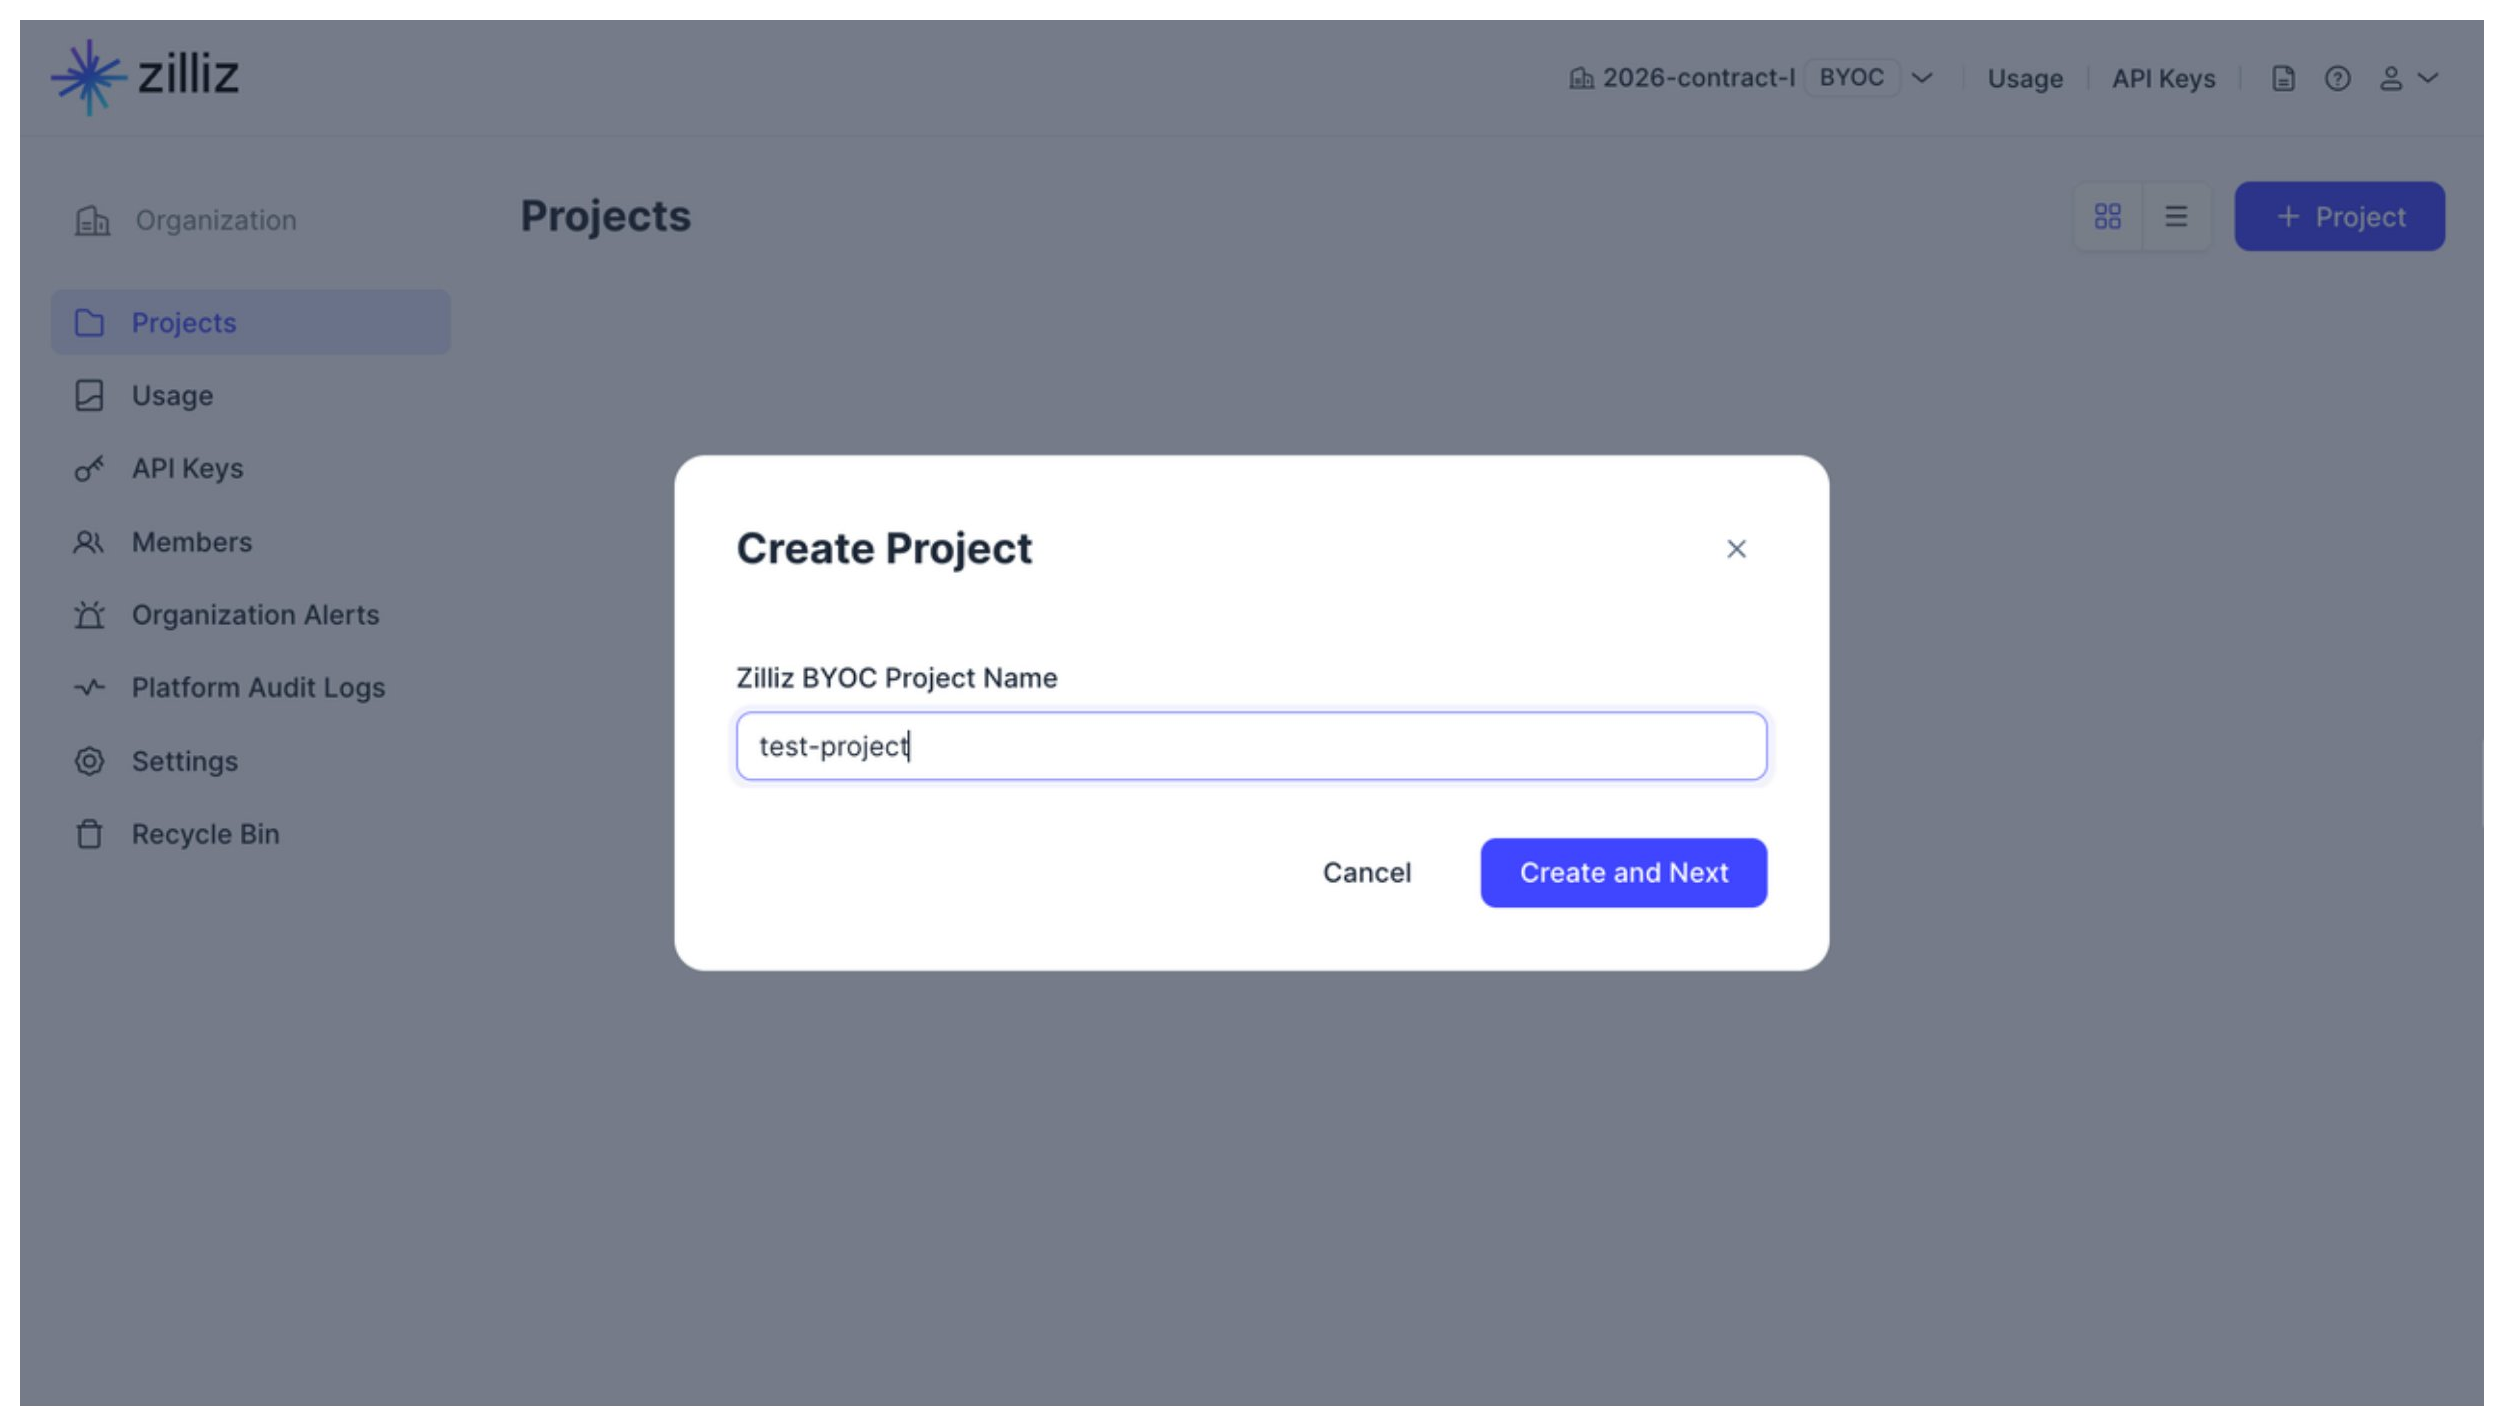
ステップ 2: プロジェクトの作成
BYOC-I 組織内で、Create Project ボタンをクリックしてデプロイを開始します。表示されたダイアログで Zilliz BYOC Project Name を設定し、Create and Next をクリックします。
プロジェクトはこのステップの最後で作成され、Deploy Data Plane ダイアログにリダイレクトされます。
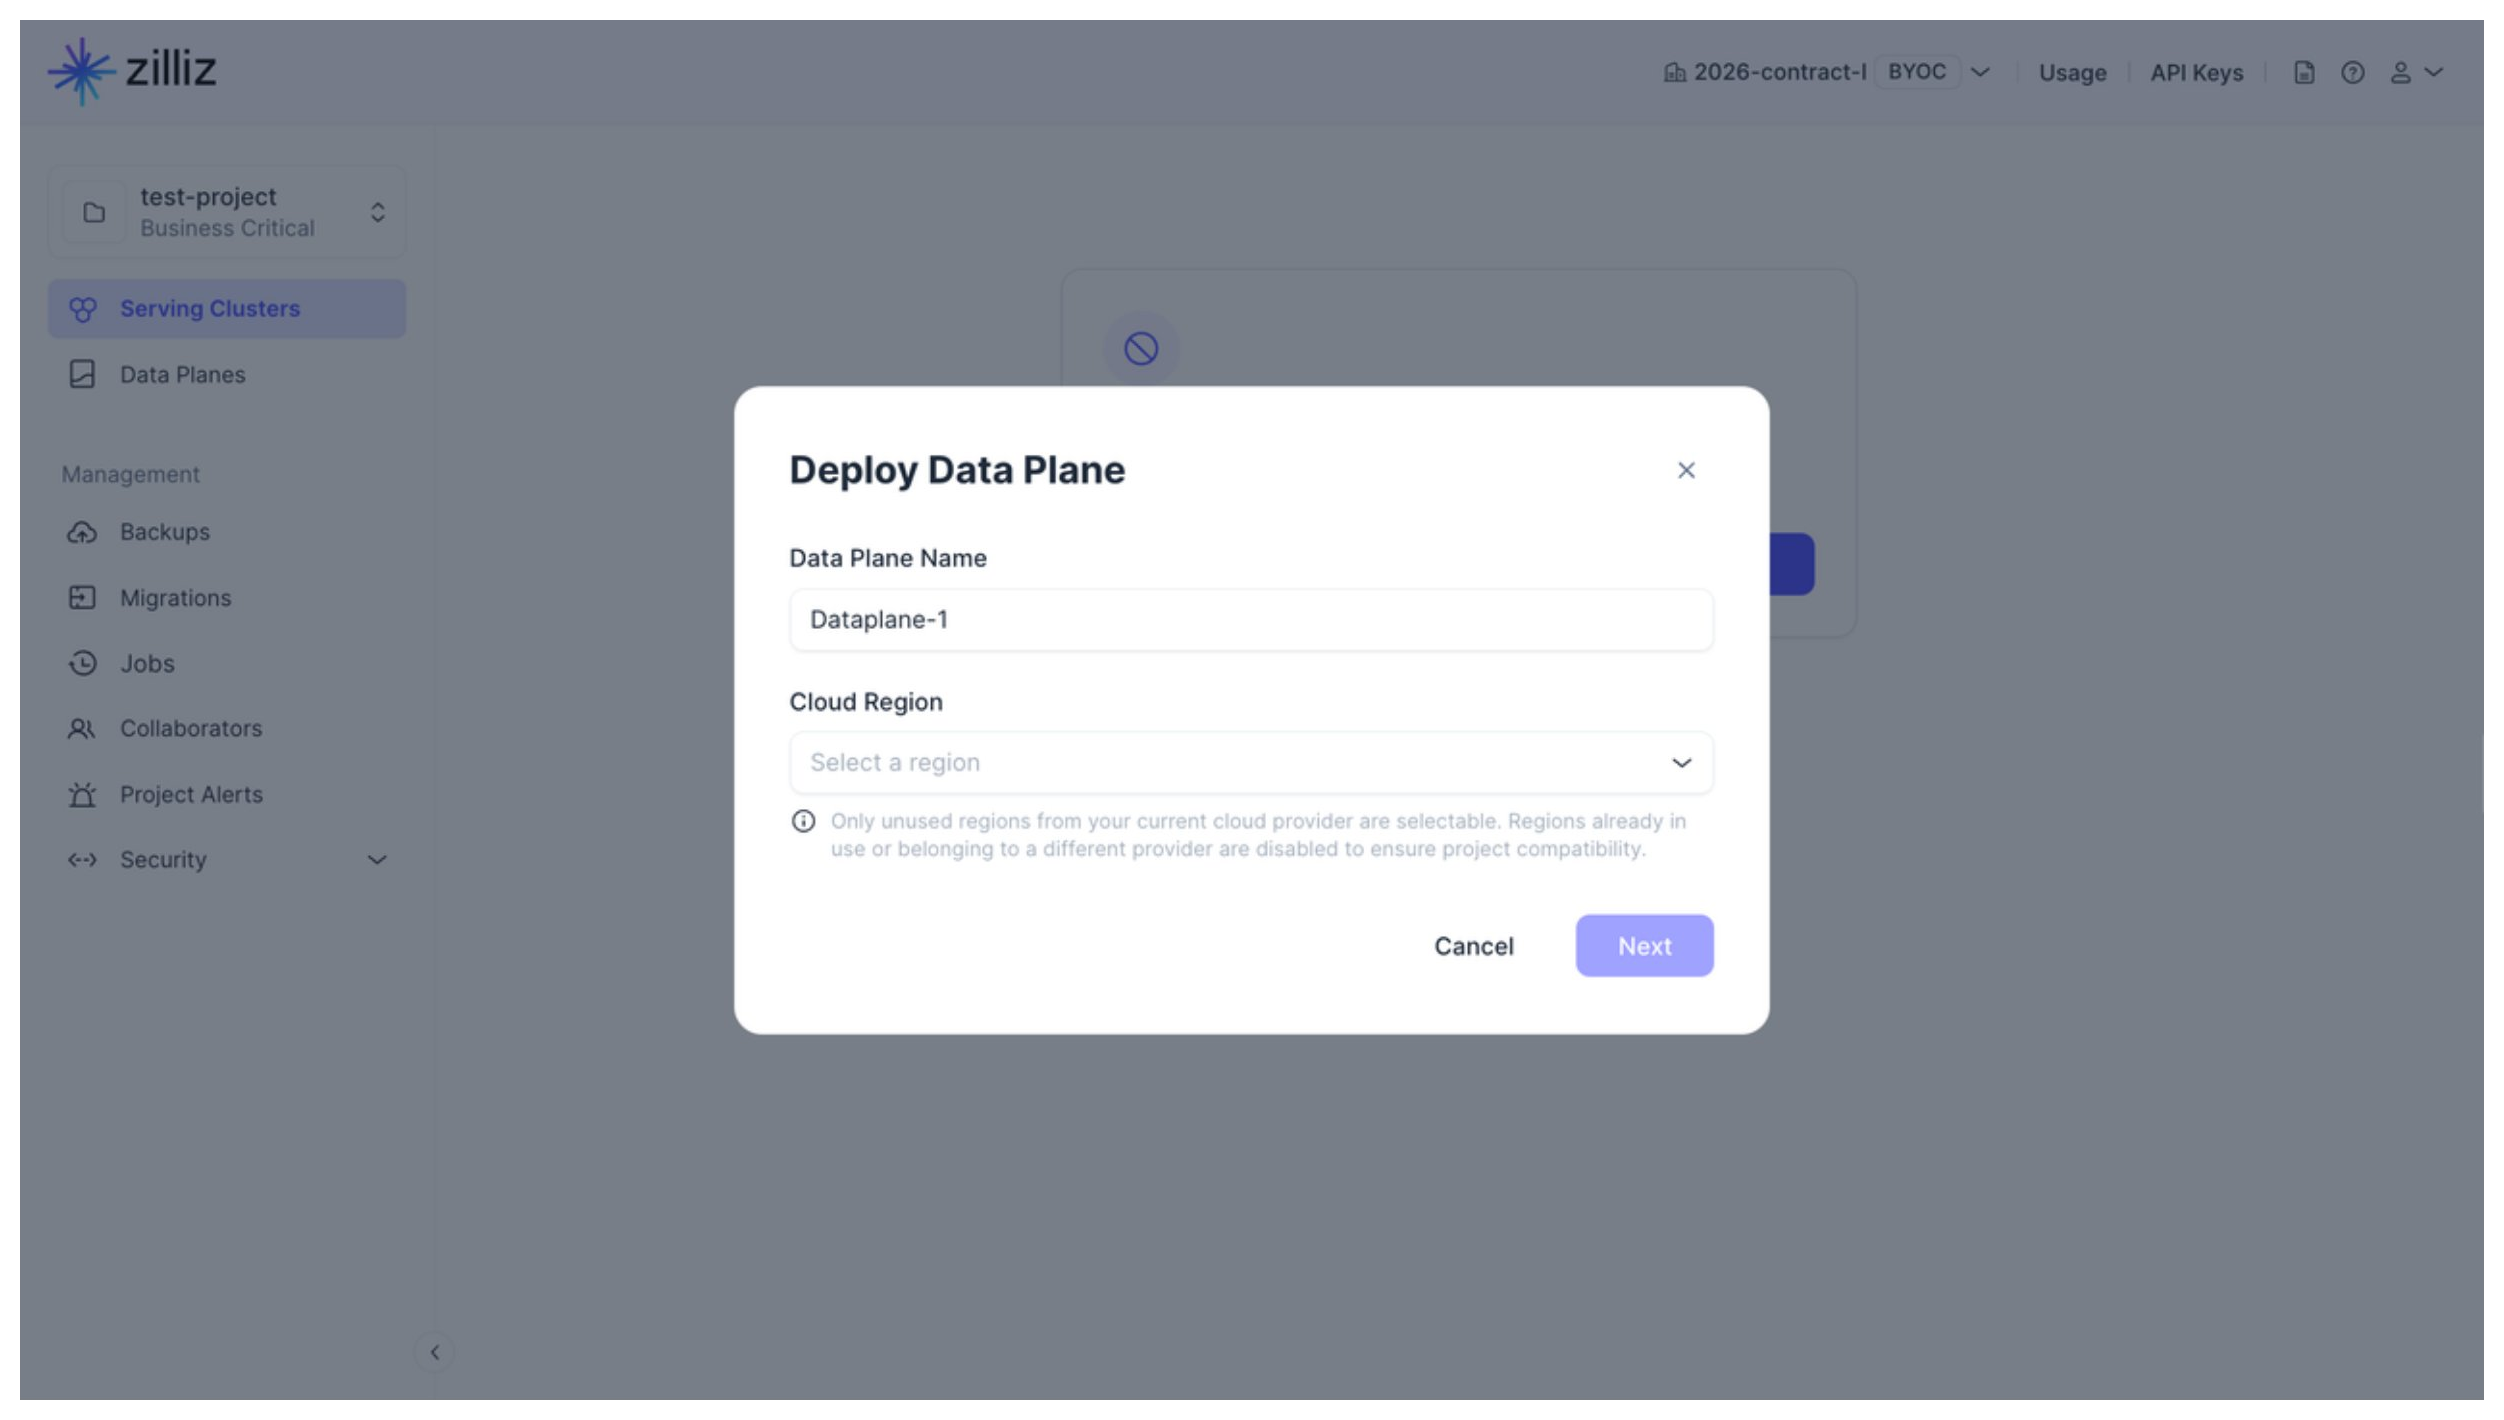
ステップ 3: データプレーンをデプロイする
Data Plane Name と Cloud Region を設定し、Next をクリックします。
Cancel をクリックするとデータプレーンのデプロイは中止されますが、上記で作成したプロジェクトは保持されます。プロジェクトでは後からいつでもデータプレーンのデプロイを開始でき、1つのプロジェクトに複数のデータプレーンを追加できます。
Azure プライベート Service Connect を有効にするかどうかを決定します。
このオプションにより、現在のプロジェクト内のクラスターへのプライベート接続が可能になります。このオプションを有効にする場合は、プライベート接続用の VPC エンドポイントを作成する必要があります。
ステップ 1 で取得した Azure の サブスクリプション ID と リソースグループ名 を入力します。
Architecture で、アプリケーションに合ったアーキテクチャタイプを選択します。
これにより、使用する Zilliz BYOC イメージのアーキテクチャタイプが決定されます。利用可能なオプションは X86 と ARM です。
リソース設定 では、以下が必要です。
-
オートスケーリング を有効または無効にして、Zilliz Cloud がプロジェクトのワークロードに基づいて定義された範囲内で VM インスタンスの数を自動的に調整し、効率的なリソース使用を確保できるようにします。
-
初期プロジェクトサイズ を構成します。
BYOC プロジェクトでは、クエリノード、インデックスサービス、Milvus コンポーネント、および依存関係が異なるタイプの VM インスタンスを使用します。これらのサービスとコンポーネントのインスタンスタイプと数を個別に設定できます。
オートスケーリング が無効の場合は、各プロジェクトコンポーネントに必要な VM インスタンスの数を対応する Count フィールドに指定するだけです。

オートスケーリング を有効にすると、実際のプロジェクトワークロードに基づいて Zilliz Cloud が VM インスタンスの数を自動的にスケーリングする範囲を、対応する Min および Max フィールドを設定して指定する必要があります。

リソース設定を容易にするため、4 つの定義済みプロジェクトサイズオプションがあります。次の表は、これらのプロジェクトサイズオプションとプロジェクト内で作成できるクラスターの数、および各クラスターが含めることができるエンティティの数の対応関係を示しています。
サイズ
最大クラスター数
最大エンティティ数(百万)
パフォーマンス最適化済み CU
容量最適化済み CU
階層型ストレージ CU
小
8 ~ 16 CU のクラスター 3 つ
2000 万 ~ 4000 万
6400 万 ~ 1.28 億
3.2 億 ~ 6.4 億
中
16 ~ 64 CU のクラスター 7 つ
4000 万 ~ 1.6 億
1.28 億 ~ 5.12 億
6.4 億 ~ 26 億
大
64 ~ 192 CU のクラスター 12 つ
1.6 億 ~ 4.8 億
5.12 億 ~ 15 億
26 億 ~ 77 億
特大
192 ~ 576 CU のクラスター 17 つ
4.8 億 ~ 14.4 億
15 億 ~ 46 億
77 億 ~ 230 億
初期プロジェクトサイズ で Custom を選択し、すべてのデータプレーンコンポーネントの VM インスタンスタイプと数を調整して、設定をカスタマイズすることもできます。希望する VM インスタンスタイプがリストにない場合は、Zilliz サポートにお問い合わせ ください。
-
Tiered Query Node を有効にするかどうかを決定します。
このオプションにより、階層型ストレージクラスターを作成できるかどうかが決まります。このオプションを選択すると、階層型クエリノードのインスタンスタイプと数を設定できます。
 📘Notes
Project Size での選択は、Tiered Storage Node の設定には影響しません。
Auto-scaling が無効の場合、Default Query Node の数と Tiered Query Node の数の合計は正の整数である必要があります。
Auto-scaling が有効の場合、Default Query Node と Tiered Query Node の両方の Min 値の合計は正の整数である必要があります。
Next をクリックします。
ステップ 4: データプレーンのデプロイ
ダイアログに表示される手順に従って、現在作成したプロジェクトのデータプレーンをデプロイします。

上記の Terraform スクリプトの実行の詳細については、Zilliz Cloud BYOC-I プロジェクト設定ガイド を参照してください。
プロジェクトのデータプレーンをデプロイし、クラスターを作成したら、直接 VPC アクセスまたは Azure プライベート Link を介してこれらのクラスターに接続できます。詳細については、BYOC クラスターへの接続 を参照してください。
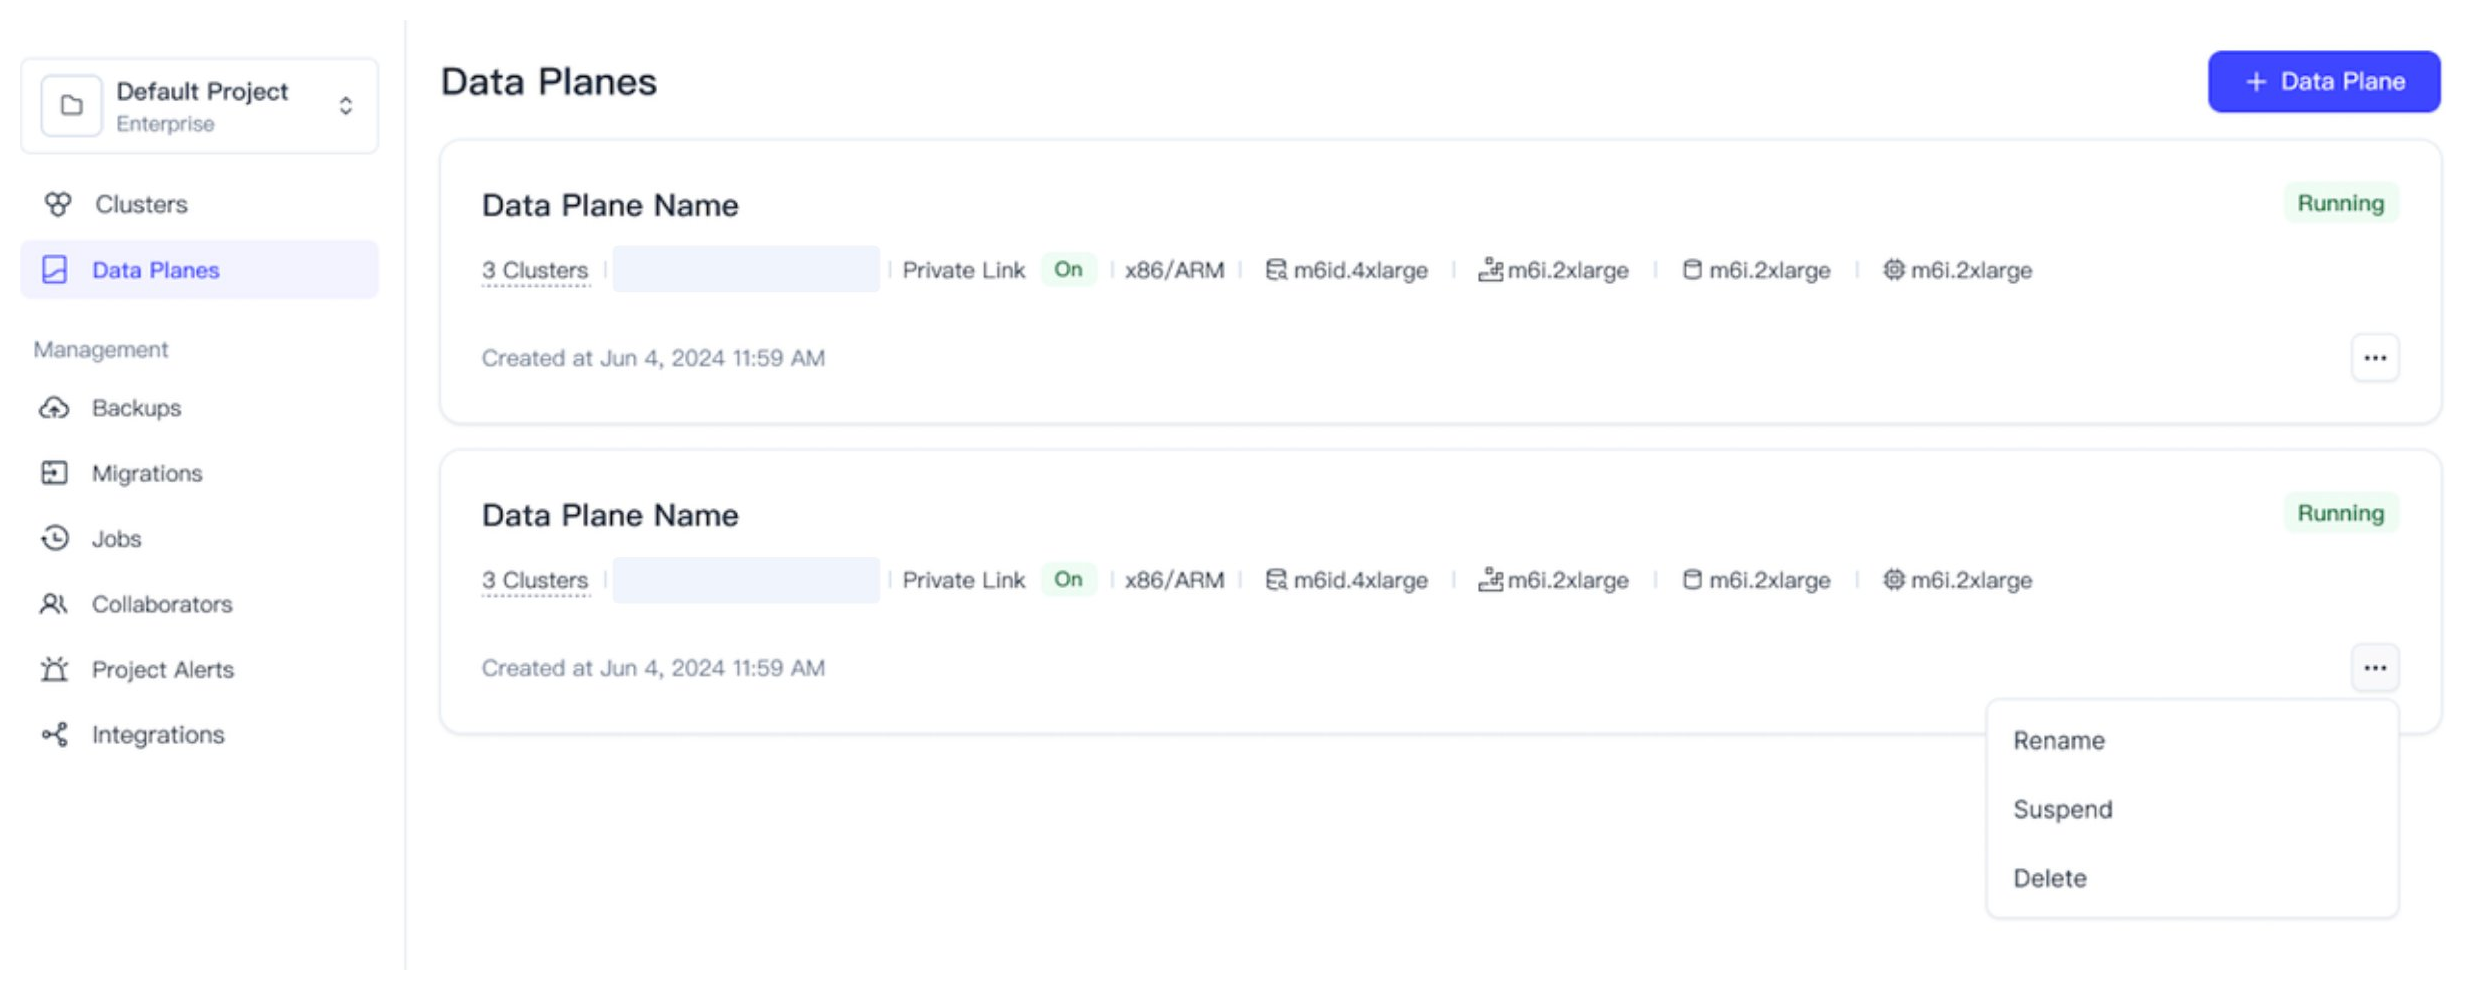
データプレーンの管理
Undeploy タグの付いたデータプレーン
プロジェクトカードの右上隅のステータスタグが デプロイ解除 と表示されている場合は、プロジェクトカードの Deploy データプレーン ボタンをクリックしていつでも再度開くことができます。プロジェクトの名前を変更または削除するには、プロジェクトカードの ... ボタンをクリックし、ドロップダウンメニューから Rename または Delete を選択します。
Deploying タグの付いたデータプレーン
デプロイ環境の準備が完了し、表示されたコマンドを実行したら、BYOC エージェントがアクティブ化するのを待つ必要があります。プロジェクトカードのステータスタグが デプロイ中 と表示され、進行状況のパーセンテージが表示されている場合は、データプレーンが準備できるまでプロジェクトの名前を変更または削除することはできません。
Running タグの付いたデータプラン
プロジェクトカードのステータスタグが Running と表示されると、プロジェクト内でクラスターの作成を開始できます。実行中のプロジェクトの名前を変更または削除するには、プロジェクト内にクラスターが存在しないことを確認してください。
テクニカルサポートアクセス
トラブルシューティングおよびメンテナンス操作を支援するため、Zilliz Cloud はデフォルトでテクニカルサポートがプロジェクトのデータプレーンにアクセスできるようにしています。

対象プロジェクトのドロップダウンメニューから テクニカルサポートアクセス をクリックして、現在の設定を確認します。

データガバナンスおよびセキュリティ要件を満たすために、これを無効にすることができます。