外部コレクションの作成Public Preview
外部コレクションは、AWS S3 や Iceberg などの外部ストレージシステムやデータベーステーブルからデータを Zilliz Cloud にコピーせずにアクセスする、Zilliz Cloud のデータコレクションの一種です。これは、Zilliz Cloud のクエリインターフェースとの互換性を維持しながら、データレイク上のクエリレイヤーとして機能します。
概要
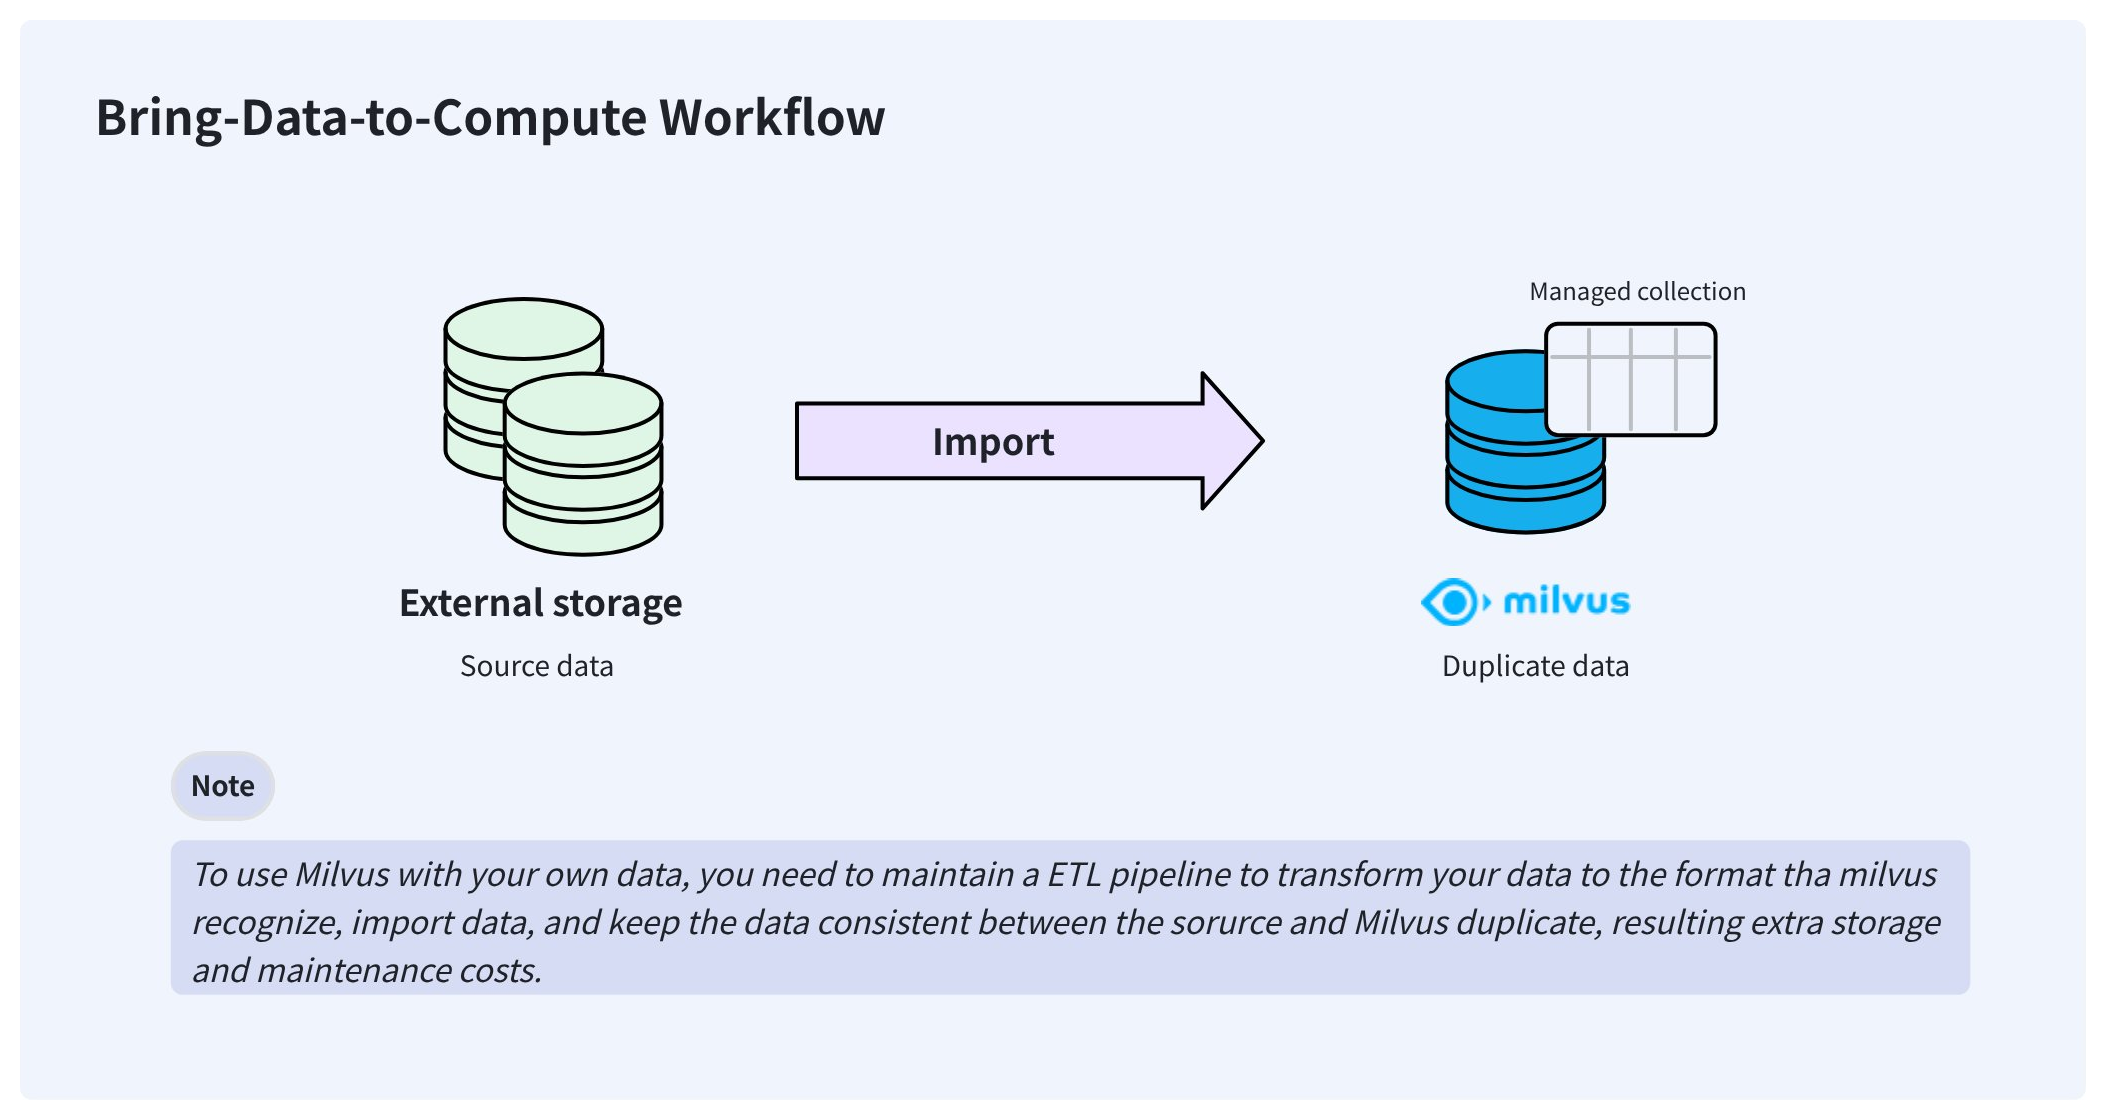
典型的な AI データパイプラインでは、ユーザーは既に Parquet やその他の形式で AWS S3 などのストレージシステムにデータを保存している場合があります。この外部保存データを Zilliz Cloud で利用するために、ユーザーは通常、Extract-Transform-Load (ETL) パイプラインを使用して Zilliz Cloud の独自ストレージにインポートする必要があります。
この bring-your-data-to-Zilliz Cloud ワークフローは、同期が困難な冗長なデータを作成し、データの一貫性を確保するためのエンジニアリングメンテナンス負担を増加させます。
これらの問題を解決するため、Zilliz Cloud は外部コレクションを提供し、データの同期や ETL パイプラインを気にすることなく、Zilliz Cloud から外部保存データにアクセスできるようにします。
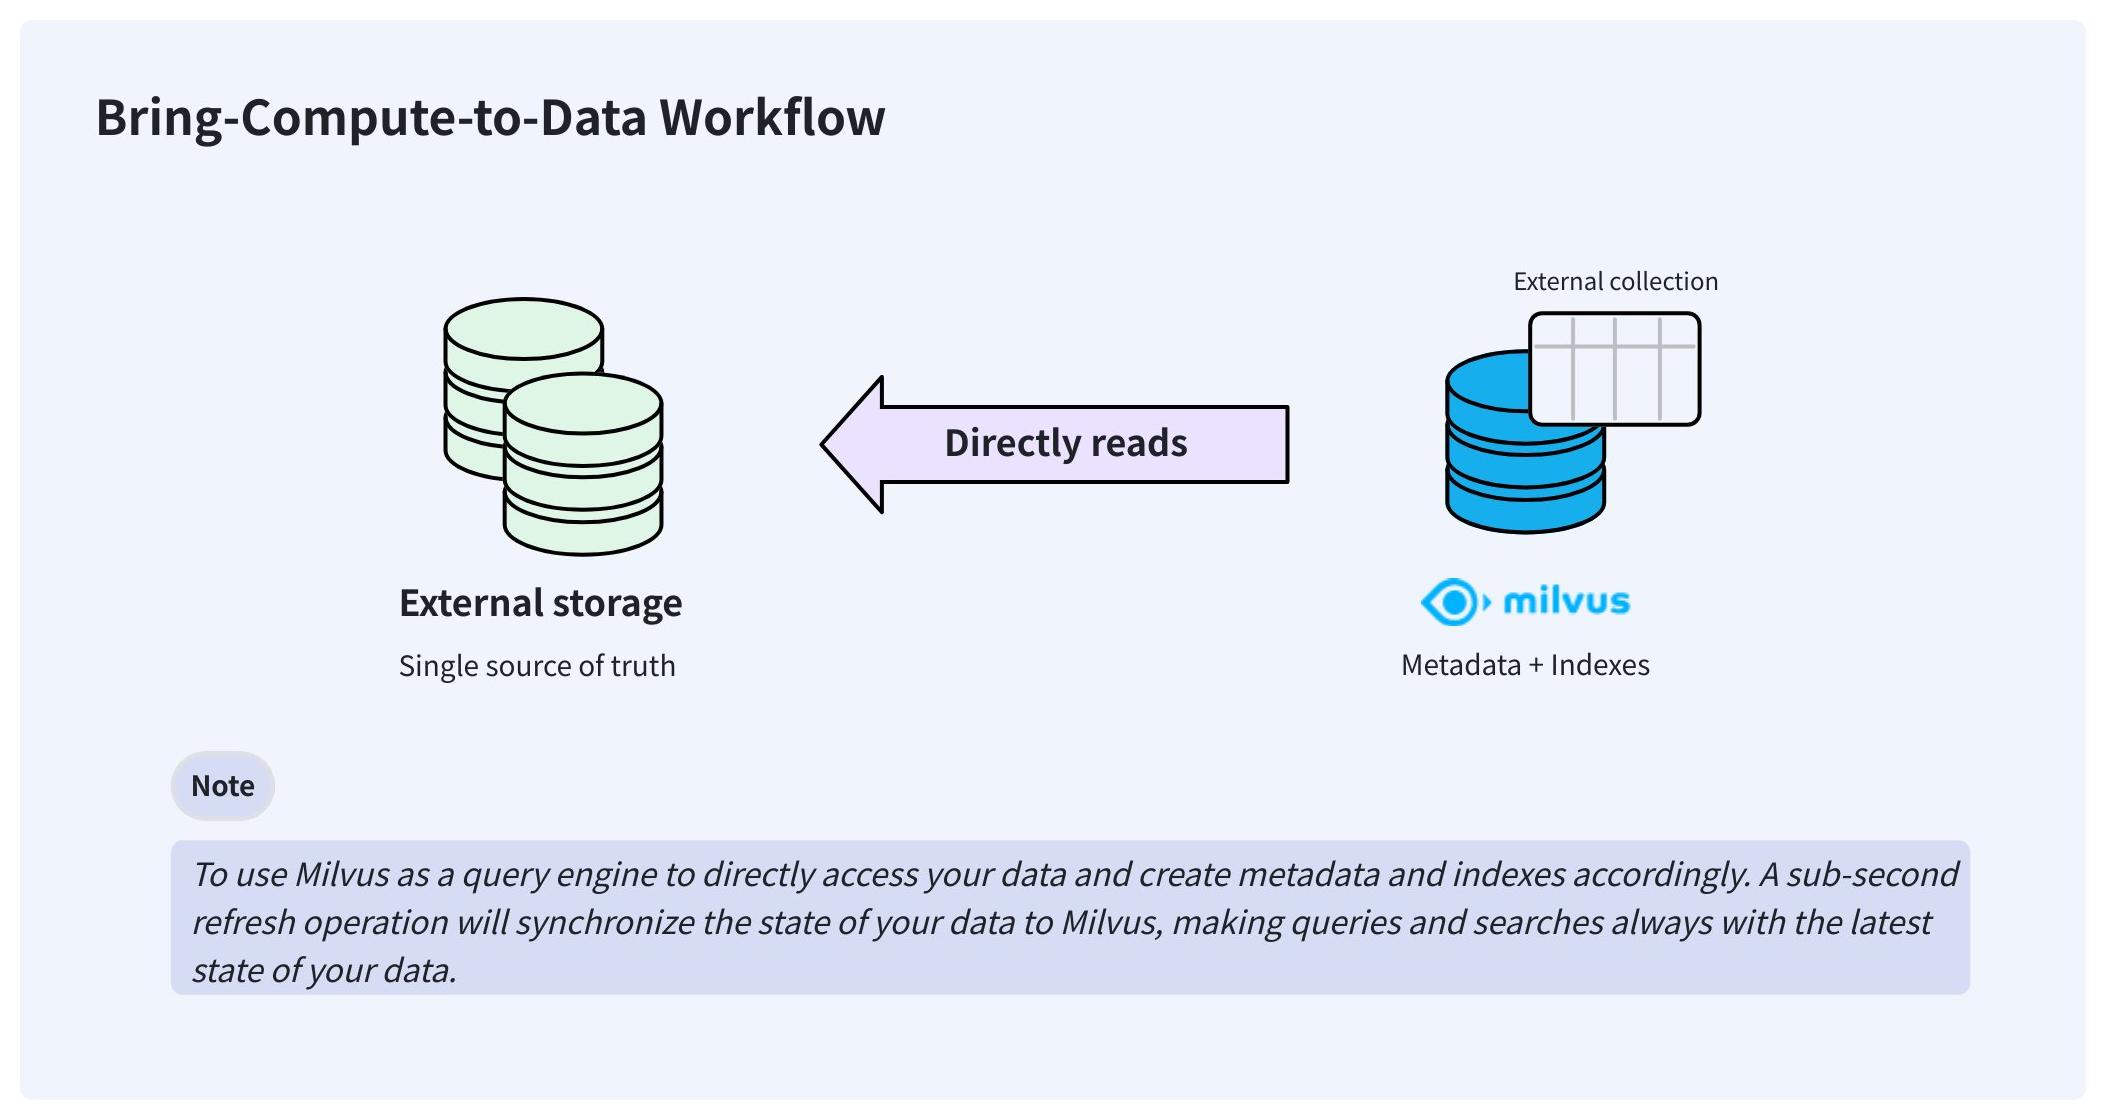
作成後、外部コレクションはデータに直接アクセスし、保存している同じ場所にデータを保持できます。バックグラウンドでは、Zilliz Cloud はマニフェストファイルを作成し、Zilliz Cloud のメタデータと外部データファイルの行とのマッピングを記録します。マニフェストファイルの準備ができたら、マネージドコレクションと同様に外部コレクションにインデックスを作成できます。
データが変更された場合、手動でサブ秒のリフレッシュをトリガーすることでメタデータを更新し、Zilliz Cloud を常に最新の状態に保ちます。
外部コレクションは、オンデマンドコンピューティング用のデータベースで利用可能です。
ステップ 1: スキーマの作成
マネージドコレクションの作成と同様に、外部コレクションを作成する前にスキーマを作成する必要があります。ただし、スキーマはマネージドコレクションのものとは少し異なります。
準備
-
オンデマンドコンピューティング用のデータベースで外部コレクションを作成するための十分な権限を持つ API キーを取得していること。
詳細については、API キー を参照してください。
-
オブジェクトストレージバケットを Zilliz Cloud と統合していること。
詳細については、サードパーティとの統合 の AWS、GCP、Azure ドキュメントを参照してください。
-
バケット統合から外部ボリュームを作成していること。ボリュームに対象のデータファイルが含まれていることを確認してください。
詳細については、外部ボリューム を参照してください。
サポートされるデータソース
Zilliz Cloud は以下のデータソースをサポートしており、選択した形式に応じて対応する外部ソースを提供する必要があります。
-
parquetexternal_sourceを、対象の Parquet ファイルを含むフォルダに設定します。 -
vortex,external_sourceを、バージョン 0.56 の Vortex カラムファイルを含むフォルダに設定します。 -
lance-tableexternal_sourceを、_transactions、_versions、data などのサブフォルダを含むフォルダパスに設定します。 -
iceberg-tableexternal_sourceを Iceberg テーブルのmetadata.jsonファイルに設定し、以下のようにスナップショット ID を渡します。external_spec={"format": "iceberg-table","snapshot_id": "473984310232959286"}
スキーマの設定
外部ボリュームに対象のデータファイルが含まれている状態で、コレクションのカラムを Parquet ファイル(parquet)、Lance テーブル(lance-table)、Iceberg テーブル(iceberg-table)、または 0.56.0 形式の Vortex ファイル(vortex)にマッピングするスキーマを作成します。
外部ソースはフォルダであることを示すために、末尾にスラッシュ(/)を付ける必要があります。
- Python
- Java
- Go
- NodeJS
- cURL
from pymilvus import MilvusClient, DataType

schema = MilvusClient.create_schema(
    external_source='volume://my_volume/path/to/a/folder/',
    external_spec='{"format": "parquet"}'
)
import com.google.gson.JsonObject;
import io.milvus.v2.service.collection.request.CreateCollectionReq;

JsonObject externalSpec = new JsonObject();
externalSpec.addProperty("format", "parquet");
CreateCollectionReq.CollectionSchema schema = CreateCollectionReq.CollectionSchema.builder()
        .externalSource("volume://my_volume/path/to/a/folder/")
        .externalSpec(externalSpec)
        .build();
import (
    "github.com/milvus-io/milvus/client/v2/entity"
    client "github.com/milvus-io/milvus/client/v2/milvusclient"
)

schema := entity.NewSchema().
    WithName("product_embeddings").
    WithExternalSource("volume://my_volume/path/to/a/folder/").
    WithExternalSpec(\\`{"format": "parquet"}\\`)
// node
export fields='[
    {
        "fieldName": "product_id",
        "dataType": "Int64",
        "isPrimary": true
    },
    {
        "fieldName": "embedding",
        "dataType": "FloatVector",
        "elementTypeParams": {
            "dim": "768"
        }
    },
    {
        "fieldName": "product_name",
        "dataType": "VarChar",
        "elementTypeParams": {
            "max_length": 512
        }
    }
]'
Step 2: Add fields
スキーマの準備が整ったら、次のようにフィールドを追加できます。
- Python
- Java
- Go
- NodeJS
- cURL
schema.add_field(
    field_name="product_id",
    datatype=DataType.INT64,
    # highlight-next
    external_field="id" # field name in the external data file
)
schema.add_field(
    field_name="product_name",
    datatype=DataType.VARCHAR,
    max_length=512,
    # highlight-next
    external_field="name"
)
schema.add_field(
    field_name="embedding",
    datatype=DataType.FLOAT_VECTOR,
    dim=768,
    # highlight-next
    external_field="vector"
)
import io.milvus.v2.common.DataType;
import io.milvus.v2.service.collection.request.AddFieldReq;

schema.addField(AddFieldReq.builder()
        .fieldName("product_id")
        .dataType(DataType.Int64)
        .externalField("id")
        .build());
schema.addField(AddFieldReq.builder()
        .fieldName("product_name")
        .dataType(DataType.VarChar)
        .maxLength(512)
        .externalField("name")
        .build());
schema.addField(AddFieldReq.builder()
        .fieldName("embedding")
        .dataType(DataType.FloatVector)
        .dimension(768)
        .externalField("vector")
        .build());
import (
    "github.com/milvus-io/milvus/client/v2/entity"
    client "github.com/milvus-io/milvus/client/v2/milvusclient"
)

schema = schema.
    WithField(
        entity.NewField().
            WithName("product_id").
            WithDataType(entity.FieldTypeInt64).
            WithExternalField("id"),
    ).
    WithField(
        entity.NewField().
            WithName("product_name").
            WithDataType(entity.FieldTypeVarChar).
            WithMaxLength(512).
            WithExternalField("name"),
    ).
    WithField(
        entity.NewField().
            WithName("embedding").
            WithDataType(entity.FieldTypeFloatVector).
            WithDim(768).
            WithExternalField("vector"),
    )
// node
export schema="{
    \"externalSource\": \"volume://my_volume/path/to/a/folder\",
    \"externalSpec\": \"{\\\"format\\\": \\\"parquet\\\"}\",
    \"fields\": $fields
}"
ステップ 3: コレクションの作成
すべてのフィールドをスキーマに追加した後、外部コレクションを作成できます。
プロジェクトレベルのデータベースで外部コレクションを作成できます。これは通常、オンデマンドクラスターに関連付けられています。
- Python
- Java
- Go
- NodeJS
- cURL
# connect the database
client = MilvusClient(
    uri="https://{project-id}.{region}.vectordb.zillizcloud.com",
    token="YOUR_API_KEY"
)

client.use_database(
    db_name="my_database"
)
# create the collection
client.create_collection(
    collection_name="test_collection",
    schema=schema
)
import io.milvus.v2.client.ConnectConfig;
import io.milvus.v2.client.MilvusClientV2;

ConnectConfig connectConfig = ConnectConfig.builder()
        .uri("https://{project-id}.{region}.vectordb.zillizcloud.com")
        .token("YOUR_API_KEY")
        .build();
MilvusClientV2 client = new MilvusClientV2(connectConfig);
CreateCollectionReq createReq = CreateCollectionReq.builder()
        .dbName("my_database")
        .collectionName("test_collection")
        .collectionSchema(schema)
        .build();
client.createCollection(createReq);
import (
    "github.com/milvus-io/milvus/client/v2/entity"
    client "github.com/milvus-io/milvus/client/v2/milvusclient"
)

ctx, cancel := context.WithCancel(context.Background())
defer cancel()
milvusAddr := "https://{project-id}.{region}.vectordb.zillizcloud.com"
token := "YOUR_API_KEY"
client, err := milvusclient.New(ctx, &milvusclient.ClientConfig{
    Address: milvusAddr,
    APIKey: token
})
err = client.CreateCollection(ctx, milvusclient.NewCreateCollectionOption("test_collection", schema).
    WithDBName("my_database").
    WithIndexOptions(indexOptions...))

if err != nil {
    fmt.Println(err.Error())
    // handle error
}
// node
export PROJECT_ENDPOINT='https://{project-id}.{region}.vectordb.zillizcloud.com'
curl --request POST \
--url "${PROJECT_ENDPOINT}/v2/vectordb/collections/create" \
--header "Authorization: Bearer ${TOKEN}" \
--header "Content-Type: application/json" \
-d "{
    \"dbName\": \"my_database\",
    \"collectionName\": \"test_collection\",
    \"schema\": $schema
}"
Step 4: Create indexes
マネージドコレクションの場合と同様に、外部コレクションの列に対してインデックスを作成できます。
- Python
- Java
- Go
- NodeJS
- cURL
index_params = client.prepare_index_params()
# Add indexes
index_params.add_index(
    field_name="embedding",
    index_type="AUTOINDEX",
    metric_type="COSINE"
)
index_params.add_index(
    field_name="product_name",
    index_type="AUTOINDEX"
)
client.create_index(
    db_name="my_database",
    collection_name="test_collection",
    index_params=index_params
)
import io.milvus.v2.common.IndexParam;
import io.milvus.v2.service.index.request.CreateIndexReq;
import java.util.*;

IndexParam indexParamForIdField = IndexParam.builder()
        .fieldName("product_name")
        .indexType(IndexParam.IndexType.AUTOINDEX)
        .build();
IndexParam indexParamForVectorField = IndexParam.builder()
        .fieldName("embedding")
        .indexType(IndexParam.IndexType.AUTOINDEX)
        .metricType(IndexParam.MetricType.COSINE)
        .build();
List<IndexParam> indexParams = new ArrayList<>();
indexParams.add(indexParamForIdField);
indexParams.add(indexParamForVectorField);
CreateIndexReq createIndexReq = CreateIndexReq.builder()
        .dbName("my_database")
        .collectionName("test_collection")
        .indexParams(indexParams)
        .build();
client.createIndex(createIndexReq);
import (
    "github.com/milvus-io/milvus/client/v2/entity"
    "github.com/milvus-io/milvus/client/v2/index"
    "github.com/milvus-io/milvus/client/v2/milvusclient"
)

collectionName := "test_collection"
indexOptions := []milvusclient.CreateIndexOption{
    milvusclient.NewCreateIndexOption(collectionName, "embedding", index.NewAutoIndex(entity.COSINE)),
    milvusclient.NewCreateIndexOption(collectionName, "product_name", index.NewAutoIndex(index.AUTOINDEX)),
}
indexTask, err := client.CreateIndex(ctx, indexOptions)
if err != nil {
    // handler err
}
err = indexTask.Await(ctx)
if err != nil {
    // handler err
}
client.createIndex({
    db_name: "my_database",
    collection_name: "test_collection",
    field_name: "product_name",
    index_type: "AUTOINDEX"
})
client.createIndex({
    db_name: "my_database",
    collection_name: "test_collection",
    field_name: "embedding",
    index_type: "AUTOINDEX",
    metric_type: "COSINE"
})
export indexParams='[
        {
            "fieldName": "embedding",
            "indexName": "my_vector",
            "indexType": "AUTOINDEX"
        },
        {
            "fieldName": "product_name",
            "indexName": "my_id",
            "indexType": "AUTOINDEX"
        }
    ]'

curl --request POST \
--url "${PROJECT_ENDPOINT}/v2/vectordb/indexes/create" \
--header "Authorization: Bearer ${TOKEN}" \
--header "Content-Type: application/json" \
-d "{
    \"dbName\": \"my_database\",
    \"collectionName\": \"test_collection\",
    \"indexParams\": $indexParams
}"
ステップ 5: データの更新
コレクションの準備が整ったら、それを更新してデータのメタデータとインデックスを作成します。
- Python
- Java
- Go
- NodeJS
- cURL
job_id = client.refresh_external_collection(
    db_name="my_database",
    collection_name="test_collection"
)
while True:
    progress = client.get_refresh_external_collection_progress(job_id=job_id)
    print(f"  {progress.state}: {progress.progress}%")
    if progress.state == "RefreshCompleted":
        elapsed = progress.end_time - progress.start_time
        print(f"  Completed in {elapsed}ms")
        break
    elif progress.state == "RefreshFailed":
        print(f"  Failed: {progress.reason}")
        break
    time.sleep(2)
import io.milvus.v2.service.utility.request.GetRefreshExternalCollectionProgressReq;
import io.milvus.v2.service.utility.request.ListRefreshExternalCollectionJobsReq;
import io.milvus.v2.service.utility.request.RefreshExternalCollectionReq;
import io.milvus.v2.service.utility.response.GetRefreshExternalCollectionProgressResp;
import io.milvus.v2.service.utility.response.ListRefreshExternalCollectionJobsResp;
import io.milvus.v2.service.utility.response.RefreshExternalCollectionJobInfo;
import io.milvus.v2.service.utility.response.RefreshExternalCollectionResp;

while (true) {
    GetRefreshExternalCollectionProgressResp resp = client.getRefreshExternalCollectionProgress(
            GetRefreshExternalCollectionProgressReq.builder()
                    .jobId(jobId)
                    .build());
    RefreshExternalCollectionJobInfo jobInfo = resp.getJobInfo();
    if ("RefreshCompleted".equals(jobInfo.getState())) {
        long elapsed = jobInfo.getEndTime() - jobInfo.getStartTime();
        System.out.printf("  Refresh completed in %dms%n", elapsed);
        break;
    } else if ("RefreshFailed".equals(jobInfo.getState())) {
        System.out.printf("  Refresh failed: %s%n", jobInfo.getReason());
    }
    TimeUnit.SECONDS.sleep(2);
}
refreshResult, err := client.RefreshExternalCollection(ctx,
    client.NewRefreshExternalCollectionOption("test_collection"))
jobID := refreshResult.JobID
for {
    progress, _ := client.GetRefreshExternalCollectionProgress(ctx,
        client.NewGetRefreshExternalCollectionProgressOption(jobID))
    fmt.Printf("State: %s\n", progress.State)
    if progress.State == entity.RefreshStateCompleted {
        fmt.Println("Refresh completed!")
        break
    }
    if progress.State == entity.RefreshStateFailed {
        fmt.Printf("Refresh failed: %s\n", progress.Reason)
        break
    }
    time.Sleep(2 * time.Second)
}
// node
curl --request POST \
--url "${PROJECT_ENDPOINT}/v2/vectordb/jobs/external_collection/refresh" \
--header "Authorization: Bearer ${TOKEN}" \
--header "Content-Type: application/json" \
-d "{
    \"dbName\": \"my_database\",
    \"collectionName\": \"test_collection\",
    \"externalSource\": \"volume://my_volume/path/to/a/folder\",
    \"externalSpec\": \"{\\\"format\\\": \\\"parquet\\\"}\"
}"
refresh 操作は非同期であるため、進行状況を監視するためにイテレーションを設定する必要があります。
refresh 操作はデータファイルのメタデータをスキャンし、それに応じてマニフェストファイルを生成します。通常、150〜250 ms かかります。
マニフェストファイルは、Milvus のメタデータと外部ファイルの行とのマッピングを記録します。
ソースデータに更新がある場合、Zilliz Cloud を最新の状態に保つために、手動で再度 refresh を呼び出す必要があります。
挿入なしですべてのアクティブなメタデータを削除する必要がある refresh は拒否されます。
オンデマンドコンピューティング用データベース内の外部コレクションについては、手動で load および release を行う必要はありません。
フォローアップ
外部コレクションを refresh したら、マネージドコレクションと同様に、外部コレクションで類似性検索やクエリを実行できます。ただし、オンデマンドコンピューティング用データベース内のコレクションは、検索やクエリのためにオンデマンドクラスタにアタッチする必要があります。詳細については、オンデマンドコンピューティング を参照してください。
search、query、get、hybrid search などの DQL 運用を実行する前に、オンデマンドクラスタのコンピューティングリソースをアタッチするためのセッションを作成する必要があります。詳細については、外部コレクションでの DQL 運用 を参照してください。